background image


14 

Troubleshooting Guide  


Many operating problems may be solved by carefully reading and following the 

instructions in this manual accordingly. Some suggestions for troubleshooting 

are  given  below.  Should  these  suggestions  not  resolve  the  problem,  contact 

our SERVICE DEPARTMENT or  a distributor  in your region  for assistance. If 

troubleshooting  service  is  required,  please  include  a  full  description  of  the 

problem. 


Problem 

Cause 

Solution 

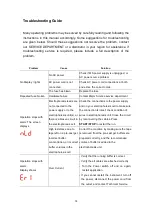
No Display / lights 

No AC power 

Check if MS power supply is unplugged, or 

AC power source problem 

AC power cord is not 

connected


Check AC power cord connections at both 

ends. Use the correct cords.


The fuse has blown 

Replace the fuse 

Repeated fuse broken 

Hardware failure 

Contact Major Science service department 

Operation stops with 

alarm: The screen 

displays   


Electrophoresis leads are 

not connected to the 

power supply or to the 

electrophoresis unit(s), or 

there is a broken circuit in 

the electrophoresis cell 

Check the connections to the power supply 

and on your electrophoresis cell to make sure 

the connection is intact; check condition of 

wires in electrophoresis unit. Close the circuit 

by reconnecting the cables. Press 

START/STOP 

to restart the run. 

High resistance due to 

tape left on a pre-cast gel, 

incorrect buffer 

concentration, or incorrect 

buffer volumes in the 

electrophoresis cell 

Correct the condition by making sure the tape 

is removed from the pre-cast gel, buffers are 

prepared correctly, and the recommended 

volume of buffer is added to the  

electrophoresis unit. 

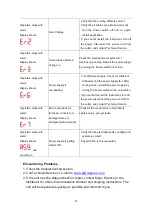
Operation stops with 

alarm: 

Display shows 


Over Current 


- Verify that the running buffer is correct. 

- Verify the all cables are attached correctly 

-  Turn  the  Power  switch  off  and  on  again; 

restart application. 

- If you cannot restart the instrument, turn off 

the  power,  disconnect  the  power  cord  from 

the outlet, and contact Technical Service. 

Summary of Contents for MP-250V

Page 1: ...MS 250V MS 300V Power Supply Instruction Manual Catalog Nos MP 250V MP 300V www majorsci com service majorsci com Version 01A October 20 2009...

Page 2: ...Cord 1 x MS 250V MS 300V Power Supply Instruction Manual Major Science is liable for all missing or damaged parts accessories within 7 days after customer received this instrument package Please conta...

Page 3: ...MP 250V or MP 300V 1 x MP 250V or MP 300V 1 x US Plug Power Cord or 1 x Euro Plug Power Cord or 1 x UK Plug Power Cord or 1 x Israel Plug Power Cord 1 x MS 250V MS 300V Power Supply Instruction Manua...

Page 4: ...ning 4 Safety Information 5 Product Specifications 7 Product Description 8 Introduction Overview Controls and Features 9 9 10 Installation Instructions 11 Operation Instructions 12 Troubleshooting Gui...

Page 5: ...equipment is operated 1 Read and follow carefully the manual instructions 2 Do not alter the power supply series Failure adhered to these directions could result in personal and or laboratory hazards...

Page 6: ...emperature Avoiding Electrical Shock Follow the guidelines below to ensure safe operation of the unit MS 250V MS 300V power supply series has been designed to use with shielded wires thus minimizing a...

Page 7: ...ds other than manufacturer s recommendation users should check with the manufacturer s instruction to confirm if the proposed method will not damage the equipment Equipment Operation Follow the guidel...

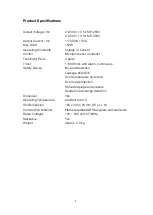
Page 8: ...rs Timer 1 999 mins with alarm continuous Safety Device No Load detection Leakage detection Over temperature protection Over load protection Shrouded plugs and sockets Sudden load change detection Cro...

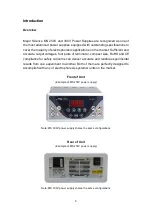
Page 9: ...ave bench top space Major Science MS 250V power supply and MS 300V power supply both provide Constant Voltage or Constant Current to instruments used in electrophoresis 4 pairs of terminator and the m...

Page 10: ...four pairs of terminator compact size RoHS and CE compliance for safety concerns can deliver accurate and reliable experimental results from one experiment to another Both of them are perfectly design...

Page 11: ...age for the location of the following controls and features MS 250V Power Supply Cat No MP 250V MS 300V Power Supply Cat No MP 300V Front Control Panel 1 Key to increase either Voltage or Current or T...

Page 12: ...the timer 5 Key to select Voltage value 6 Key to select Current value 7 Key to set or select Timer mode Installation Instructions Major Science MS 250V MS 300V Power Supply series is actually an alrea...

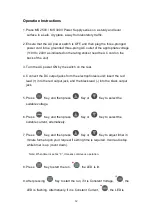
Page 13: ...the electrophoresis unit insert the red lead into the red output jack and the black lead into the black output jack 5 Press Key and then press Key or Key to select the suitable voltage 6 Press Key an...

Page 14: ...he LED is flashing Press Key to restart the run 11 Press Key again to stop the unit at any time if necessary 12 When the run is completed operation stops with alarm and the screen shows Press Key to t...

Page 15: ...ot connected to the power supply or to the electrophoresis unit s or there is a broken circuit in the electrophoresis cell Check the connections to the power supply and on your electrophoresis cell to...

Page 16: ...e power supply by turning the Power switch to the on position If you cannot restart the instrument turn off the power disconnect the power cord from the outlet and contact Technical Service Operation...

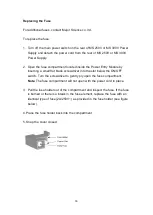
Page 17: ...inserting a small flat blade screwdriver into the slot below the ON OFF switch Turn the screwdriver to gently pry open the fuse compartment Note The fuse compartment will not open with the power cord...

Page 18: ...ecalibration under normal use The housing may be cleaned with a dry cloth If the unit must be returned for repair contact our SERVICE DEPARTMENT or your local distributor for shipping instruction Orde...

Page 19: ...is embraced within the terms of the warranty All claims made under this warranty must be presented to Major Science within two years following the date of delivery of the product to the customer Manuf...

Page 20: ...19 MEMO...
Reviews: