background image

15

Bluetooth

To select Bluetooth mode, press the ‘Power/Mode’ button (

Ref.4

until “BT Mode” is displayed on the front screen (

Ref.10

).

Once on Bluetooth mode, go to your settings on your phone/

tablet that you wish to connect to the Majority Castle. Select the 

‘Majority Castle’ to begin connecting via Bluetooth. 
Once connected, the radio’s display screen will show “BT Mode 

Connect”. You can now begin to enjoy music and media from 

your Bluetooth device.
To select music you will need to select the album or playlist from 

your phone, but once selected you can then use the ‘Skip Back’ 

(

Ref.11

) or ‘Skip Forward’ (

Ref.13

) button to select previous or 

next tracks.

AUX-In Port


To select AUX mode, press the ‘Power/Mode’ button (

Ref.4

) until 

“AUX Mode” is displayed on the front screen (

Ref.10

).

Connect an AUX cable into the AUX-in port at the back of the 

radio (

Ref.16

) and connect to your chosen device.

Begin playing media and controlling media from your chosen 

device. Ensure that the volume is switched up on your device.

Instructions Guide

Bluetooth and AUX-In

Instructions Guide

USB Charging and Phone Stand

Dual USB Ports – Charging your phone

Both USB Ports have an output of 5V/2A (

Ref.1/

2

). When 

connected via a USB lead into the USB port, the system will 
charge your device.

Please note that you can not play your music via the USB 
connection - it is purely a charging facility. You can play your 
phone music either using Bluetooth or an Aux 3.5mm cable as 
instructed on page 14.

Phone Stand Set Up

To set up the phone stand (

Ref.20

), remove the rubber strip from 

the top of the unit (

Ref.20

) and insert the phone stand. (If the 

rubber strip is hard to remove, use a small pin to extract it from 
the top of the music system). 

The soft protector strip faces the same way as the display screen 
so that the phone is protected when resting horizontally on top 
of the speaker.

Summary of Contents for CASTLE CB3A-CDAB-WHT

Page 1: ...CB3A CDAB WHT CB3A CDAB BLK CASTLE Instructions Guide Compact Music System...

Page 2: ...luetooth and AUX In 14 USB Charging and Phone Stand 15 Dual Alarm Setting 16 Sleep Setting 18 Settings Clock and Date 19 Settings Menu 21 Additional Features 22 Troubleshooting 23 Specifications 24 Wa...

Page 3: ...1 1 2 5 6 6 7 9 11 13 14 15 16 18 19 21 22 23 24 24 25 What s in the Box Box Contents 1 Majority Castle Music System 2 Remote Control 3 Phone Stand 4 Power Adapter 5 Instructions Guide...

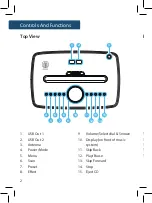
Page 4: ...t 2 3 Antenna 4 Power Mode 5 Menu 6 Scan 7 Preset 8 Effect 9 Volume Select dial Snooze 10 Display on front of music system 11 Skip Back 12 Play Pause 13 Skip Forward 14 Stop 15 Eject CD 16 A 16 H 16 D...

Page 5: ...trols And Functions Rear View ooze ic 16 Aux In Jack 16 Headphone jack 16 DC 9v in jack wall plug 16 On Off switch 16 Phone stand 4 5 6 7 8 9 10 11 12 13 14 15 17 18 19 16 1 3 2 5 4 6 7 8 9 10 11 12 1...

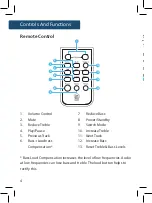
Page 6: ...Reduce Treble 4 Play Pause 5 Previous Track 6 Bass Loudness Compensation 7 Reduce Bass 8 Power Standby 9 Switch Mode 10 Increase Treble 11 Next Track 12 Increase Bass 13 Reset Treble Bass Levels Bass...

Page 7: ...radio Please follow the guidance of the manual to set up your new purchase and begin enjoying its features If you require further assistance with your new radio please contact our support team on the...

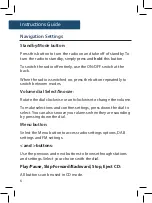
Page 8: ...lume dial Select Snooze Rotate the dial clockwise or anticlockwise to change the volume To make selections and confirm settings press down the dial to select You can also snooze your alarms when they...

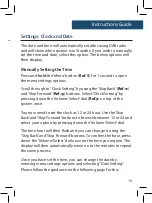
Page 9: ...display Language English on the display screen To change the language to German use the Skip Back Ref 11 or Skip Forward Ref 13 button to scroll through options Once you have chosen your desired lang...

Page 10: ...y press and hold the Power Mode Button Ref 4 The front display will show Goodbye and then go into standby showing the time and date To turn off fully press the button on rear of the unit Ref 19 and sw...

Page 11: ...se This will start scanning up the frequency band and store all stations that have good signal The radio will automatically save all the stations with a strong signal up to 240 MHz After searching has...

Page 12: ...own the Volume Select dial Ref 9 The display will then show Preset x Stored Repeat the same process when making other preset stations To remove a station as a preset simply save a new station over it...

Page 13: ...rst available station with strong signal will begin to play To fine tune or search for stations use the Skip Back or Skip Forward buttons Ref 11 13 You can press and release these buttons multiple tim...

Page 14: ...r choice press down the Volume Select dial Ref 9 The display will then show Preset x Stored Repeat the same process when making other preset stations To remove a station as a preset simply save a new...

Page 15: ...he radio Ref 15 Insert your CD slightly and the drive will take the CD into the system to play The first song on the CD will now begin to play Functions Press and release the Play Pause button Ref 12...

Page 16: ...rom your Bluetooth device To select music you will need to select the album or playlist from your phone but once selected you can then use the Skip Back Ref 11 or Skip Forward Ref 13 button to select...

Page 17: ...ction it is purely a charging facility You can play your phone music either using Bluetooth or an Aux 3 5mm cable as instructed on page 14 Phone Stand Set Up To set up the phone stand Ref 20 remove th...

Page 18: ...the Volume Select dial The hour digits for the alarm will then flash Choose the hour of the alarm using the Skip Back and Skip Forward buttons until your alarm hour is displayed Select the hour by pr...

Page 19: ...Alarm Del By selecting Alarm On Off you can turn the alarm on to sound or turn it off to cancel from sounding If you select Alarm Del you can delete the alarm from being set up on the radio for futur...

Page 20: ...isplay the menu setting options Browse to the Sleep Setting option by using the Skip Back and Skip Forward buttons Select this option by pressing down the Volume Select dial Ref 9 on top of the system...

Page 21: ...ssing down the Volume Select dial Ref 9 on top of the system once You now need to set the clock as 12 or 24 hour Use the Skip Back and Skip Forward buttons to browse between 12 or 24 and select your o...

Page 22: ...he system once The year of the date will flash and can be changed by using the Skip Back and Skip Forward buttons Select the date year by pressing down the Volume Select dial The month of the date wil...

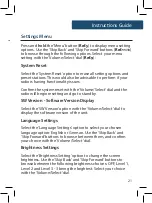
Page 23: ...ct dial and the radio will begin resetting and go to standby SW Version Software Version Display Select the SW Version option with the Volume Select dial to display the software version of the unit La...

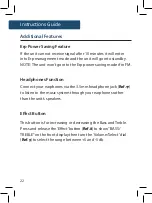
Page 24: ...ower saving mode if in FM Headphones Function Connect your earphones via the 3 5mm headphone jack Ref 17 to listen to the music system through your earphones rather than the unit s speakers Effect But...

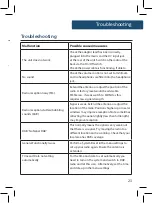
Page 25: ...al strength Radio reception stutters bubbling sounds DAB Signal is weak Extend the antenna or adjust the location of the radio Positions higher up or nearer windows may improve reception Note sometime...

Page 26: ...arranty for an additional 24 months free of charge Warranty Power Supply DC 9V 3A input Mode DAB DAB Digital FM CD Player Bluetooth AUX In Radio Frequencies FM 87 5MHz 108MHz DAB DAB 174 240MHz Power...

Page 27: ...ctrical products and batteries safely according to your local authority and regulations ADDITIONAL WARNINGS The apparatus shall not be exposed to dripping or splashing and no objects filled with liqui...

Page 28: ......

Page 29: ...www majorityradios co uk...

Reviews: