background image

UK

29

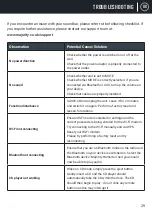
If you encounter an issue with your soundbar, please refer to the following checklist. If 
you require further assistance, please contact our support team at: 

www�majority�co�uk/support

Observation

Potential Cause/Solution

No power/function

Check whether the power is switched on or off at the 
wall.
Check that the power adaptor is properly connected to 
the power outlet.

No sound

Check whether unit is set to MUTE.
Check whether MODE is correctly selected. If you are 
connected via Bluetooth or AUX, turn up the volume on 
your device.
Check that cables are properly installed.

Function disturbance

Switch off and unplug the unit. Leave it for 2 minutes 
and switch it on again. Perform a factory reset and 
rescan for stations.

Wi-Fi not connecting

Ensure Wi-Fi mode is selected in settings and the 
correct passcode is being entered for the Wi-Fi modem.
Try connecting to the Wi-Fi manually and via WPS.
Reset your Wi-Fi modem.

Please try performing a factory reset and try 
reconnecting.

Bluetooth not connecting

Ensure that you are on Bluetooth mode on the radio and 
the Bluetooth on your device is switched on. Select the 
Bluetooth device ‘Majority Homerton’ and you should 
now be able to play audio.

CD player not working

When on CD mode, simply press the eject button. 

Gently insert a CD and the CD player should 
automatically take the CD within the drive. The CD 

should then begin to play - do not click any remote 

buttons as this may interrupt it.

TROUBLESHOOTING

Summary of Contents for HOMERTON

Page 1: ...U S E R M A N U A L H O M E A U D I O C A M B R I D G E H O M E R T O N...

Page 2: ...or DAB FM Internet Radio Stations 13 DAB DAB Radio 14 FM Radio 15 Media Centre 16 CD Player 17 CD Programming 18 Information Centre 19 Connections AUX Bluetooth 20 Alarm Clock 21 Configuration Setting...

Page 3: ...UK 3 BOX CONTENTS WHAT S IN THE BOX A Majority Homerton B Remote control C User manual D Power adapter A B C D...

Page 4: ...NTROL PANEL 1 2 3 5 6 7 8 9 4 11 13 12 10 1 Power Standby 2 Menu 3 Alarm 4 Sleep 5 Previous 6 Next 7 Navigation Volume OK dial 8 FAV 9 CD eject load 10 Stop 11 Pause Play 12 Rewind 13 Fast Forward CON...

Page 5: ...UK 5 CONTROLS FUNCTIONS FRONT VIEW 14 15 14 Display screen 15 CD port BACK VIEW 20 17 18 19 16 16 DC power input 17 AUX In 18 Headphone port 19 USB Port 20 Antenna...

Page 6: ...UK 6 REMOTE CONTROL CONTROLS FUNCTIONS 21 22 23 25 24 26 27 28 39 29 31 32 33 41 35 34 36 37 40 38 30 42...

Page 7: ...p backwards through tracks in CD mode 26 Mute Unmute 27 Scroll up 28 Back button scroll 29 Vol 30 FAV Preset recall 31 CD eject open 32 Sleep button Press to set sleep timer 33 Program 34 Stop 35 Paus...

Page 8: ...press down the dial to confirm selections This dial will allow you to change the volume when you are on the radio station playing screen Menu button Use the Menu button to view the main menu screen a...

Page 9: ...RITY screen Ensure the antenna Ref 20 is extended as far as possible This will enable you to get the best signal you can before scanning for stations in DAB FM modes Select your chosen language by scr...

Page 10: ...g for Wireless Network 00 00 Wireless Network WPS PBC When prompted with the message Would you like to configure network now Select YES WPS Your radio will begin to search for Wi Fi connections When s...

Page 11: ...s All Stations plus a variety of genre categories in alphabetical order Select the category that you wish to listen to with the Navigation Dial Ref 7 and continue browsing until you find your desired...

Page 12: ...lect the option Clear my Playlist with the Navigation dial The radio will then display Confirm delete Select YES to delete your playlist with the Select dial My Media U In configuration settings there...

Page 13: ...o go to the preset number and select your preset number by pressing down the dial Please note If a station has already been preset the radio will not allow you to preset twice Recalling your favourite...

Page 14: ...dial Ref 7 and highlight the chosen station Select the station you wish to listen to by pressing down the dial When you have selected a station the screen will display the station and begin to play T...

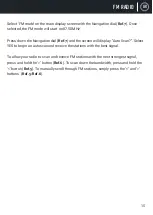
Page 15: ...7 and the screen will display Auto Scan Select YES to begin an autoscan and receive the stations with the best signal To allow your radio to scan and receive FM stations with the next strongest signal...

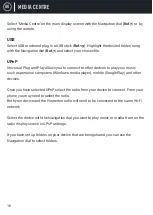
Page 16: ...music such as personal computers Windows media player mobile GooglePlay and other devices Once you have selected UPnP select the radio from your device to connect From your phone you may need to sele...

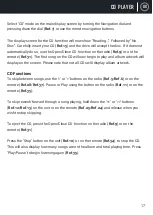
Page 17: ...lease note that not all CDs will display album artwork CD Functions To skip between songs use the or buttons on the radio Ref 5 Ref 6 or on the remote Ref 28 Ref 37 Pause or Play using the button on t...

Page 18: ...scroll through to the song you would like to choose Once on the chosen song for 001 press the Program button Ref 33 to confirm and be taken to choose your next programmed song 3 Repeat the above step...

Page 19: ...e country followed by the town city Once you have chosen a town city the following information will be displayed current temperature weather symbol image and approximate temperature range for the next...

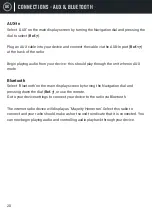
Page 20: ...ld play through the unit when in AUX mode Bluetooth Select Bluetooth on the main display screen by turning the Navigation dial and pressing down the dial Ref 7 or use the remote Go to your device sett...

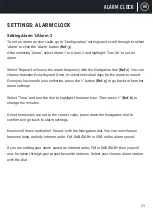
Page 21: ...press the button Ref 5 to go back to the other alarm settings Select Time and turn the dial to highlight the alarm hour Then press Ref 6 to change the minutes Once the minutes are set to the correct...

Page 22: ...nd select the alarm you wish to turn off Once the alarm is selected you will have the option to turn off or on Highlight the Turn Off option and use the Navigation dial Ref 7 to confirm NOTE Change th...

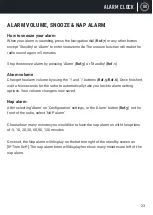
Page 23: ...finished wait a few seconds for the radio to automatically take you back to alarm setting options Your volume change is now saved Nap alarm After selecting Alarm on Configuration settings or the Alar...

Page 24: ...n dial Ref 7 Select Set Date and Time with the Navigation dial and choose Manual Setup Change the day by highlighting the character and using the Navigation dial to scroll through to the desired unit...

Page 25: ...Choose between 15 30 60 90 120 150 and 180 minutes Once this has been selected the timer duration and a sleep icon will display on the top right of the radio screen To turn the Sleep Timer off simply...

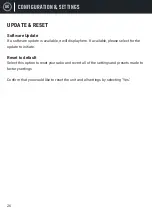
Page 26: ...l display here If available please select for the update to initiate Reset to default Select this option to reset your radio and revert all of the settings and presets made to factory settings Confirm...

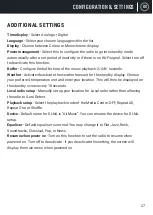
Page 27: ...eferred temperature unit and enter your location This will then be displayed on the standby screen every 10 seconds Local radio setup Manually set up your location for Local radio rather than allowing...

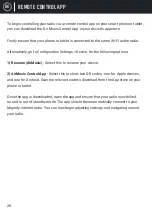
Page 28: ...ing options 1 Rename AirMusic Select this to rename your device 2 AirMusic Control App Select this to show two QR codes one for Apple devices and one for Android Scan the relevant code to download fro...

Page 29: ...Leave it for 2 minutes and switch it on again Perform a factory reset and rescan for stations Wi Fi not connecting Ensure Wi Fi mode is selected in settings and the correct passcode is being entered...

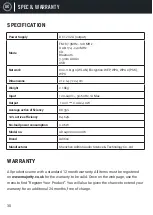
Page 30: ...itional 24 months free of charge SPEC WARRANTY Power Supply DC 12V 2A output Mode FM 87 5MHz 108 MHz DAB 174 240 MHz CD Bluetooth 3 5mm AUX in USB Network 802 11b g n WLAN Encryption WEP WPA WPA 2 PSK...

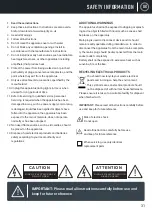
Page 31: ...of used electrical products and batteries safely according to your local authority and regulations ADDITIONAL WARNINGS The apparatus shall not be exposed to dripping or splash ing and no objects fill...

Page 32: ...W W W M A J O R I T Y C O U K...

Reviews: