background image


Page 9 

© 2013 Maka Technologies Group. All Rights Reserved.  


Global Headquarter 

2 Alexandra Road, Delta House 

#02-03 Singapore 15991 

www.makagps.com


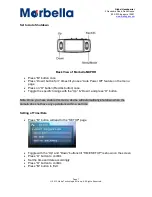
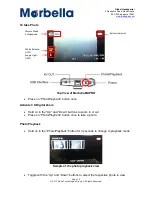
Note: During recording, a red spot on the left hand side of the display screen will starts 
blinking. 

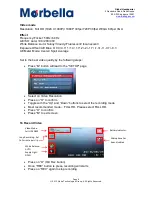
Lock files manually while recording 


To Enable / Disable Lock


During recording, hold on “M” button for 3 seconds. To disable the manual lock, 
hold on “M” button for 3 seconds again. 

Note: A yellow lock icon will be shown on the right hand side of the screen. 

To Enable/ Disable Microphone 


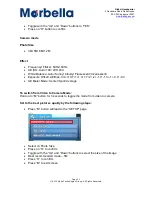
Toggle with the “Up” and “Down” buttons till “VIDEO RECORD MODE” is shown on 
the screen 


Press “O” button to confirm 


Set to “VIDEO” to disable microphone or Toggle with the “Up” and “Down” buttons 
to Set to “VIDEO+AUDIO” to enable microphone 


Press “O” button to confirm 


Press “M” button to Exit 

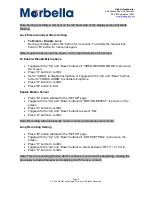
Enable Motion Sensor 


Press “M” button will lead to the “SETUP” page 


Toggle with the “Up” and “Down” buttons till “MOTION DETECT” is shown on the 
screen 


Press “O” button to confirm 


Toggle with the “Up” and “Down” buttons to select “ON” 


Press “O” button to confirm 

Note: Recording will automatically on when camera detects any movements. 
 

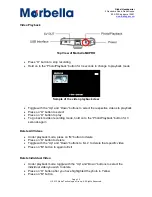
Loop Recording Setting


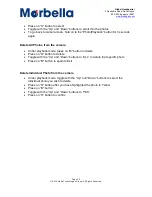
Press “M” button will lead to the “SETUP” page 


Toggle with the “Up” and “Down” buttons till “LOOP SETTING” is shown on the 
screen 


Press “O” button to confirm 


Toggle with the “Up” and “Down” buttons to select between ”OFF/ 1 / 3 / 5 min 


Press “O” button to confirm 

Note: This is a recording process which continues to record at the beginning, erasing the 
previously recorded material and replacing it with the new content. 


Summary of Contents for Marbella MXPro

Page 1: ...RoadcorderTM User Manual R07 June 2013 Trademarks All brand and product names are trademarks or registered trademarks of Maka GPS Technologies Group In association with Maka GPS Technologies Private L...

Page 2: ...Page 2 2013 Maka Technologies Group All Rights Reserved Global Headquarter 2 Alexandra Road Delta House 02 03 Singapore 15991 www makagps com Annex A Product Layout...

Page 3: ...e chip Ambarella A2S60 Internal Memory Embedded with 256MB GPS module External set Storage Card Type MicroSD Card Maximum support 32GB Format JPEG EXIF2 2 DCF Video format H 264 MOV The zoom video 3x...

Page 4: ...file error when trying to playback pictures or videos MicroSD card might be corrupted There bad sectors in the card Reformat the microSD card No image is displayed on a high definition TV screen 1 Ca...

Page 5: ...to full capacity every 2 or 3 months during storage Note The device will not be charge via USB from the computer unless USB charger is plug directly to the GPS logger port Not included in the package...

Page 6: ...To install the microSD card Follow the TF Card slot icon displayed on the device and insert the microSD card gently To remove the microSD card Push in the microSD card slightly and it will be ejected...

Page 7: ...page Press on O button Rec Ok button once Toggle the specific timings with the Up Down and press O button Note Once you have enable this mode device will automatically shutdown when the camera does n...

Page 8: ...eter Mode Center Spot Average Set to the best video quality by the following steps Press M button will lead to the SETUP page Select on Video Resolution Press on O to confirm Toggle with the Up and Do...

Page 9: ...Toggle with the Up and Down buttons to Set to VIDEO AUDIO to enable microphone Press O button to confirm Press M button to Exit Enable Motion Sensor Press M button will lead to the SETUP page Toggle...

Page 10: ...ctive videos to playback Press on O button to select Press on O button to play To go back to video recording mode hold on to the Photo Playback button for 3 seconds again Delete All Videos Under playb...

Page 11: ...to Sunny Cloudy Fluorescent Incanescent Exposure Offset AE Bias 0 0 3 0 7 1 1 3 1 7 2 2 1 7 1 3 1 0 7 0 3 AE Meter Mode Center Spot Average To switch from Video to Camera Mode Hold on to M button for...

Page 12: ...nce Activate 3 X Digital Zoom Hold on to the Up and Down buttons to zoom in or out Press on Photo Playback button once to take a photo Photo Playback Hold on to the Photo Playback button for 3 seconds...

Page 13: ...elete All Photos from the camera Under playback mode press on M button to delete Press on O button to delete Toggle with the Up and Down buttons to ALL to delete that specific photo Press on M button...

Page 14: ...nst a map backdrop either in real time or when analysing the track later Note Only applicable to users who purchase the gps logger from Maka GPS Technologies Pte Ltd Activation of GPS Logger Sample Vi...

Page 15: ...dra Road Delta House 02 03 Singapore 15991 www makagps com Wait for estimated 2 to 3 minutes to capture the GPS signals from the satellites Once its locked as shown on the sample view below drive as p...

Page 16: ...r Step 1 Plug your USB cable into your DVR s USB port shown below Top View of Marbella MXPRO Step 2 Plug the other side of your USB to the computer Step 3 Your computer will detects 2 Removable Drive...

Page 17: ...3 Maka Technologies Group All Rights Reserved Global Headquarter 2 Alexandra Road Delta House 02 03 Singapore 15991 www makagps com Step 6 Click on Extract button Step 7 Wait for 1 minute while it is...

Page 18: ...oup All Rights Reserved Global Headquarter 2 Alexandra Road Delta House 02 03 Singapore 15991 www makagps com Step 8 A new folder named 20120820_ will be created Double click on the folder Step 9 Doub...

Page 19: ...xandra Road Delta House 02 03 Singapore 15991 www makagps com Step 10 This program will bring you the page Click on the folder option as highlighted in the image below Step 11 Select the Removable Dri...

Page 20: ...re 15991 www makagps com Step 12 Double click on DCIM folder Step 13 Double click on 100 Media folder Step 14 Select videos which you would like to play and click on Open Step 15 Select videos which y...

Reviews: