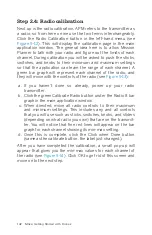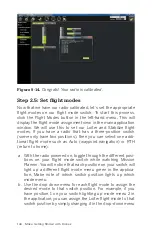
Step 2.3: Set up the compass
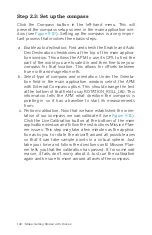
Click the Compass button in the left-hand menu. This will
present the compass setup screen in the main application win-
dow (see
). Setting up the compass is a very impor-
tant process that involves three basic steps:
a.
Enable auto declination:
Find and check the Enable and Auto
Dec Declination checkboxes at the top of the main applica-
tion window. This allows the APM to use its GPS to find the
part of the world you are located in and then fine-tune your
compass for that location. This allows for offsets between
true north and magnetic north.
b.
Select type of compass and orientation:
Under the Orienta-
tion field in the main application window, select the APM
with External Compass option. This should change the text
at the bottom of that field to say ROTATION_ROLL_180. This
information tells the APM what direction the compass is
pointing in, so it has a baseline to start its measurements
from.
c.
Perform calibration:
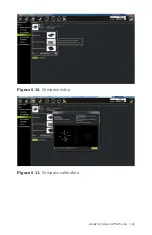
Now that we have established the orien-
tation of our compass, we can calibrate it (see
).
Click the Live Calibration button at the bottom of the main
application window and follow the instructions Mission Plan-
ner issues. This step may take a few minutes as the applica-
tion asks you to rotate the aircraft around all possible axes
so that it can take sample points in a virtual sphere. Just
take your time and follow the directions until Mission Plan-
ner tells you that the calibration has passed. If, for some odd
reason, it fails, don’t worry about it. Just run the calibration
again and be sure to move around all axes of the compass.
140 Make: Getting Started with Drones
Summary of Contents for Belinda Kilby
Page 1: ......
Page 3: ...Make Getting Started with Drones Terry Kilby and Belinda Kilby...
Page 26: ......
Page 90: ......
Page 126: ......
Page 153: ...Figure 9 10 Compass setup Figure 9 11 Compass calibration ArduPilot Mega APM Setup 141...
Page 198: ......


