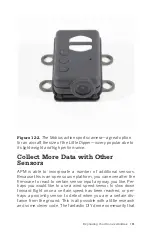
12/Expanding Your
Drone’s Abilities
Congratulations! You have done it. You built your first drone, and
you have learned a number of valuable lessons along the way. It
is our hope that at least some of these lessons will resonate with
you in a way that encourages experimentation in the future. This
chapter gives you a few suggestions for modifications that you
can make now that you’ve mastered the art of building drones.
Add a Camera and First-Person
View
If you built the autonomous kit, it did not come with an FPV
package or camera. Now that you are comfortable building
these aircraft, it’s a great time to add a live video feed to see
what your drone sees in real time. To do this, you will need to
add a video transmitter on the aircraft and a video receiver to a
ground station with some type of monitor (goggles or small
screen) to view the feed (see Figures
).
FPV Installation
The drone model, the Little Dipper, that we used as the build
example for this book is a 300-class quadcopter, which is small
compared to other drone designs. For this reason, to add FPV to
such a compact quad, we recommend that you remove another
component (that’s not vital for flight). If you have added every-
thing shown in this book, there is already a good deal of elec-
tronics loaded onto your drone. For best flight performance,
battery life, and overall stability, it is best to avoid trying to carry
too much on your drone’s frame. If FPV is a must for you, per-
haps removing the telemetry radio is the right way to go.
179
Summary of Contents for Belinda Kilby
Page 1: ......
Page 3: ...Make Getting Started with Drones Terry Kilby and Belinda Kilby...
Page 26: ......
Page 90: ......
Page 126: ......
Page 153: ...Figure 9 10 Compass setup Figure 9 11 Compass calibration ArduPilot Mega APM Setup 141...
Page 198: ......

