


5
OPERATION
WARNING:
•
It should never be necessary to force the tool. The
weight of the tool applies adequate pressure.
Forcing and excessive pressure could cause
dangerous wheel breakage.
•
Continued use of a worn-out wheel may result in
wheel explosion and serious personal injury.
Depressed center wheel should not be used after it
has been worn down to 75 mm in diameter. Use of
the wheel after this point is unsafe and it should be
removed from service and rendered unusable by
intentional destruction.
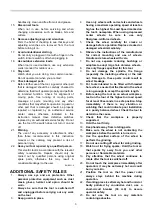
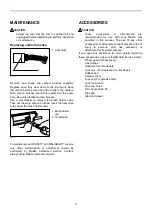
A
B
15
008439
ALWAYS hold the tool firmly with one hand on rear
handle and the other on the side handle. Turn the tool on
and then apply the wheel or disc to the workpiece. In
general, keep the edge of the wheel or disc at an angle
of about 15 degrees to the workpiece surface. During
the break-in period with a new wheel, do not work the
grinder in the B direction or it will cut into the workpiece.
Once the edge of the wheel has been rounded off by use,
the wheel may be worked in both A and B direction.
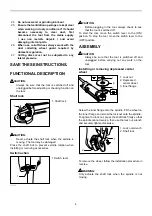
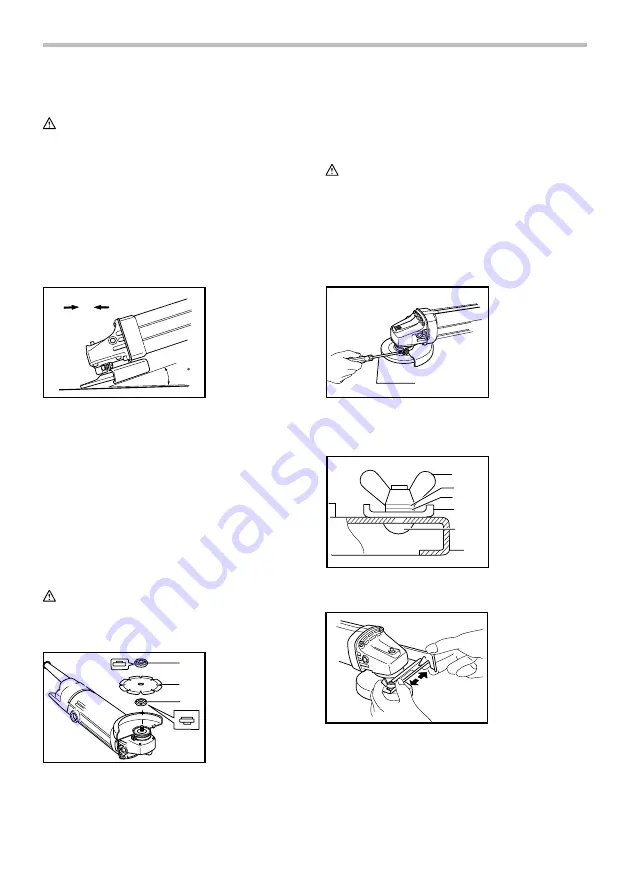
Installing or removing diamond wheel
(optional accessory)
CAUTION:
•
Make sure that the arrow on the tool should point in
the same direction as the arrow on the diamond
wheel.
1
2
3
008445
Screw the inner flange onto the spindle. Fit the diamond
wheel on over the inner flange and screw the lock nut
onto the spindle. Notice that flat side of the lock nut
should face the diamond wheel in case the diamond
wheel is used.
WARNING:
Only actuate the shaft lock when the spindle is not
moving.
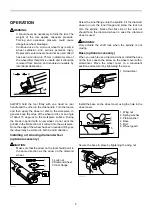
Base (optional accessory)
When you wish to use a diamond wheel, install the base
on the tool. Loosen the screw on the wheel cover with a
screwdriver. Move the wheel cover to a convenient
position and secure it by tightening the screw.
1
008440
Install the base on the wheel cover using the hole in the
wheel cover.
1
2
3
4
5
6
008441
Secure the base in place by tightening the wing nut.
008442
1. Wing nut
2. Spring washer
3. Plain washer
4. Base
5. Bolt
6. Wheel guard
1. Screwdriver
1. Lock nut
2. Diamond wheel
3. Inner flange
Summary of Contents for 9500N
Page 7: ...7 ...


