15
3
2
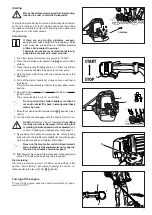
4 Screw the tank cap on tightly again.
5 Clean the tank cap and the surrounding area thoroughly.
When laying down the dipstick, make sure that
it does not come into contact with dirt under no
circumstances whatsoever! Remove dirt imme-
diately whenever necessary!
6 Turn the dipstick (
2
) out of the opening anticlockwise.
7 Upon first-time operation of the brushcutter, use a suitable
filling bottle to fill 80 cm
3
of engine oil up to the bottom edge
of the filling opening (
3
).
An engine oil bottle can be used for precise do-
sing without spilling engine oil
(see extract from
the spare parts list)
.
9 Turn the dipstick back in again.
Following first-time operation of the brushcutter,
the engine oil must be changed after 20 hours of
operation and not after 50 hours of operation.
Putting on the shoulder strap
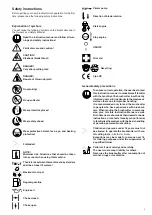
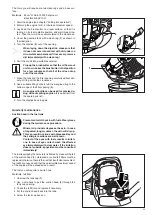
1 Put on the shoulder strap as shown in the illustration.
Adjust the shoulder strap so that the fastening hook (
1
) for
the brushcutter is situated at the height of your hip bone.
The shoulder straps of the BCX3410 brushcutters
are not equipped with a hip protection pad.
Balancing the brushcutter
To balance the brushcutter, the machine must have been re-
fueled and filled with oil (see section "Refueling the brushcutter"
in this chapter).
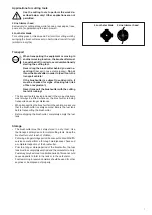
The ground clearance depends on the selected cutting tool.
When a line trimmer head is being used on level ground, the
line trimmer head should be resting on the ground lightly without
the operator touching the machine with his hands.
When the 4-tooth star blade is being used on difficult ground,
the cutting tool must be resting approx. 20 cm above the ground
without the operator touching the machine with his hands.
The tool you will require, if appropriate, is the Phillips screwdri-
ver.
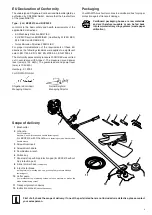
1 Hook the fastening hook (
1
) of the shoulder strap, depending
on the cutting tool, into one of the two holes of the strap
holder (
2
).
If the adjustment option is not sufficient:
Undo the screw (
3
) slightly.
3 Push the strap holder into the desired position on the main
tube.
4 Retighten the screw firmly.
At this point, the adjustment of the handles to suit
your body should also be carried out again.
1
1
2
3


