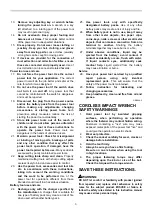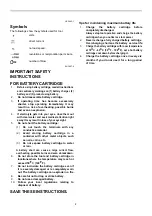
7
4.
Press the button and choose the desired number.
The displayed number changes fast by keeping
pressing the button. To set the first digit, pull the
switch trigger and then release it.
5.
The lamp on the right side of the display starts to blink
so that the number of second digit can be changed.
6.
Press the button and choose the desired number.
The displayed number changes fast by keeping
pressing the button. To set the second digit, pull
the switch trigger and then release it.
7.
For the final setting, pull the switch trigger while
pressing the indication button. The number of
impacts is set at once.
To reconfigure the number of impacts, pull the
trigger without pressing the indication button so
that return to 3 above.
Confirming the current setting number
To check the current setting number, pull the trigger
once, release it and then press the indication button.
Relation between presetting number and
action
Clockwise rotation
Auto-stop setting does not work.
Indication lamp goes out.
Then, the lamp goes out.
Red color lamp lights on.
Switch off before impacting
[number of impacts
(presetting number x 2)
x 0.02] seconds.
Green color lamp lights on.
After impacting [number of
impacts (presetting number
x 2) x 0.02] seconds.
Auto-stop setting does not work.
Presetting
number
01 - 99
0
Counterclockwise rotation
Auto-stop setting does not work.
003611
NOTE:
•
Use presetting number as a guideline. To keep the
fastening torque, number of impacts changes
automatically by remaining battery capacity.
Indicating lamp
1
013665
•
After impacting preset numbers, the indicating
lamp lights in green color.
•
The red color light will light on if the trigger is
released before the presetting number of impacts
is achieved. It indicates that the operation is
incomplete.
•
When auto-stop mechanism is working, the
indicating lamp lights red while the switch trigger is
being pulled.
ASSEMBLY
CAUTION:
•
Always be sure that the tool is switched off and the
battery cartridge is removed before carrying out
any work on the tool.
Selecting correct socket
Always use the correct size socket for bolts and nuts.
An incorrect size socket will result in inaccurate and
inconsistent fastening torque and/or damage to the bolt
or nut.
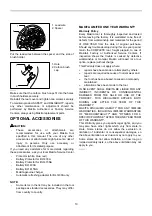
Installing or removing socket
1
2
013606
To install the socket, push it onto the anvil of the tool
until it locks into place.
To remove the socket, simply pull it off.
OPERATION
[*1] Presetting number of impacts is impossible for more
than 200 impacts (4 seconds).
[*2] Fastening time includes when you pull the trigger
completely.
CAUTION:
•
Hold the tool firmly and place the socket over the
bolt or nut. Turn the tool on and fasten for the
proper fastening time and number of impacts
(presetting number).
•
If the tool is operated continuously until the battery
cartridge has discharged, allow the tool to rest for
15 minutes before proceeding with a fresh battery.
The proper fastening torque may differ depending upon
the kind or size of the bolt, the material of the workpiece
to be fastened, etc. The relation between fastening
torque and fastening time is shown in the figures.
1. Socket
2. Anvil
1. Indicating lamp


