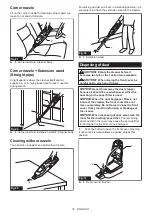
11 ENGLISH
2.
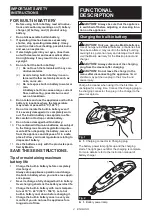
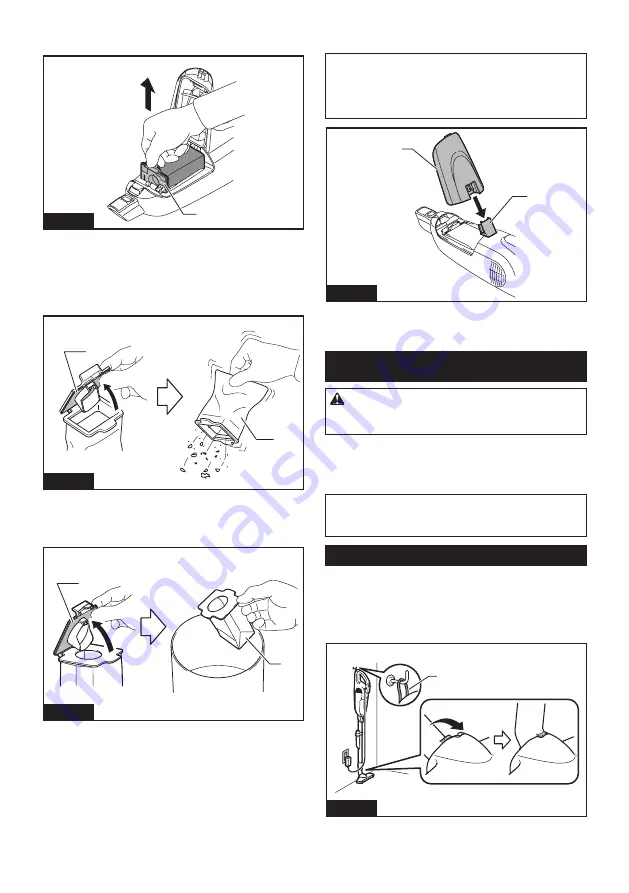
Pull out both the orange-colored dust stopper and
dust bag/paper filter together at the same time.
1
Fig.32
►
1.
Dust stopper
3.
Perform the procedures below depending on the
dust container type:
When using the dust bag
Remove the dust stopper and empty the dust bag.
1
2
Fig.33
►
1.
Dust stopper
2.
Dust bag
When using the paper filter
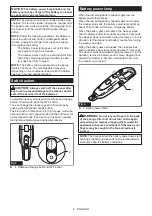
Remove the dust stopper and dispose of the paper filter.
1
2
Fig.34
►
1.
Dust stopper
2.
Paper filter
4.
Place the dust bag/new paper filter and dust stop
-
per together into the cleaner and close the front cover.
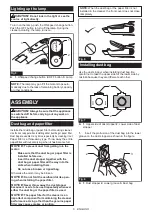
NOTE:
The cleaner is constructed in such a way that
the front cover comes off when trying to force the
front cover open at the angle of more than 90°. If the
front cover comes off, insert it into the front cover joint
in place.
1
2
Fig.35
►
1.
Front cover
2.
Front cover joint
MAINTENANCE
CAUTION:
Always be sure that the appliance
is switched off before attempting to perform
inspection or maintenance.
To maintain product SAFETY and RELIABILITY,
repairs, any other maintenance or adjustment should
be performed by Makita Authorized or Factory Service
Centers, always using Makita replacement parts.
NOTICE:
Never use gasoline, benzine, thinner,
alcohol or the like. Discoloration, deformation or
cracks may result.
After use
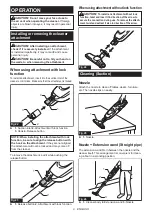
You can store or charge the cleaner while it is hooked
on the wall with the hanger on the appliance.
Lock the nozzle head, and hang the cleaner with a
hook available in the market or the wall mount (optional
accessory).
1
Fig.36
►
1.
Hanger


