20
ENGLISH
MAINTENANCE
CAUTION:
Always be sure that the tool is
switched off and the battery cartridge is removed
before attempting to perform inspection or
maintenance.
NOTICE:
Never use gasoline, benzine, thinner,
alcohol or the like. Discoloration, deformation or
cracks may result.
To maintain product SAFETY and RELIABILITY,
repairs, any other maintenance or adjustment should
be performed by Makita Authorized or Factory Service
Centers, always using Makita replacement parts.
Chip discharge opening cleaning
Clean the chip discharge opening regularly.
Use a compressed air to clean the clogged chip dis-
charge opening.
Sharpening the blades
For conventional planer blades only
Always keep your blades sharp for the best perfor
-
mance possible. Use the sharpening holder to remove
nicks and produce a fine edge.
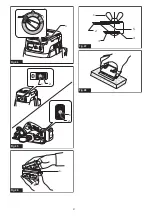
►
Fig.46:
1.
Sharpening holder
First, loosen the two wing nuts on the holder and insert
the blades (A) and (B), so that they contact the sides
(C) and (D). Then tighten the wing nuts.
►
Fig.47:
1.
Wing nut
2.
Blade (A)
3.
Blade (B)
4.
Side
(D)
5.
Side (C)
Immerse the dressing stone in water for 2 or 3 minutes
before sharpening. Hold the holder so that the both
blades contact the dressing stone for simultaneous
sharpening at the same angle.
►
Fig.48
OPTIONAL
ACCESSORIES
CAUTION:
These accessories or attachments
are recommended for use with your Makita tool
specified in this manual.
The use of any other
accessories or attachments might present a risk of
injury to persons. Only use accessory or attachment
for its stated purpose.
If you need any assistance for more details regard
-
ing these accessories, ask your local Makita Service
Center.
•
High-speed steel Planer blade
•
Tungsten-carbide Planer blade (For longer blade
life)
•
Mini planer blade
•
Sharpening holder assembly
•
Blade gauge
•
Set plate set
•
Edge fence (Guide rule)
•
Dressing stone
•
Dust bag assembly
•
Elbow
•
Chamfering rule assembly
•
Wireless unit
•
Makita genuine battery and charger
NOTE:
Some items in the list may be included in the
tool package as standard accessories. They may
differ from country to country.
Summary of Contents for DKP181Z
Page 2: ...2 1 3 Fig 1 1 Fig 2 1 2 Fig 3 2 1 Fig 4 2 1 Fig 5 1 Fig 6 1 2 3 Fig 7 1 Fig 8 2 ...
Page 5: ...1 Fig 23 1 2 Fig 24 Fig 25 1 2 3 Fig 26 3 2 1 Fig 27 0 2 0 4mm Fig 28 Fig 29 Fig 30 5 ...
Page 6: ...1 2 3 Fig 31 1 2 Fig 32 1 a b Fig 33 Fig 34 1 Fig 35 1 2 4 3 Fig 36 1 2 3 Fig 37 6 ...
Page 7: ...1 Fig 38 2 1 1 2 Fig 39 Fig 40 1 Fig 41 1 2 Fig 42 1 Fig 43 7 ...
Page 8: ...1 Fig 44 2 1 1 2 Fig 45 1 Fig 46 5 4 2 3 1 Fig 47 Fig 48 8 ...
Page 111: ...111 ...


