5 / 9
Fig.4
7
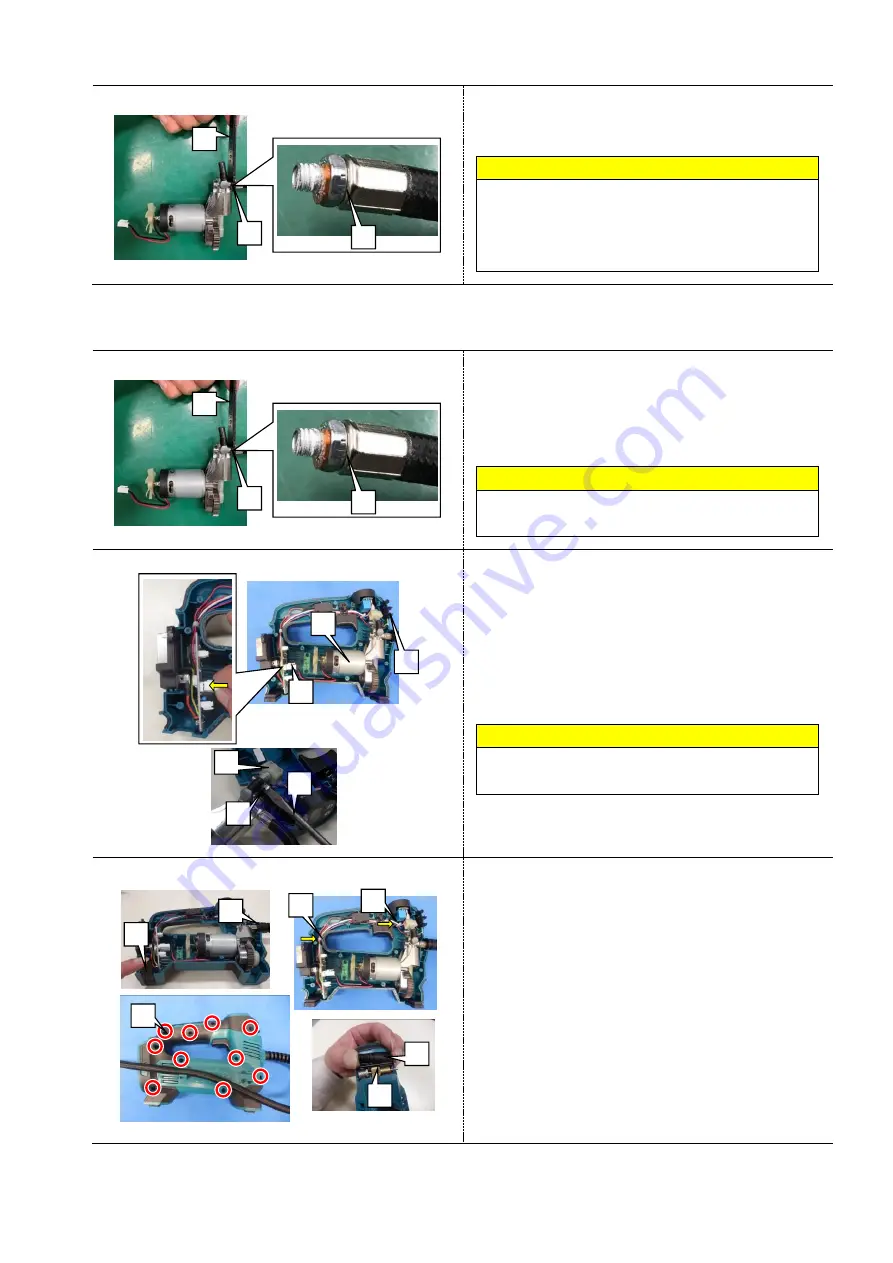
Loosen and remove Hose [1] with Wrench 10 [2]
(781036-5).
Note
Only a thin wrench [2] can be inserted, so be
careful when loosening.
As adhesive is applied to the thread on Hose end, be
careful when you loosen it.
4-2-2
Assembling
Fig.5
1
Remove the old screw lock adhesive on the thread
of Hose end [1], then apply a high strength
adhesive (Loctite 272), and then tighten the joint
portion with Wrench 10 [2] (781036-5).
Note
Only a thin wrench can be inserted, so be careful
when tightening.
Fig.6
2
Connect Lead wires of Motor assembly [1] to the
connector of PCB [2].
3
Insert the tube on the side of Pressure sensor [3]
into Pump section. Assemble Clamp [5], then
tighten the screw with a slotted screwdriver [4].
Assemble Fixed bracket [6].
Note
When inserting the tube, be careful to tighten it
because only a thin wrench can be inserted.
4
Assemble Motor assembly [1] to Housing.
Fig.7
5
Assemble Mats [1] (2 pcs). Assemble the pipe
guard of Air pipe assembly [2] to Housing.
6
Bundle Lead wires with Cable ties [3], [4].
7
Align Housing R with Housing L, then tighten
Screws 3x14 [5] (10 pcs).
8
Assemble Swim ring adapter [6] and Ball adapter
[7] to Fixed bracket.
[3]
[4]
[2]
[1]
[5]
[6]
[7]
[1]
[6]
[2]
[3]
[5]
[4]
[1]
[1]
[2]
[1]
[1]
[2]


