

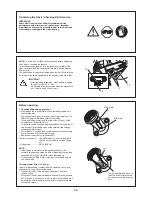


14
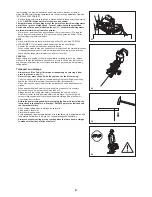
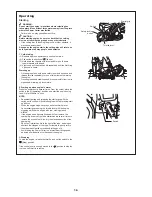
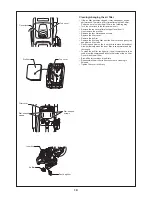
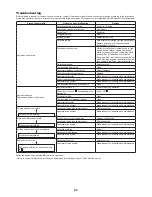
Tightening the V-belt / Checking V-belt tension
IMPORTANT:
Exact V-belt tension is essential for maximum cutting
performance with minimum fuel consumption. Improper
V-belt tension will result in premature wear to the V-belt and
V-belt wheel or damage to the clutch bearing.
NOTE:
The two hex. nut
(9)
must be loosened before tightening
the V-belt or checking the tension.
To increase the belt tension, turn the tension screw
(10)
to the
right (clockwise) with the combination wrench included with the
Power Cutter.
The belt tension is correctly adjusted when the nut
(11)
is located
as shown in the figure compared to the position of the mark
(12)
.
IMPORTANT:
After tightening/inspection, make certain to tighten
•
the hex. nut
(9)
(25 - 31 Nm).
Do not adjust the belt tension while the machine is
•
hot. There is a risk of burn injury.
11
12
9
10
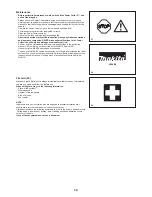
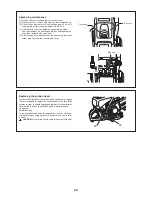
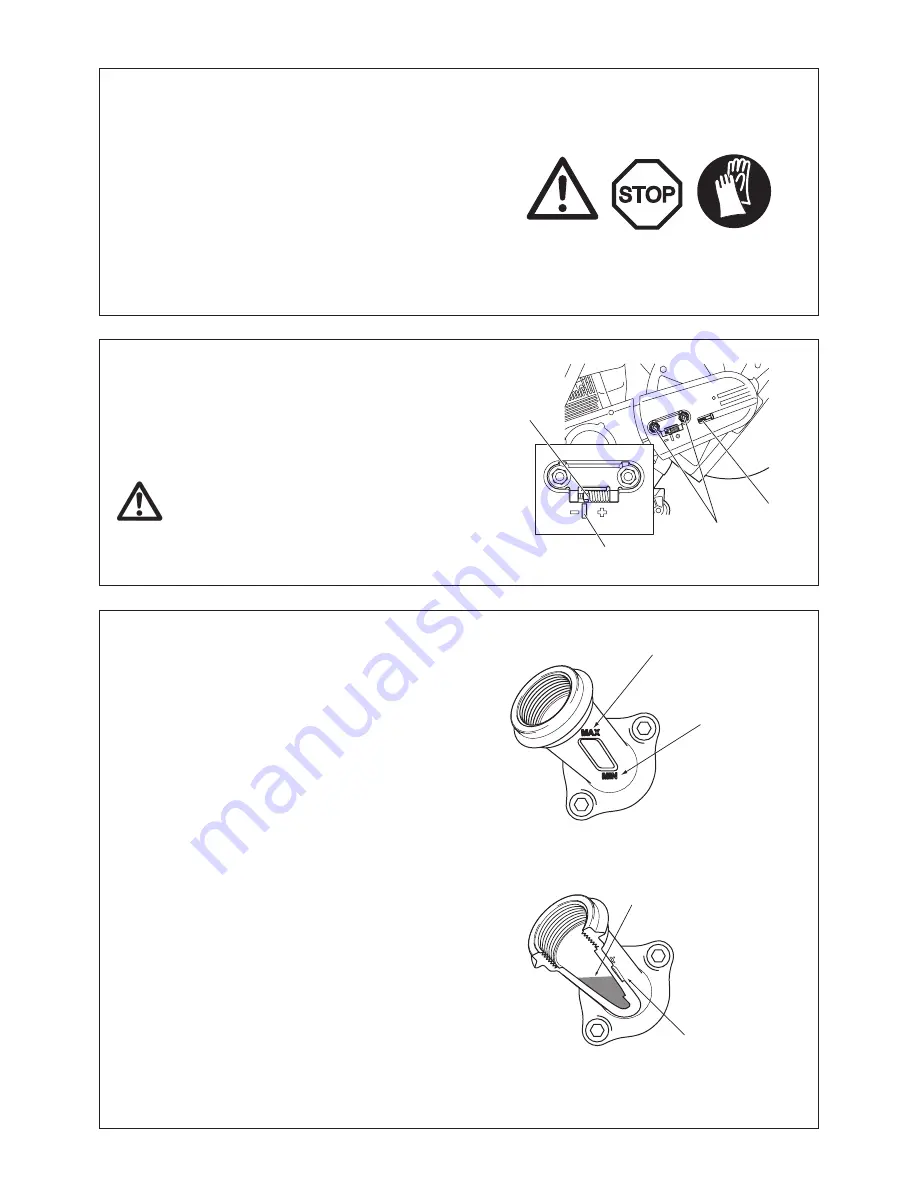
Before operating
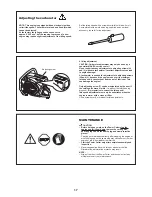
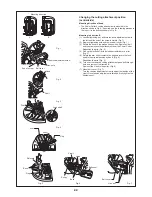
1. Checking/replenishing engine oil
With the engine in a cool state, check/replenish engine oil in
•
the following way.
Position engine on a flat level, and check to see whether oil is
•
within the range of MAX and MIN of the oil tank.
If oil is insufficient (near the MIN mark of the oil tank), fill the
•
oil tank with oil to the MAX mark.
Oil quantity can be checked externally without removing the oil
•
cap as the oil level can be seen at the external, see-through,
measuring mark window.
For reference, oil needs to be replenished every ten operating
•
hours (one tank of oil for ten fuel refuels).
Replace extremely dirty or discolored oil.
•
<Recommended oil> .... Use API grade SF class or higher SAE
10W-30 oil (automobile 4-stroke engine
oil).
<Oil quantity> ...............0.22 L (220 mL)
NOTE:
If the engine is not stored in the upright position, oil will
•
circulate through the engine, which will mean that there will be
excessive oil in the Power Cutter when replenishing.
If oil exceeds the MAX mark, it may leak out causing dirtying
•
or white smoke.
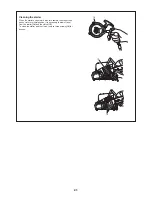
Oil replacement Point 1 <Oil cap>
Interval of replacement: Initially, after 20 operating hours, and
subsequently every 30 operating hours.
Clean away the dirt from around oil filling neck and then
•
remove oil cap.
Place the oil cap on a surface where it will not pick up grit and
•
dirt. If the cap is put back on in a dirty state, oil circulation may
deteriorate and engine parts become worn, which may cause
mechanical failure.
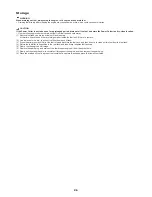
MAX mark
MIN mark
Oil
The oil is visible from here, so
the MAX and MIN marks can
be used to check the quantity
of oil.
Summary of Contents for EK7650H
Page 27: ...27...
Page 28: ...Makita Corporation 885023C7 www makita com ALA...


