background image

5

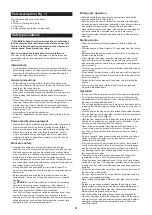
Part description (Fig. 1)

The numbers below refer to the figure 

1. Shaft

2. Protector (Cutting tool guard)

3. Cord cutter

4. Nylon cutting head (String trimmer head)

Safety precautions

 WARNING: Read all safety warnings and all instructions 

in this booklet and the instruction manual of the power unit. 

Failure to follow the warnings and instructions may result in 

electric shock, fire and/or serious injury.

Save all warnings and instructions for future reference.

The term “string trimmer” and “equipment” in the warnings and 

precautions refer to the combination of the attachment and the 

power unit.

Intended use

• 

This attachment is designed only for the purpose of trimming 

grass and light weed in conjunction with an approved power unit. 

Never use the attachment for the other purpose. Abusing the 

attachment may cause serious injury.

General precautions

• 

Before starting the string trimmer, read this booklet and the 

instruction manual of the power unit to become familiar with the 

handling of the string trimmer.

•  Do not lend the attachment to a person with insufficient 

experience or knowledge regarding handling of string trimmers.

• 

When lending the attachment, always attach this instruction 

manual.

• 

Do not allow children or young persons under 18 years old to use 

the string trimmer. Keep them away from the string trimmer.

• 

Handle the string trimmer with the utmost care and attention.

• 

Never use the string trimmer after consuming alcohol or drugs, or 

if feeling tired or ill.

• 

Never attempt to modify the attachment.

• 

Follow the regulations about handling of string trimmers in your 

country.

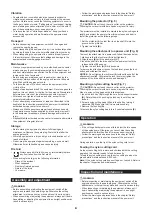
Personal protective equipment

• 

Wear safety helmet, protective goggles and protective gloves to 

protect yourself from flying debris or falling objects. 

(Fig. 2)

•  Wear ear protection such as ear muffs to prevent hearing loss.

• 

Wear proper clothing and shoes for safe operation, such as 

a work overall and sturdy, non-slip shoes. Do not wear loose 

clothing or jewelry. Loose clothes, jewelry or long hair can be 

caught in moving parts.

Work area safety

• 

Operate the equipment under good visibility and daylight 

conditions only. Do not operate the equipment in darkness or fog.

• 

Start and operate the engine only outdoors in a well ventilated 

area. Operation in a confined or poorly ventilated area can result 

in death due to suffocation or carbon monoxide poisoning.

• 

During operation, never stand on an unstable or slippery surface 

or a steep slope. During the cold season, beware of ice and snow 

and always ensure secure footing.

• 

During operation, keep bystanders or animals at least 15 m 

away from the equipment. Stop the engine as soon as someone 

approaches.

• 

Before operation, examine the work area for stones or other 

solid objects. They can be thrown and cause injury or property 

damage.

• 

 WARNING:

 Use of this product can create dust containing 

chemicals which may cause respiratory or other illnesses.

Some examples of these chemicals are compounds found in 

pesticides, insecticides, fertilizers and herbicides.

Your risk from these exposures varies, depending on how often 

you do this type of work. To reduce your exposure to these 

chemicals, work in a well ventilated area, and work with approved 

safety equipment, such as those dust masks that are specially 

designed to filter out microscopic particles.

Putting into operation

•  Before assembling or adjusting the equipment, switch off the 

engine and remove the spark plug.

• 

Before starting the engine, inspect the equipment for damages, 

loose screws/nuts or improper assembly. Check all control levers 

and switches for easy action. Clean and dry the handles.

• 

Never attempt to start the engine if the equipment is damaged or 

not fully assembled. Otherwise serious injury may result.

• 

Adjust the shoulder harness and hand grip to suit the operator’s 

body size.

Starting engine

• 

Wear the personal protective equipments before starting the 

engine.

• 

Start the engine at least 3 meters (10 feet) away from the fueling 

spot.

• 

Before starting the engine, make sure that there is no person or 

animal in the work area.

• 

When starting the engine, keep the rotating parts clear of your 

body and other object, including the ground. They may rotate 

when starting and may cause injury or damage to the equipment 

and/or property.

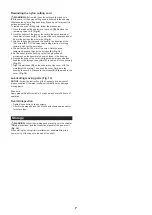
•  Place the equipment on firm ground. Maintain good balance and 

secure footing.

•  When pulling the starter knob, hold the power unit firmly against 

the ground by your left hand. Never step on the drive shaft of the 

power unit. 

(Fig. 3)

• 

Follow the instruction manual of the power unit for starting the 

engine.

• 

If the nylon cutting head rotates at idle, stop the engine and 

adjust the idle speed down.

Operation

•  In the event of an emergency, switch off the engine immediately.

• 

If you feel any unusual condition (e.g. noise, vibration) during 

operation, switch off the engine. Do not use the equipment until 

the cause is recognized and solved.

• 

The cutting attachment continues to move for a short period after 

releasing the throttle trigger or switch off the engine. Don’t rush to 

contact it.

• 

With the engine running only at idle, attach the shoulder harness.

• 

During operation, use the shoulder harness. Keep the equipment 

on your right side firmly. 

(Fig. 4)

• 

Hold the front handle with the left hand and the rear grip with the 

right hand, no matter you are right-hander or left-hander. Wrap 

your fingers and thumbs around the handles.

• 

Never attempt to operate the equipment with one hand. Loss 

of control may result in serious or fatal injury. To reduce the 

risk of injury, keep your hands and feet away from the cutting 

attachment.

• 

Do not overreach. Keep proper footing and balance at all times. 

Watch for hidden obstacles such as tree stumps, roots and 

ditches to avoid stumbling.

• 

If the equipment gets heavy impact or fall, check the condition 

before continuing work. Check the fuel system for fuel leakage 

and the controls and safety devices for malfunction. If there is 

any damage or doubt, ask Makita authorized service center for 

the inspection and repair.

• 

Take a rest to prevent loss of control caused by fatigue. We 

recommend to take a 10 to 20-minute rest every hour.

• 

When you leave the equipment, even if it is a short time, always 

switch off the engine. The equipment unattended with the engine 

running may be used by unauthorized person and cause serious 

accident.

• 

Follow the instruction manual of the power unit for proper use of 

the control lever and switch.

• 

During or after operation, do not put the hot equipment onto dry 

grass or combustible materials.

• 

Never attach cutting blades. Blade contact may result in serious 

injury.

• 

If grass or branches get caught between the cutting tool and 

guard, always stop the motor and remove the spark plug cap or 

the battery cartridge before cleaning. Otherwise unintentional 

blade rotation may cause serious injury.

• 

Check the cutting attachment frequently during operation for 

cracks or damages. Before the inspection, switch off the engine 

and wait until the cutting attachment stops completely. Replace 

damaged cutting attachment immediately, even if it has only 

superficial cracks.

Summary of Contents for ER400MP

Page 1: ...resente opuscolo e il manuale di istruzioni del gruppo di alimentazione La mancata osservanza delle avvertenze e delle istruzioni pu condurre a infortuni gravi o letali Waarschuwing Lees voor gebruik...

Page 2: ...2 4 1 2 3 1 2 3 4 B A A C D B 2 3 1 4 5 6...

Page 3: ...3 A B C D E A A B 7 8 C D E 9 10 F G H A 11 12 13 14...

Page 4: ...Technical data 8 EC Declaration of Conformity 9 Symbols The following symbols are used on the attachment and this instruction manual Understand these definitions Read and follow the instruction manua...

Page 5: ...engine inspect the equipment for damages loose screws nuts or improper assembly Check all control levers and switches for easy action Clean and dry the handles Never attempt to start the engine if th...

Page 6: ...ious injury When assembling or adjusting the equipment always put it down Assembling or adjusting the equipment in an upright position may result in serious injury Follow the warnings and precautions...

Page 7: ...hat the grooves and protrusions on the spool match up with those in the housing 6 Unhook the ends of the cord from their temporary position and feed the cords through the eyelets F to come out of the...

Page 8: ...ne immediately The cutting attachment is broken Replace the cutting attachment with new one The cutting attachment is not tightened securely Tighten the cutting attachment securely One end of nylon cu...

Page 9: ...y that the product s Designation String Trimmer Attachment Designation of Type s ER400MP Fulfills all the relevant provisions of 2006 42 EC and also fulfills all the relevant provisions of the followi...

Page 10: ...les Les symboles suivants figurent sur la t te et dans le pr sent mode d emploi Veillez comprendre ces d finitions Lisez le mode d emploi et suivez ses instructions Faites preuve de prudence et de vig...

Page 11: ...roduit peut entra ner la cr ation de poussi re contenant des produits chimiques susceptibles de provoquer des maladies respiratoires ou autres Parmi ces produits chimiques figurent les compos s pr sen...

Page 12: ...s des composants en plastique Apr s chaque utilisation serrez toutes les vis et tous les crous l exception des vis de r glage du carburateur N essayez pas d effectuer des t ches d entretien ou de r pa...

Page 13: ...lon est bien fix au bloc Sinon la t te fils de nylon peut se d tacher et entra ner des blessures graves Pour r enrouler le fil de coupe en nylon proc dez comme suit 1 Appuyez sur les attaches A et ret...

Page 14: ...t teignez imm diatement le moteur La t te fils de nylon est cass e Remplacez la t te fils de nylon La t te fils de nylon n est pas bien fix e Fixez correctement la t te fils de nylon Une extr mit des...

Page 15: ...it que le s produit s D signation T te Coupe Herbe D signation du des type s ER400MP Respectent toutes les dispositions pertinentes de la d claration 2006 42 CE et satisfait l ensemble des disposition...

Page 16: ...en Symbole werden am Aufsatz und in diesem Handbuch verwendet Sie m ssen diese Bedeutungen verstehen Lesen Sie die Betriebsanleitung aufmerksam durch und befolgen Sie diese Besondere Aufmerksamkeit er...

Page 17: ...Arbeiten den Arbeitsbereich auf das Vorhandensein von Steinen und sonstigen massiven Objekten Diese k nnen umherfliegen und Verletzungen oder Sachsch den verursachen WARNUNG Bei Gebrauch dieses Produk...

Page 18: ...n Gep ckst cken kommen Wartung Lassen Sie Ihr Werkzeug durch unser autorisiertes Servicecenter warten verwenden Sie stets nur originale Ersatzteile Unsachgem e Reparatur und Wartungsarbeiten k nnen di...

Page 19: ...ons und Wartungsarbeiten am Werkzeug vornehmen Anderenfalls k nnten sich Schneidaufsatz und andere Bauteile unerwartet bewegen und schwere Verletzungen verursachen Legen Sie das Werkzeug zwecks Inspek...

Page 20: ...rsetzen Sie den Schneidaufsatz durch einen neuen Der Schneidaufsatz ist nicht sicher festgezogen Ziehen Sie den Schneidaufsatz fest Ein Ende des Nylon Schneidseils ist zerrissen wodurch der Nylon Schn...

Page 21: ...t dass das Produkt bzw die Produkte Bezeichnung Sensen Aufsatz Typenbezeichnung en ER400MP allen einschl gigen Bestimmungen der Richtlinie 2006 42 EG nachkommen und erf llt auch alle zutreffenden Vors...

Page 22: ...Simboli Sull accessorio e nel manuale di istruzioni sono utilizzati i simboli riportati di seguito importante comprendere le definizioni utilizzate Leggere e rispettare le indicazioni nel manuale di i...

Page 23: ...pesticidi insetticidi fertilizzanti e diserbanti Il pericolo legato all esposizione dipende dalla frequenza con cui viene svolto questo tipo di lavoro Per ridurre l esposizione alle sostanze chimiche...

Page 24: ...durre a guasti dell utensile danni alle cose e o gravi infortuni Richiedere al centro assistenza autorizzato Makita di ispezionare l utensile e di effettuarne la manutenzione a intervalli regolari Sto...

Page 25: ...to per riavvolgere il filo di taglio in nylon 1 Premere i ganci di arresto A e rimuovere il coperchio B Rimuovere il filo in nylon rimanente Fig 8 2 Agganciare la parte centrale del nuovo filo in nylo...

Page 26: ...te il motore L accessorio di taglio rotto Sostituire l accessorio di taglio L accessorio di taglio non ben serrato Serrare correttamente l accessorio di taglio Un estremit del filo di taglio in nylon...

Page 27: ...o Denominazione Accessorio tagliabordi Denominazione della tipologia ER400MP Soddisfa tutte le pertinenti prescrizioni della Dichiarazione di conformit CE 2006 42 EC ed inoltre conforme a tutte le dis...

Page 28: ...che gegevens 32 EU verklaring van conformiteit 33 Symbolen Hieronder staan de symbolen die op het hulpstuk en in deze gebruiksaanwijzing worden gebruikt U dient de betekenis ervan te kennen Lees de ge...

Page 29: ...stof opwerpen waarin chemische bestanddelen kunnen zitten die ziekten aan de luchtwegen of andere ziekten kunnen veroorzaken Enkele voorbeelden van deze chemische bestanddelen zijn verbindingen die g...

Page 30: ...wasbenzine thinner alcohol enz Dit kan leiden tot verkleuren vervormen of barsten van de kunststofdelen Draai na gebruik alle schroeven bouten en moeren vast uitgezonderd de stelschroeven van de carb...

Page 31: ...van de nylondraad of de snijkop stevig op de behuizing is bevestigd Anders kan de nylondraad snijkop uit elkaar vliegen en ernstig persoonlijk letsel veroorzaken Om de nylondraad opnieuw op te wikkele...

Page 32: ...r onmiddellijk uit Het snijgarnituur is kapot Vervang het snijgarnituur door een nieuwe Het snijgarnituur is niet stevig bevestigd Draai het snijgarnituur stevig vast E n uiteinde van de nylondraden i...

Page 33: ...het de product en Aanduiding Graskantmaaierhulpstuk Aanduiding van type n ER400MP Voldoet aan de relevante voorwaarden van 2006 42 EG en voldoet tevens aan alle relevante voorwaarden van de volgende...

Page 34: ...d de la CE 39 S mbolos Se utilizan los siguientes s mbolos en el accesorio y este manual de instrucciones Comprenda estas definiciones Lea y siga el manual de instrucciones Preste especial cuidado y a...

Page 35: ...producto puede crear polvo que contiene productos qu micos que pueden causar enfermedades respiratorias y de otro tipo Algunos ejemplos de estos productos qu micos son compuestos que se encuentran en...

Page 36: ...ntenimiento o reparaci n que no se describa en este folleto o en el manual de instrucciones del grupo motor Consulte con un centro de servicio autorizado de Makita para esas tareas Utilice siempre de...

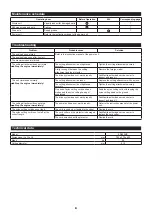
Page 37: ...es Para rebobinar el hilo de corte de nylon siga estos pasos 1 Presione los pestillos A y retire la cubierta B Retire los restos del hilo de nylon Fig 8 2 Enganche la parte media del nuevo hilo de nyl...

Page 38: ...tenga el motor inmediatamente El cabezal de corte est roto Sustituya el cabezal de corte con uno nuevo El cabezal de corte no se ha apretado firmemente Apriete el cabezal de corte firmemente Un extrem...

Page 39: ...idad que los productos Designaci n Accesorio para Desbrozadora Designaci n de tipos ER400MP Cumplen con todas las disposiciones relevantes de 2006 42 CE y tambi n cumple con todas las disposiciones re...

Page 40: ...rmidade CE 45 S mbolos Os s mbolos seguintes s o utilizados no implemento e neste manual de instru es Compreenda estas defini es Leia e siga o manual de instru es Tenha um cuidado e aten o especiais U...

Page 41: ...que se encontram em pesticidas insecticidas fertilizantes e herbicidas O risco resultante da exposi o a estes qu micos varia dependendo do n mero de vezes que faz este tipo de trabalho Para reduzir a...

Page 42: ...do Makita para efectuar esses trabalhos Utilize sempre pe as sobresselentes e acess rios originais da Makita Utilizar pe as ou acess rios fornecidos por terceiros pode resultar na avaria do equipament...

Page 43: ...erimentos pessoais graves Para rebobinar o fio de corte em nylon efectue os passos abaixo 1 Prima os entalhes A e retire a tampa B Retire o fio de nylon restante Fig 8 2 Engate o meio do novo fio de n...

Page 44: ...mala Desligue imediatamente o motor O implemento de corte est partido Substitua o implemento de corte por um novo O implemento de corte n o est bem apertado Aperte bem o implemento de corte Uma extre...

Page 45: ...o s produto s Designa o Implemento Aparador de Grama Designa o do s tipo s ER400MP Cumpre todas as disposi es relevantes da norma 2006 42 EC e tamb m est em conformidade com todas as disposi es releva...

Page 46: ...ske data 50 EF overensstemmelseserkl ring 51 Symboler De f lgende symboler er anvendt p tilbeh ret og i denne brugsanvisning Forst disse definitioner L s og f lg brugsanvisningen V r s rlig forsigtig...

Page 47: ...sudstyr s som st vmasker der er specielt konstrueret til at frafiltrere mikroskopiske partikler Anvendelse Inden samling eller justering af udstyret skal du slukke for motoren og fjerne t ndr ret Inde...

Page 48: ...f eks en v g Ellers kan den pludselig falde ned og for rsage personskade F rstehj lp Hav altid en f rstehj lpskasse i n rheden Erstat straks de ting der benyttes fra f rstehj lpskassen Oplys f lgende...

Page 49: ...ng spolen i retning af RH pilen D RH angiver omviklingsretningen for tr dtrimmere med h jreh ndsrotation 4 Vikl hele snoren p undtagen cirka 100 mm Lad enderne midlertidigt v re h gtet gennem indhakke...

Page 50: ...malt Stop straks motoren Sk reudstyret er i stykker Udskift sk reudstyret med et nyt Sk reudstyret er ikke strammet ordentligt Stram sk reudstyret ordentligt Den ene ende af nylontrimmersnoren er kn k...

Page 51: ...nsvar for at produktet produkterne Betegnelse Tr dtrimmertilbeh r Typebetegnelse r ER400MP Opfylder alle de relevante bestemmelser i 2006 42 EF og opfylder ogs alle relevante bestemmelser i f lgende E...

Page 52: ...52 Makita Makita Makita 52 52 52 53 53 54 55 55 55 56 56 56 57 15 50 EX2650LH...

Page 53: ...53 1 1 2 3 4 18 2 15 3 10 3 4...

Page 54: ...54 Makita 10 20 Makita Makita Makita 5 1 A 2 B 6 1 A 2 B C 3 D...

Page 55: ...55 4 A A 7 1 A B 2 C D 3 A E 6 000 1 1 A B 8 2 C 80 9 3 RH D RH 4 100 E 10 5 6 F 11 7 G H A 12 13 Shell Alvania 2 25 Makita 14...

Page 56: ...56 25 55 55 55 Makita Makita Makita ER400MP x x 703 x 270 x 402 0 5 410...

Page 57: ...57 Makita Europe N V Jan Baptist Vinkstraat 2 3070 Kortenberg Hiroshi Tsujimura ER400MP 2006 42 2000 14 EK EN ISO 11806 1 2011 Kortenberg 26 6 2019 Hiroshi Tsujimura Makita Europe N V...
Page 58: ...Ata man zerinde ve bu kullan m k lavuzunda kullan lan simgeler a a da a klanm t r Bu tan mlar dikkatlice okuyun Kullan m k lavuzunu okuyun ve dikkate al n Gerekli nlemleri al n ve dikkatli olun Koruy...
Page 59: ...rnek olarak verilebilir Maruziyetlerden kaynaklanan riskler bu tip i leri ne s kl kla yapt n za ba l olarak de i mektedir Bu kimyasal maddelere maruziyetinizi azaltmak i in iyi havaland r lan bir ort...
Page 60: ...lir Makita yetkili servis merkezinden makineyi d zenli olarak kontrol etmesini ve bak m n yapmas n isteyin Saklama Makineyi depoya kald rmadan nce eksiksiz bir temizlik ve bak m al mas uygulay n Bujiy...

Page 61: ...ortas n makaran n merkezinde bulunan t rna a ge irin C Telin bir ucu di er ucundan yakla k 80 mm daha uzun olmal d r ekil 9 3 Telin her iki ucunu RH oku y n nde makara etraf na s k ca sar n D RH sa a...

Page 62: ...urdurun Kesme ata man k r lm t r Kesme ata man n yenisiyle de i tirin Kesme ata man sa lam ekilde s k lmam t r Kesme ata man n sa lam ekilde s k n Naylon kesme telinin bir ucu kopmu ve naylon kesme ba...

Page 63: ...cak ekilde r n n r nlerin G sterim Misinal Yan T rpan Ata man Tip G sterimi ER400MP 2006 42 EC nin ilgili gereksinimlerine uygun oldu unu ve ayr ca a a daki AT AB direktiflerinin ilgili h k mlerini de...

Page 64: ...885038C991 ALA www makita com Makita Europe N V Makita Corporation 3 11 8 Sumiyoshi cho Anjo Aichi 446 8502 Japan Jan Baptist Vinkstraat 2 3070 Kortenberg Belgium...

Reviews: