9 ENGLISH
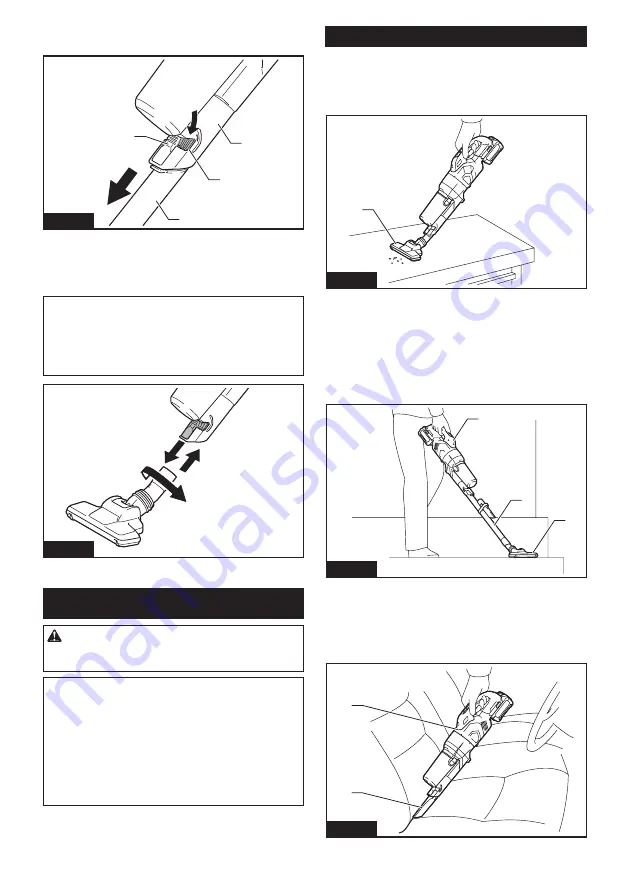
To remove attachment, pull it off the cleaner while
pressing and holding the arms of the release button.
1
2
3
4
Fig.8
►
1.
Release button
2.
Arm of release button
3.
Attachment with lock function
4.
Suction inlet
When using attachment without lock function
NOTICE:
To install attachment without lock function,
insert it into the suction inlet of the cleaner by twisting
it as shown in the figure. To detach attachment, release
it from the cleaner by twisting it as shown in the figure.
Avoid twisting the attachment in the direction opposite to
the arrow in the figure as it may loosen the cyclone unit.
Fig.9
OPERATION
CAUTION:
Do not move your face close to the
air vent when operating the cleaner.
If foreign objects
are blown into eyes, it may result in personal injury.
NOTICE:
Avoid using the cleaner in a horizontal
or upward facing position.
It may otherwise cause
the mesh filter to become clogged.
NOTICE:
Always use the cleaner with filters
installed.
Using the cleaner without filters may result
in a motor malfunction.
NOTICE:
Empty the dust case in the cyclone unit
when dust has accumulated.
Continued use will
result in weakened suction force.
The cyclone unit helps reduce the amount of dust that
enters into the cleaner, enhancing the suction perfor-
mance with simple and easy dust disposing.
Cleaning (Suction)
Nozzle
Attach the nozzle to clean off tables, desks, furniture,
etc. The nozzle slips on easily.
1
Fig.10
►
1.
Nozzle
Extension wand (Straight
pipe)
The extension wand fits in between the nozzle and the
cleaner itself. This arrangement is convenient for clean-
ing a floor in a standing position.
1
2
3
Fig.11
►
1.
Cleaner body
2.
Extension wand
3.
Nozzle
Corner nozzle
Fit on the corner nozzle for cleaning corners and crev-
ices of a car or furniture.
1
2
Fig.12
►
1.
Corner nozzle
2.
Cleaner body
Summary of Contents for GLC03
Page 39: ...39 ...