

6
Adjusting depth of cut
1
2
001672
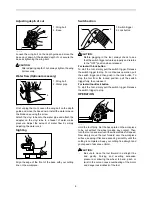
Loosen the wing bolt on the depth guide and move the
base up or down. At the desired depth of cut, secure the
base by tightening the wing bolt.
CAUTION:
•
After adjusting depth of cut, always tighten the wing
bolt securely.
Water flow (Optional accessory)
1
2
007717
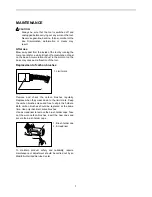
First, unplug the tool. Loosen the wing bolt on the depth
guide and move the base down. Install the water pipe on
the blade case using the screw.
Attach the vinyl tube onto the water pipe and attach the
adapter on the vinyl tube to a faucet of water mains
pressure. Adjust the amount of water flow by simply
adjusting the water cock.
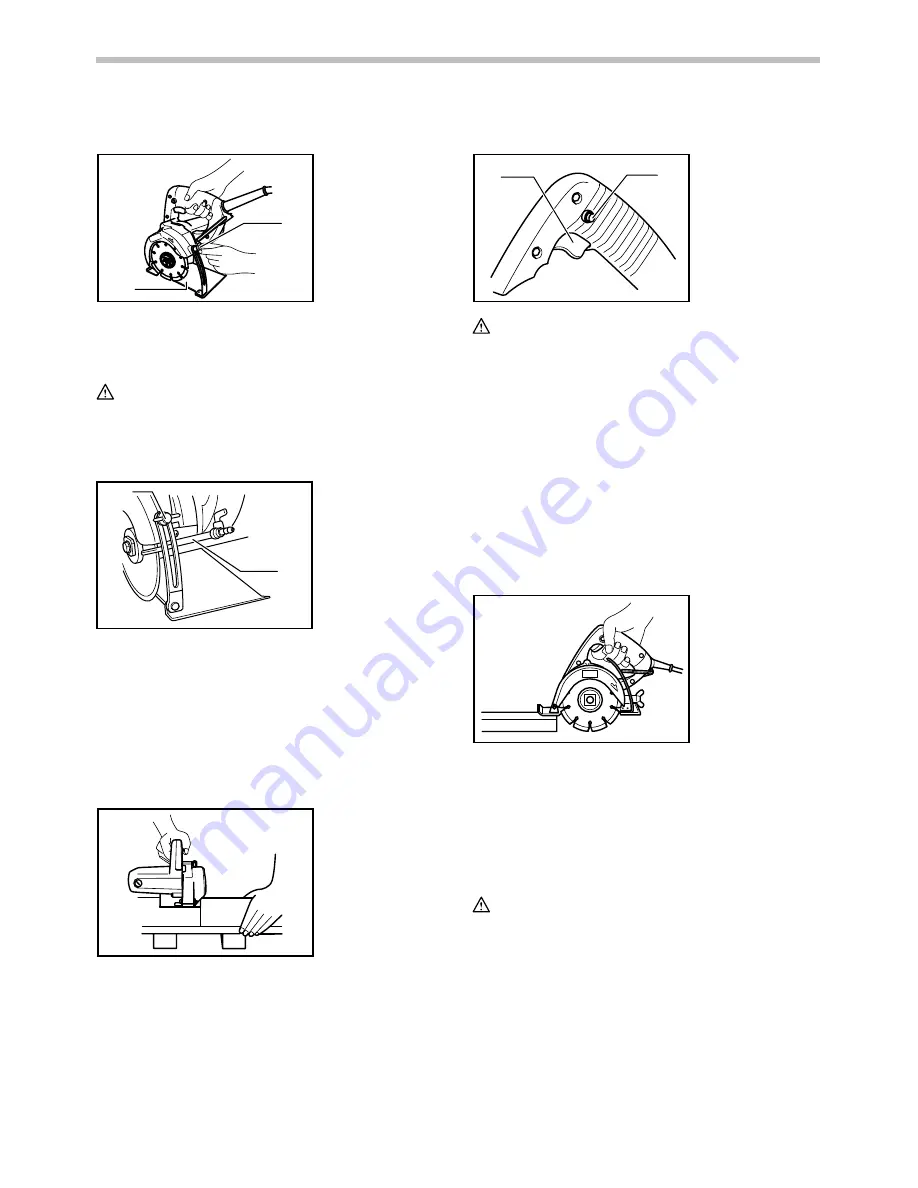
Sighting
001674
Align the edge of the front of the base with your cutting
line on the workpiece.
Switch action
1
2
001673
CAUTION:
•
Before plugging in the tool, always check to see
that the switch trigger actuates properly and returns
to the "OFF" position when released.
For tool with lock button
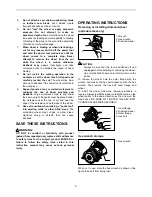
To start the tool, simply pull the switch trigger. Release
the switch trigger to stop. For continuous operation, pull
the switch trigger and then push in the lock button. To
stop the tool from the locked position, pull the switch
trigger fully, then release it.
For tool without lock button
To start the tool, simply pull the switch trigger. Release
the switch trigger to stop.
OPERATION
001675
Hold the tool firmly. Set the base plate on the workpiece
to be cut without the wheel making any contact. Then
turn the tool on and wait until the wheel attains full speed.
Now simply move the tool forward over the workpiece
surface, keeping it flat and advancing smoothly until the
cutting is completed. Keep your cutting line straight and
your speed of advance uniform.
CAUTION:
•
Be sure to move the tool forward in a straight line
and gently. Forcing and exerting excessive
pressure or allowing the wheel to bend, pinch or
twist in the cut can cause overheating of the motor
and dangerous kickback of the tool.
1. Switch trigger
2. Lock button
1. Wing bolt
2. Water pipe
1. Wing bolt
2. Base


