9 ENGLISH
Material of
container
Microwave
Notes
Heat-resistant
ceramic
Yes
Never use the ceramics which
are decorated with metal rim or
glazed.
Heat-resistant
plastic
Yes
It cannot be used for long time
microwave cooking.
Heat-resistant
glass
Yes
-
Grill rack
No
-
Plastic film
Yes
It should not be used when
cooking meat or chops as the
over-temperature may do damage
to the film.
Attaching the shoulder belt
Optional accessory
CAUTION:
Make sure the shoulder belt
securely attached properly.
Otherwise falling acci-
dent may occur.
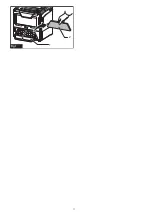
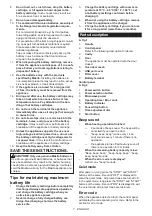
1.
Put the belt through the two holes on the handle.
2.
Buckle the belt.
►
Fig.5
Appliance / battery protection
system
The appliance and battery are equipped with the protec-
tion system. This system automatically cuts off power
to the motor to extend appliance and battery life. The
appliance will automatically stop during operation if the
appliance or battery is placed under one of the following
conditions.
•
Overload protection : When the appliance or
battery is operated in a manner that causes it to
draw an abnormally high current, the appliance
automatically stops without any indication. In
this situation, turn the appliance off and stop the
application that caused the appliance to become
overloaded. Then turn the appliance on to restart.
•
Overheat protection : When the appliance or
battery is overheated, the appliance automatically
stops. Let the appliance cool down before turning
it on again.
•
Overdischarge protection : When the battery
capacity becomes low, the appliance stops auto-
matically. If the appliance does not operate even
when the switches are operated, remove the
battery cartridge from the appliance and charge it.
Door opening and closing protection
function
If the door is opened during the operation, the appliance
stops working immediately, the light inside the cavity
turns on, and the microwave work gets suspended.
After the door is closed, the light inside the cavity
goes out. Press the start button again to resume the
operation.
When opening the door while the program is running
and do not close it within 3 minutes, the appliance exit
the program and shut down.
The operation does not start without closing the door.
When pressing the start button with the door open, the
buzzer beeps once, and displaying code: F09.
Tilt protection
The appliance cannot operate when the appliance is
tilted. If the appliance is tilted, the error code: F01 is
displayed. Place the appliance horizontally and restart
operation.
Protections against other causes
Protection system is also designed for other causes that
could damage the appliance and allows the appliance to
stop automatically. Take all the following steps to clear
the causes, when the appliance has been brought to a
temporary halt or stop in operation.
When the error code is displayed, refer to the section
for the error code.
1. Turn the appliance off, and then turn it on again to
restart.
2. Charge the battery(ies) or replace it/them with
recharged battery(ies).
3. Let the appliance and battery(ies) cool down.
If no improvement can be found by restoring protection
system, then contact our after-sales department.
Using appliance with cord
connected power source
Before using the cord connected power source, read
instructions and cautionary markings on it.
WARNING:
When using the appliance with
the cord connected power source, put the cord
connected power source on the stable surface.
This appliance is used in static position. Using the
cord connected power source which you carry on
your back may cause falling accident.
HOW TO USE
Installing or removing battery
cartridge
CAUTION:
Always switch off the appliance
before installing or removing of the battery
cartridge.
CAUTION:
Hold the appliance and the bat-
tery cartridge firmly when installing or removing
battery cartridge.
Failure to hold the appliance and
the battery cartridge firmly may cause them to slip off
your hands and result in damage to the appliance and
battery cartridge and a personal injury.
To install the battery cartridge, align the tongue on the
battery cartridge with the groove in the housing and slip
it into place. Insert it all the way until it locks in place
with a little click. If you can see the red indicator on the
upper side of the button, it is not locked completely.
Summary of Contents for MW001G
Page 3: ...3 2 1 Fig 7 ...
Page 327: ...327 ...


