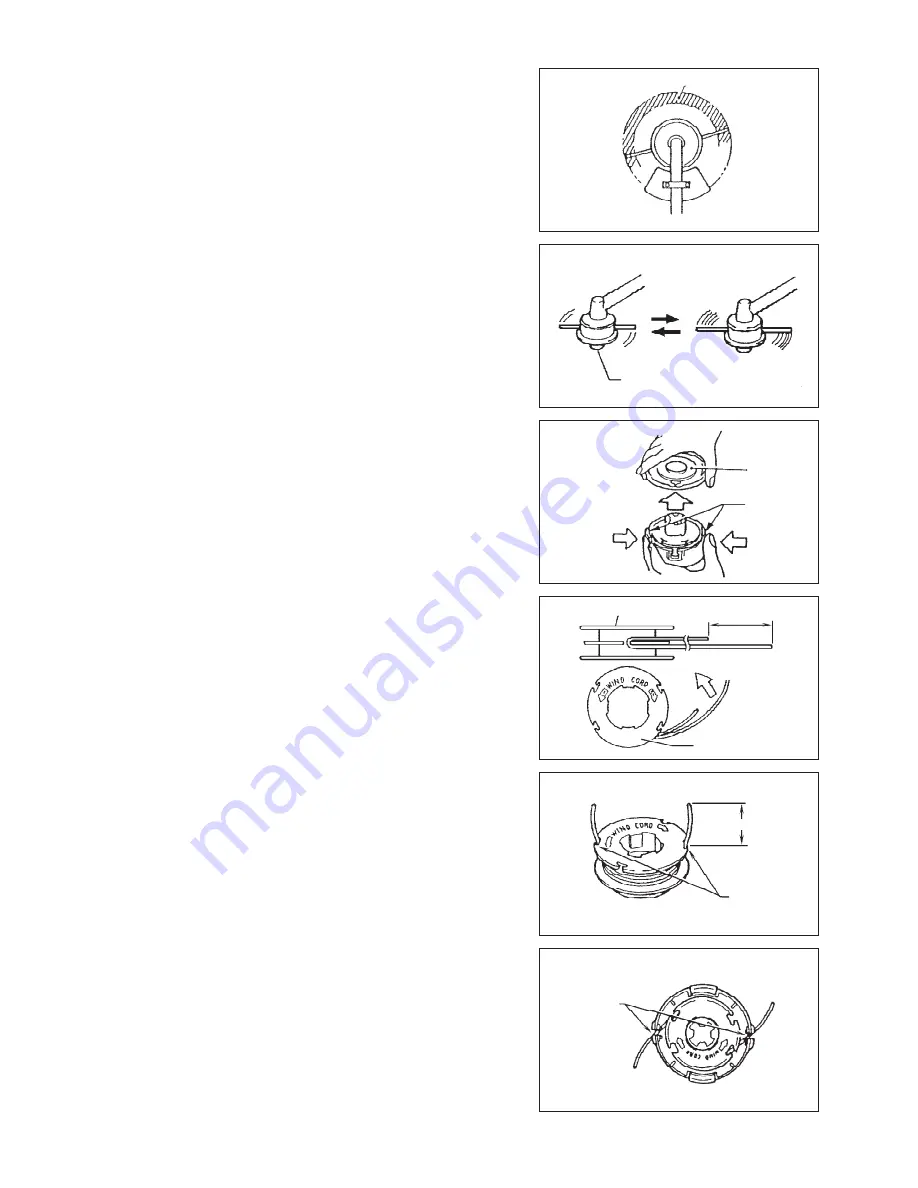
NYLON CUTTING HEAD
The nylon cutting head is a dual string trimmer head capable of both automatic and
bump & feed mechanisms.
The nylon cutting head will automatically feed out the proper length of nylon cord by
the changes in centrifugal force caused by increasing or decreasing rpms. However,
to cut soft grass more efficiently, bump the nylon cutting head against the ground to
feed out extra cord as indicated under operation section.
Operation
Increase the nylon cutting head speed to approx. 6,000 min
–
-1
.
Low speed (under 4,800 min
-1
) is not suitable, the nylon cord will not feed out
properly at low speed.
The most effective cutting area is shown by the shaded area.
–
If the nylon cord does not feed out automatically proceed as follows:
1. Release the throttle lever to run the engine idle and then squeeze the throttle
lever fully. Repeat this procedure until the nylon cord feeds out to the proper
length.
2. If the nylon cord is too short to feed out automatically with the above procedure,
bump the knob of the nylon cutting head against the ground to feed out the
nylon cord.
3. If the nylon cord does not feed out with procedure 2, rewind/replace the nylon
cord by following the procedures described under “Replacing the nylon cord”.
Replacing the nylon cord
First, stop the engine.
–
Press on the housing latches inward to lift off the cover, then remove the spool.
–
Most effective cutting area
Idle speed
Full speed
Knob
Cover
Latches
Press
Press
Spool
80 mm (3-1/8”)
For left hand rotation
Spool
100 mm (3-15/16”)
Notches
Eyelets
Hook the center of new nylon cord into the notch in the center of the spool, with
–
one end of the cord extending about 80 mm (3-1/8”) more than the other.
Then wind both ends firmly around the spool in the direction of the head rotation
(left-hand direction indicated by LH and right-hand direction by RH on the side of
the spool).
Wind all but about 100 mm (3-15/16”) of the cords, leaving the ends temporarily
–
hooked through a notch on the side of the spool.
Mount the spool in the housing so that the grooves and protrusions on the spool
–
match up with those in the housing. Keep the side with letters on the spool visible
on the top. Now, unhook the ends of the cord from their temporary position and
feed the cords through the eyelets to come out of the housing.
16


