6 / 7
5-3-2
Disassembling/ Assembling of Main housing
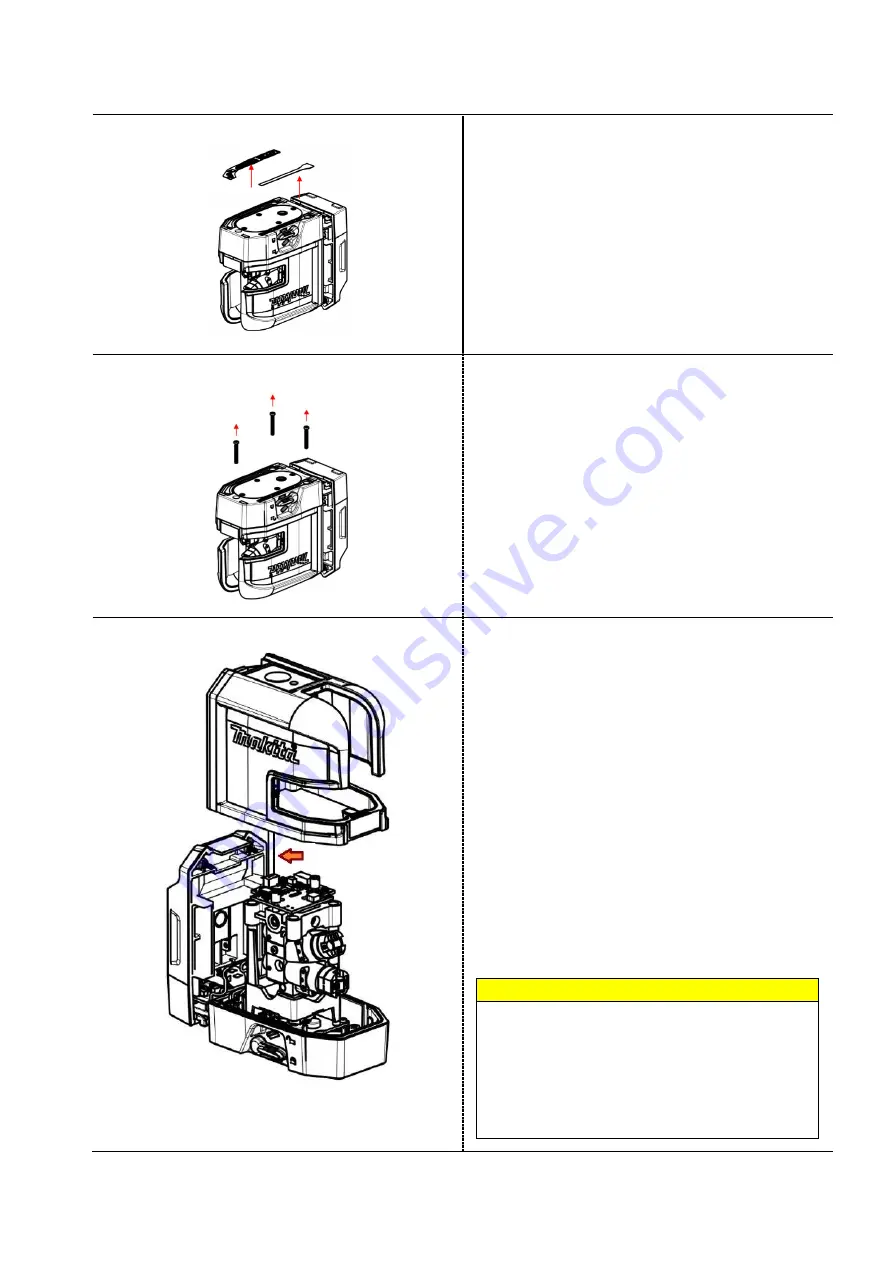
Fig. 7
1
Remove Base labels (2 pcs) because there are
Screws under them.
2
Remove the adhesive residue and stick new Labels
when assembling.
Fig. 8
3
Remove 2.6x20 Tapping screws (3 pcs.) with T8
screwdriver.
4
Tighten them with a torque of 0.4 N∙m when
assembling.
Fig. 9
5
Pull up Main housing. After pulling up slightly,
then twist and pull up so that Laser unit and
Housing do not interfere each other. At this time, be
careful not to cut Keypad cable indicated with the
arrow.
6
One side of Keypad cable is integrated with
Keypad (Switch) that is glued on Main housing and
the other is connected Control board.
7
Pull off Keypad cable because it is connected to
Control board with its connector.
8
When assembling, make sure that Keypad cable is
not twisted, and then connect Connector of Keypad
cable to that of Control board.
Note
Take preventive measures against static electricity
(e.g. a wrist strap on the market) when touching the
vicinity of Control board.
Before tightening Screws and sticking Labels,
check the operation and confirm that there is no
abnormality.


