background image

8 ENGLISH

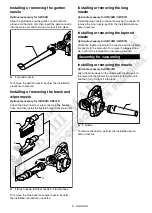
Installing or removing the garden 

nozzle

Optional accessory for UB100D

Align the protrusions on the garden nozzle with the 

grooves on the main unit, then insert the garden nozzle 

into the main unit, and then turn it to lock it into place.

1

►    

1.

 Garden nozzle

To remove the garden nozzle, perform the installation 

procedure in reverse.

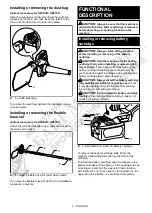
Installing or removing the brush and 

wiper nozzle

Optional accessory for UB100D / UB101D

Attach the brush nozzle or wiper nozzle to the flexible 

hose, and then install the flexible horse to the main unit.

1

2

3

►    

1.

 Brush nozzle 

2.

 Wiper nozzle 

3.

 Flexible hose

To remove the brush nozzle or wiper nozzle, perform 

the installation procedure in reverse.

Installing or removing the long 

nozzle

Optional accessory for UB100D / UB101D

Install the long nozzle in the same way as the nozzle. To 

remove the long nozzle, perform the installation proce-

dure in reverse.

Installing or removing the tapered 

nozzle

Optional accessory for UB100D / UB101D

Attach the tapered nozzle to the nozzle, and then install 

the nozzle to the main unit. To remove the tapered noz-

zle, perform the installation procedure in reverse.

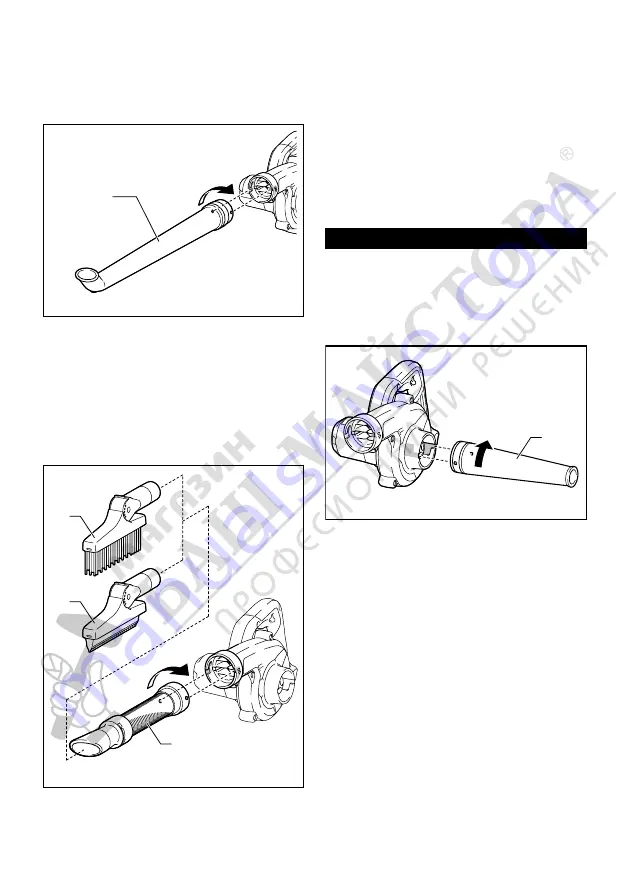
Assembly for vacuuming

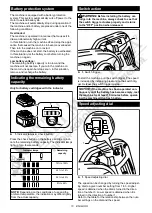
Installing or removing the nozzle

Optional accessory for UB101D

Align the protrusions on the nozzle with the grooves on 

the main unit, then insert the nozzle into the main unit, 

and then turn it to lock it into place.

1

►    

1.

 Nozzle

To remove the nozzle, perform the installation proce-

dure in reverse.

Summary of Contents for UB101D

Page 1: ...INSTRUCTION MANUAL Cordless Blower UB100D UB101D ENGLISH Original instructions Read before use ...

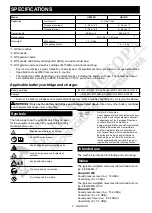
Page 2: ... above Use of any other battery cartridges and chargers may cause injury and or fire Symbols The followings show the symbols which may be used for the equipment Be sure that you understand their meaning before use Take particular care and attention Read instruction manual Keep hands away from rotating parts Long hair may cause entanglement accident Keep bystanders away Wear eye and ear protection ...

Page 3: ...warnings instruc tions illustrations and specifications provided with this power tool Failure to follow all instructions listed below may result in electric shock fire and or serious injury Save all warnings and instruc tions for future reference The term power tool in the warnings refers to your mains operated corded power tool or battery operated cordless power tool Work area safety 1 Keep work ...

Page 4: ...ower tools out of the reach of children and do not allow persons unfamiliar with the power tool or these instructions to operate the power tool Power tools are dangerous in the hands of untrained users 5 Maintain power tools and accessories Check for misalignment or binding of moving parts break age of parts and any other condition that may affect the power tool s operation If damaged have the pow...

Page 5: ...ng the machine always wear non slip and protective footwear Non skid closed toed safety boots and shoes will reduce the risk of injury 6 Use personal protective equipment Always wear eye protection Protective equipment such as a dust mask non skid safety shoes hard hat or hearing protection used for appropriate conditions will reduce personal injuries Operation 1 Switch off the machine and remove ...

Page 6: ... injury 6 Do not expose a battery pack or tool to fire or excessive temperature Exposure to fire or tem perature above 130 C may cause explosion 7 Follow all charging instructions and do not charge the battery pack or tool outside the temperature range specified in the instruc tions Charging improperly or at temperatures outside the specified range may damage the battery and increase the risk of f...

Page 7: ...o the han dling of hot battery cartridges 15 Do not touch the terminal of the tool imme diately after use as it may get hot enough to cause burns 16 Do not allow chips dust or soil stuck into the terminals holes and grooves of the battery cartridge It may result in poor performance or breakdown of the tool or battery cartridge 17 Unless the tool supports the use near high voltage electrical power ...

Page 8: ...r wiper nozzle perform the installation procedure in reverse Installing or removing the long nozzle Optional accessory for UB100D UB101D Install the long nozzle in the same way as the nozzle To remove the long nozzle perform the installation proce dure in reverse Installing or removing the tapered nozzle Optional accessory for UB100D UB101D Attach the tapered nozzle to the nozzle and then install ...

Page 9: ...ing or removing of the battery cartridge CAUTION Hold the machine and the battery cartridge firmly when installing or removing bat tery cartridge Failure to hold the machine and the battery cartridge firmly may cause them to slip off your hands and result in damage to the machine and battery cartridge and a personal injury CAUTION Always install the battery cartridge fully until the red indicator ...

Page 10: ...ttery cartridge to indi cate the remaining battery capacity The indicator lamps light up for a few seconds Indicator lamps Remaining capacity Lighted Off 75 to 100 50 to 75 25 to 50 0 to 25 NOTE Depending on the conditions of use and the ambient temperature the indication may differ slightly from the actual capacity Switch action WARNING Before installing the battery car tridge into the machine al...

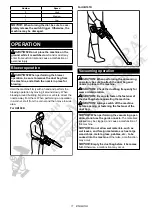
Page 11: ...ion in a corner start from the corner and then move to wide area For UB100D For UB101D Vacuuming operation CAUTION When performing the vacuuming operation be sure to attach the dust bag and nozzle in place to the machine CAUTION Check the dust bag frequently for wear or deterioration CAUTION Be sure to fasten the fastener of the dust bag before operating the machine CAUTION Always switch off the m...

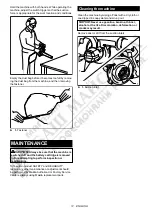
Page 12: ...f and the battery cartridge is removed before attempting to perform inspection or maintenance To maintain product SAFETY and RELIABILITY repairs any other maintenance or adjustment should be performed by Makita Authorized or Factory Service Centers always using Makita replacement parts Cleaning the machine Clean the machine by wiping off dust with a dry cloth or one dipped in soapy water and wrung...

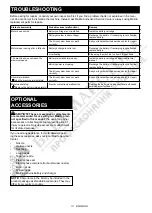
Page 13: ...ng Recharge the battery If recharging is not effective replace battery The drive system does not work correctly Ask your local authorized service center for repair Abnormal vibration stop the machine immediately The drive system does not work correctly Ask your local authorized service center for repair Motor cannot stop Remove the battery immediately Electric or electronic malfunction Remove the ...

Page 14: ...www makita com Makita Europe N V Makita Corporation 3 11 8 Sumiyoshi cho Anjo Aichi 446 8502 Japan Jan Baptist Vinkstraat 2 3070 Kortenberg Belgium 885818 224 EN 20200609 ...

Reviews: