3
ENGLISH
(Original instructions)
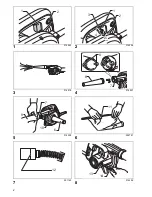
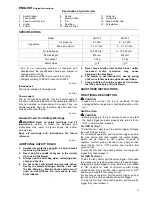
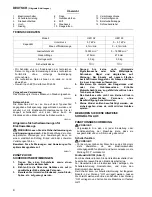
Explanation of general view
1
Switch trigger
2
Lock button
3
Speed control screw
4
Higher
5
Lower
6
Nozzle
7
Blower outlet
8
Pin
9
Dust bag
10 Suction inlet
11 Fastener
12 Limit mark
13 Brush holder cap
14 Screwdriver
SPECIFICATIONS
• Due to our continuing program of research and
development, the specifications herein are subject to
change without notice.
• Specifications may differ from country to country.
• Weight according to EPTA-Procedure 01/2003
ENE018-1
Intended use
The tool is intended for blowing dust.
ENF002-2
Power supply
The tool should be connected only to a power supply of
the same voltage as indicated on the nameplate, and can
only be operated on single-phase AC supply. They are
double-insulated and can, therefore, also be used from
sockets without earth wire.
GEA010-1
General Power Tool Safety Warnings
WARNING Read all safety warnings and all
instructions.
Failure to follow the warnings and
instructions may result in electric shock, fire and/or
serious injury.
Save all warnings and instructions for future
reference.
ENB017-1
ADDITIONAL SAFETY RULES
1.
Always use protective goggles, a cap and mask
when using the blower.
2.
Never point the nozzle at anyone in the vicinity
when using the blower.
3.
Always use the dust bag when collecting dust,
chips and the like.
4.
Do not collect still smoldering cigarette ashes,
freshly cut metals shavings, screws, nails and
the like. Warning – Electric shock could occur if
used on wet surfaces. Do not expose to rain.
Store indoors.
5.
Never block suction inlet and/or blower outlet.
Increased motor revolution may cause
dangerous fan breakage.
6.
The blower is not intended for use by young
children or infirm persons without supervision.
7.
Young children should be supervised to ensure
that they do not play with the blower.
SAVE THESE INSTRUCTIONS.
FUNCTIONAL DESCRIPTION
CAUTION:
• Always be sure that the tool is switched off and
unplugged before adjusting or checking function on the
tool.
Switch action
CAUTION:
• Before plugging in the tool, always check to see that
the switch trigger actuates properly and returns to the
“OFF” position when released.
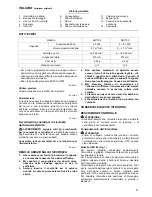
For UB1102 (Fig. 1)
To start the tool, simply pull the switch trigger. Release
the switch trigger to stop.
For continuous operation, pull the switch trigger, push in
the lock button and then release the switch trigger.
Switch can be locked in “ON” position for ease of
operator comfort during extended use. Apply caution
when locking tool in “ON” position and maintain firm
grasp on tool.
To stop the tool from the locked position, pull the switch
trigger fully, then release it.
For UB1103 (Fig. 2)
To start the tool, simply pull the switch trigger. Tool speed
is increased by increasing pressure on the switch trigger.
Release the switch trigger to stop. Switch can be locked
in “ON” position for ease of operator comfort during
extended use. Apply caution when locking tool in “ON”
position and maintain firm grasp on tool.
For continuous operation, pull the switch trigger, push in
the lock button and then release the switch trigger.
To stop the tool from the locked position, pull the switch
trigger fully, then release it.
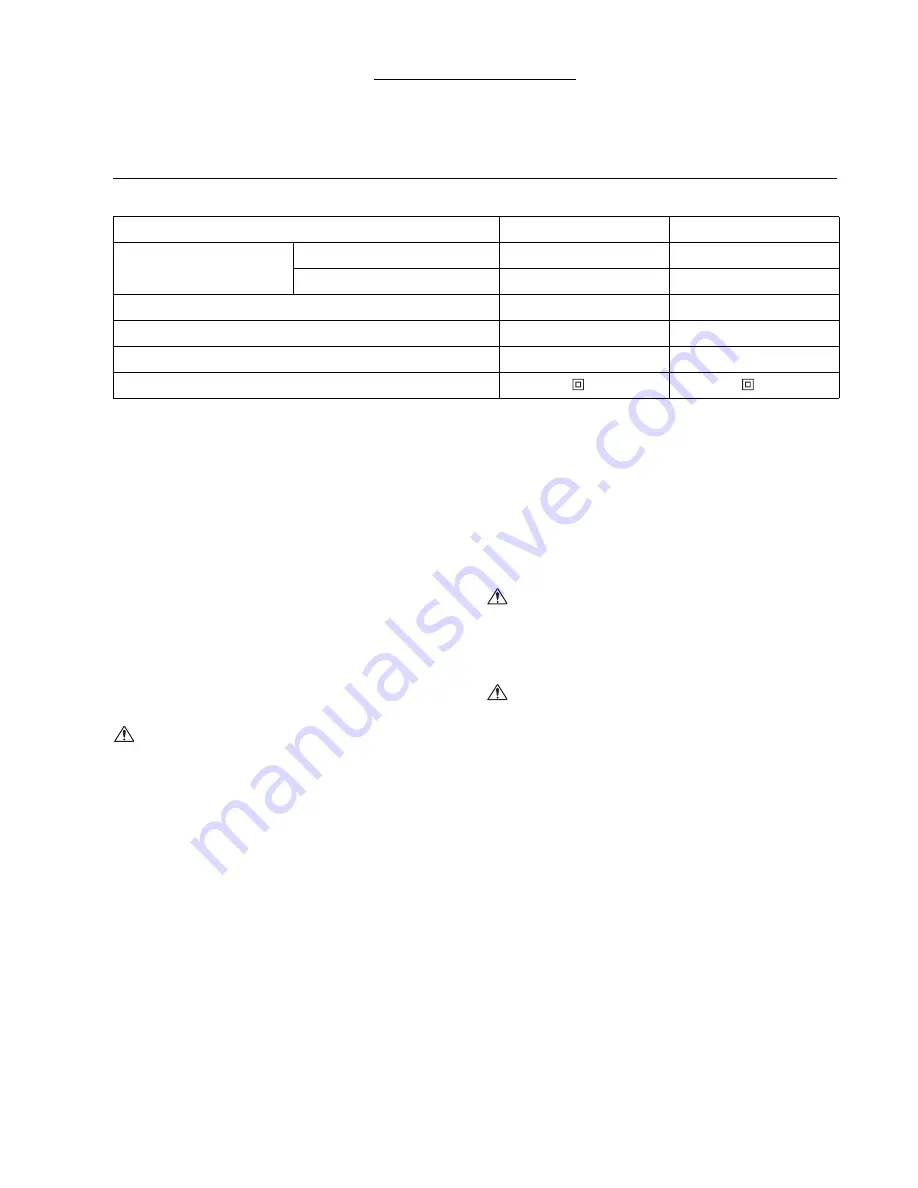
Model
UB1102
UB1103
Capacities
Air pressure
5.7 kPa
0 – 5.7 kPa
Max. air volume
4.1 m
3
/min
0 – 4.1 m
3
/min
No load speed
16,000 min
–1
0 – 16,000 min
–1
Overall length
479 mm
479 mm
Net weight
2.0 kg
2.0 kg
Safety class
/II
/II


