8
ENGLISH
HOW TO USE
CAUTION:
Always be sure that the tool is
switched off and the battery cartridge is removed
before carrying out any work on the tool.
NOTICE:
When you are not working, lay the
machine down and store it.
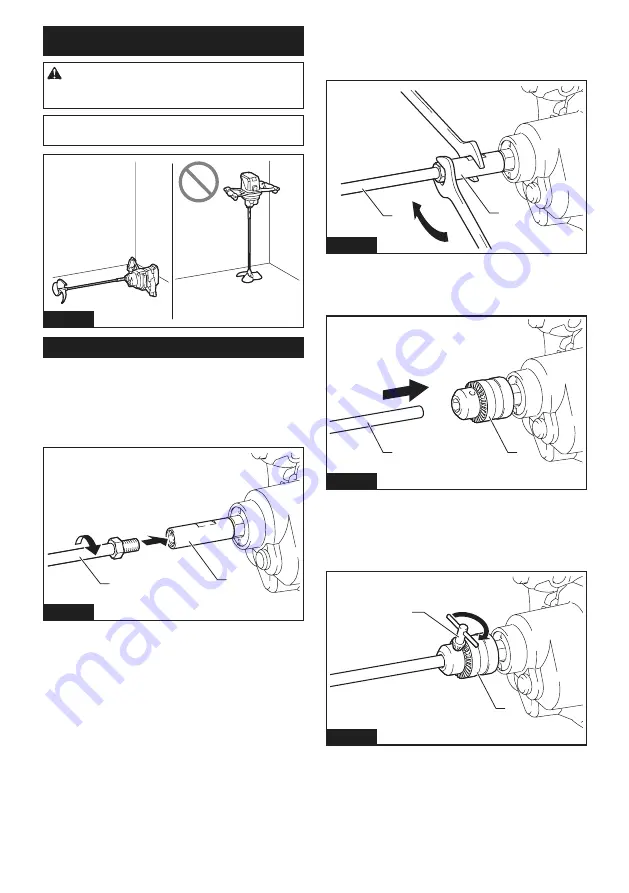
Fig.5
Assembly
Installing the shaft
Optional accessory
For UT001G
1.
Tighten the shaft into the shaft holder.
1
2
Fig.6
►
1.
Shaft
2.
Shaft holder
2.
Hold the flats on the shaft holder with wrench 19
so that the shaft holder cannot revolve. With the flats
held so, tighten the hex nut with another wrench 19 in
the direction of arrow.
1
2
Fig.7
►
1.
Shaft
2.
Shaft holder
For UT002G
1.
Insert the shaft into the chuck as far as it will go.
1
2
Fig.8
►
1.
Shaft
2.
Chuck
2.
Tighten the chuck by hand, and then place the
chuck key in each of three holes and tighten it clock-
wise. Be sure to tighten the chuck key at all three holes
evenly.
2
1
Fig.9
►
1.
Chuck key
2.
Chuck
3.
To remove the shaft, turn the chuck key coun-
terclockwise at one of the holes, and then loosen the
chuck by hand.


