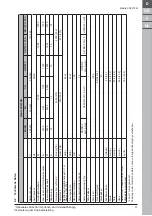


*) Optional accessories / Option depending on model
Original instruction
17
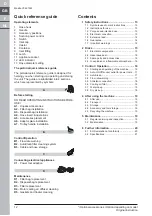
D
GB
F
NL
Makita VC4210M
be picked-up. If used for dust extraction in con-
nection with dust producing tool then connect
end of suction hose with appropriate adapter.
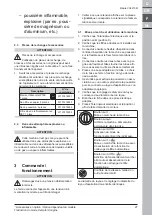
6. Check that hose diameter setting corraspondes
to actual hose diameter.
7. Connect the plug into a proper electrical outlet.
8. Put the electrical switch into position I in order to
start the motor.
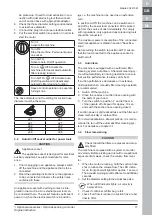
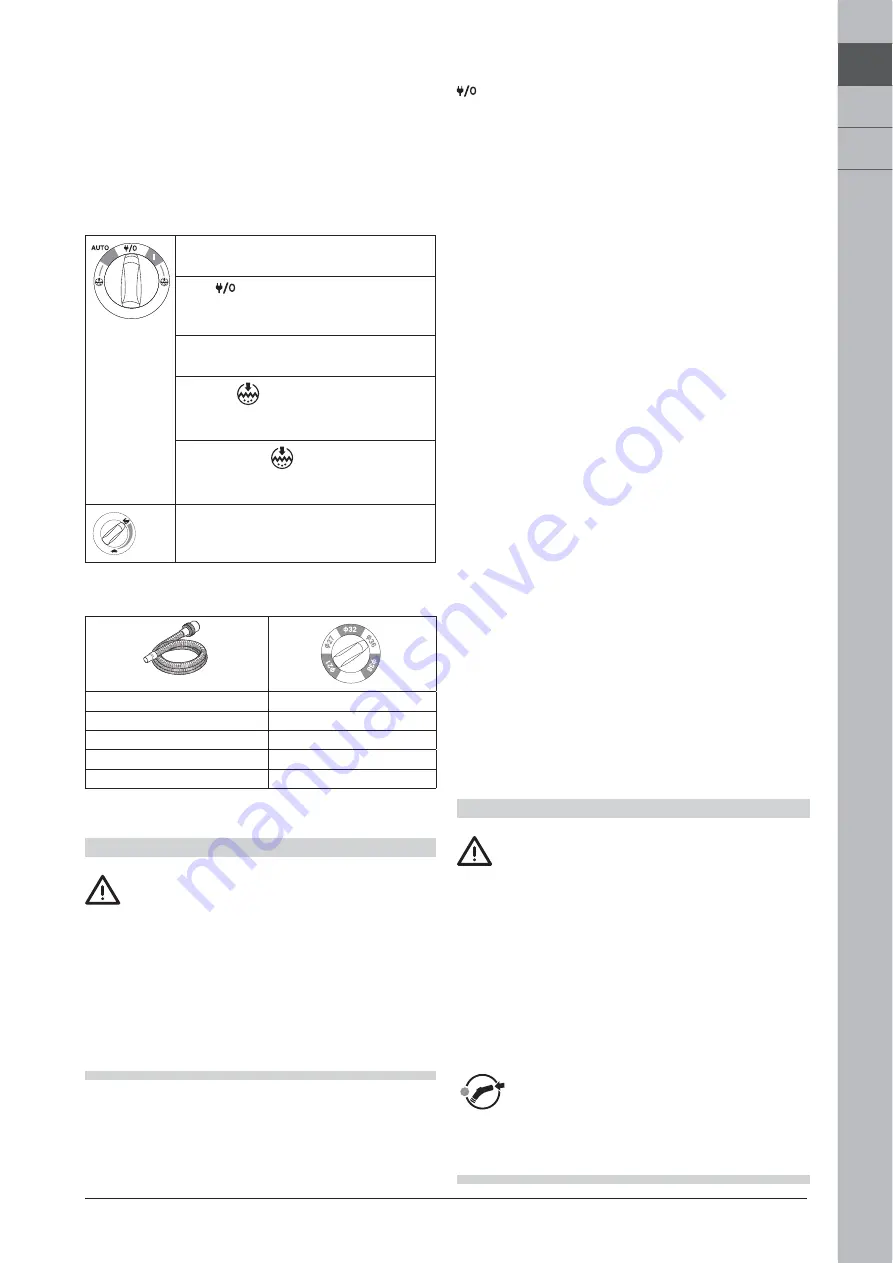
Turn I:
Activate the machine
Turn
:
Stop the machine. Permanent power
on socket
Turn AUTO :
Activate Auto-On/Off operation
Turn I +
Off: Activate the
machine with deactivated automatic
filter cleaning function
Turn AUTO +
Off: Activate Auto-
On/Off operation with deactivated
automatic filter cleaning function
Speed control operation on separate
turning knob
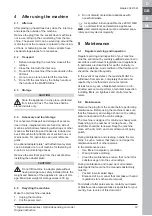
The hose diameter and the setting for suction hose
diameter must be the same.
ø21
ø21
ø27
ø27
ø32
ø32
ø36
ø36
ø38
ø38
3.2
Auto-On/Off socket outlet for power tools
CAUTION
Appliance socket.
The appliance socket is designed for electrical
auxiliary equipment; see technical data for refer-
ence.
1. Prior to plugging in an appliance, always switch
off the machine and the appliance that is to be
connected.
2. Read the operating instructions to the appliance
to be connected and observe the safety notes
contained in these.
An appliance socket with earthing contact is inte-
grated in the machine. An external power tool can
be connected there. The socket features permanent
power on, when the electrical switch is in position
, i.e. the machine can be used as an extension
cord.
In position AUTO the machine can be switched on
and off by the power tool connected. Dirt is picked
up from the source of dust immediately. To comply
with regulations, only approved dust producing tools
should be connected.
The maximum power consumption of the connected
electrical appliance is stated in section “Specifica-
tions”.
Before turning the switch to position AUTO ensure
that the tool connected to the appliance socket is
switched off.
3.3
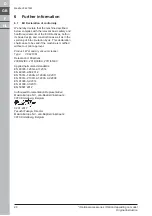
AutoClean
The machine is equipped with an automatic filter
cleaning system, AutoClean. A frequent cleaning cy-
cle will automatically run during operation to ensure
that suction performance is always at its best.
If suction performance decreases or in extensive
dust applications a manually filter cleaning operation
is recommended:
1. Switch off the machine.
2. Close the nozzles or suction hose opening with
the palm of your hand.
3. Turn the switch to position „I“ and let the ma-
chine operate at full speed for approx. 10 sec-
onds with the suction hose opening closed.
If suction power is still reduced take out the filter and
clean mechanically or replace filter.
For certain applications, like wet pick up, it is recom-
mended to turn off the automatic filter cleaning sys-
tem. For details see chapter 3.1.
3.4
Flow rate warning
CAUTION
Check that all the filters are present and prop-
erly fitted.
The machine is equipped with a system to monitor
air velocity. Before picking up dust with occupational
exposure limit values, check the volume flow moni-
tor.
1. When the motor is running, hold the suction hose
shut to reduce the volume flow. The LED indica-
tor on front panel will light after approx. 1 second.
The acoustic warning sounds after some additional
seconds.
2. Set the diameter setting to the actual hose size.
When LED indicator lights, air velocity is
below 20 m/s.
1. Check if container or filter bag is full.
2. check if air flow is reduced in suction hose, tube/
nozzle, filter.
Summary of Contents for VC4210M
Page 2: ...Makita VC4210M A1 A2 M 1 2 1 3 3 4 4 5 5 5 6 6 1 2 1...
Page 3: ...Makita VC4210M A4 21 21 27 27 32 32 36 36 38 38 3 2 1 A3 M 4 3 1 2 1 5 6 6 MAX MIN 4 5...
Page 4: ...Makita VC4210M A5 1 2 A5...
Page 5: ...Makita VC4210M A6 x4 1 1 2 2 3A 3A 4A 4A 4A 4A 3B 4B 4B...
Page 6: ...Makita VC4210M A7 x2 x2 x4 B1 20 m s 1 3 2 9...
Page 7: ...Makita VC4210M B2 AutoClean B3 10 sec 2 1...
Page 8: ...Makita VC4210M C1 C1 1 7 2 2 3 4 5 6 8...
Page 9: ...Makita VC4210M D1 M 1 2 3 2 4 5 6 7 8 8 D2 M 5 4 7 6 1 2 3 2 8 9 9...
Page 10: ...Makita VC4210M D3 M 4 1 2 3 5 6 D3 8 7...
Page 11: ...Makita VC4210M D4 D5 4 5 6 1 2 3 7 1 2 3 2 4 5 6...
Page 12: ...Makita VC4210M D5 8 9 9 7...


