13 ENGLISH
Recommended cord connected power source
Portable power pack
PDC01 / PDC1200 / PDC1500
•
The cord connected power source(s) listed above may not be available depending on your region of residence.
•
Before using the cord connected power source, read instruction and cautionary markings on them.
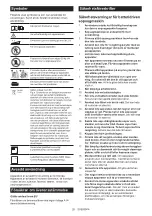
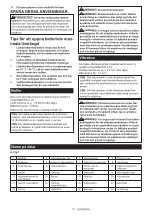
Symbols
The followings show the symbols which may be used
for the equipment. Be sure that you understand their
meaning before use.
Read instruction manual.
Take particular care and attention.
2 %
Do not use on a slope of more than 2%.
Do not step onto the appliance.
Do not place objects weighing 20 kg (44
lbs) or more on top of the appliance.
To prevent accidents or injury, make sure
to switch the appliance off and remove the
batteries before maintaining the brushes or
performing repairs.
A representative battery applicable to this
appliance.
Ni-MH
Li-ion
Only for EU countries
Due to the presence of hazardous com-
ponents in the equipment, waste electrical
and electronic equipment, accumulators
and batteries may have a negative impact
on the environment and human health.
Do not dispose of electrical and electronic
appliances or batteries with household waste!
In accordance with the European Directive
on waste electrical and electronic equip-
ment and on accumulators and batteries
and waste accumulators and batteries,
as well as their adaptation to national law,
waste electrical equipment, batteries and
accumulators should be stored separately
and delivered to a separate collection point
for municipal waste, operating in accor-
dance with the regulations on environmen-
tal protection.
This is indicated by the symbol of the
crossed-out wheeled bin placed on the
equipment.
Guaranteed sound power level according
to EU Outdoor Noise Directive.
Sound power level according to Australia
NSW Noise Control Regulation.
Intended use
The appliance is intended for collecting dry debris. The
appliance is suitable for commercial use, for example in
hotels, schools, hospitals, factories, shops, offices and
rental businesses.
Declarations of Conformity
For European countries only
The Declarations of conformity are included in Annex A
to this instruction manual.
Safety precautions
Cordless vacuum sweeper safety
warnings
1.
Operators shall be adequately instructed on
the use of the vacuum sweeper.
2.
This vacuum sweeper is for dry use only.
3.
When not in use, always store the vacuum
sweeper indoors.
4.
Do not use for cleaning purposes on surfaces
having a gradient exceeding that marked on
the appliance.
5.
Do not let children play with rechargeable
appliance.
6.
When store the appliance, place the appliance
on a flat and stable surface. Store the appli
-
ance out of the reach of children.
7.
Always place the appliance on a flat surface
when the appliance will be stood on its end.
8.
Keep the work location neat and tidy. Also,
make sure it is well lit and always kept clean.
Failure to do so may cause accidents.
9.
Wear appropriate work attire.
10.
Do not use battery adapter.
11.
Do not touch the battery area with wet hands.
Otherwise, electric shock may result.
12.
Do not use the filter in a wet.
Motor burnout or a
breakdown may result.
13.
Do not use the appliance when it is raining
or when the road surface is wet. Also, do not
pick up refuse containing liquid or foam.
Motor
burnout or a breakdown may result.
14.
Do not collect string-like refuse such as cord,
string, or wire. These refuse may get entan-
gled in the brushes. Remove the refuse before
cleaning operation.
Otherwise a breakdown may
result.
15.
Do not disconnect the earthing line.
16.
Do not attempt to clean the exterior or interior
with benzine, thinner or cleaning chemicals.
Cracks and discoloration may be caused.
17.
Wear appropriate protective equipment such
as goggles and a dust mask when cleaning
dusty location, performing maintenance or
disposing of refuse.
18.
Mount filters properly.
Using the appliance with
no filter attached, attached in the wrong position,
or in a damaged state could cause motor burnout
or a breakdown.
Summary of Contents for VS001G
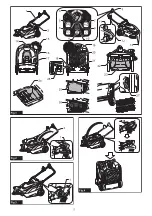
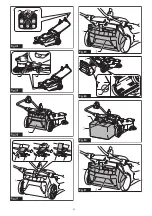
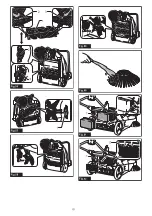
Page 3: ...3 1 2 3 Fig 5 1 Fig 6 1 2 Fig 7 1 Fig 8 1 2 Fig 9 1 2 Fig 10...
Page 4: ...4 1 Fig 11 1 Fig 12 2 3 1 Fig 13 1 Fig 14 1 2 Fig 15 1 2 Fig 16...
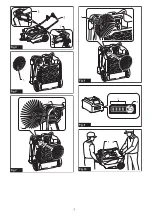
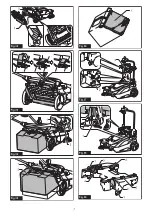
Page 5: ...5 1 3 2 Fig 17 1 2 3 Fig 18 2 1 Fig 19 1 Fig 20 1 Fig 21 1 2 3 Fig 22 Fig 23...
Page 6: ...6 1 2 Fig 24 1 1 Fig 25 1 Fig 26 1 Fig 27 1 2 Fig 28 1 2 Fig 29 1 2 Fig 30 1 2 Fig 31...
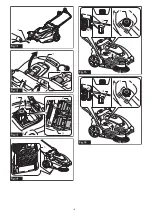
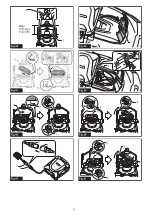
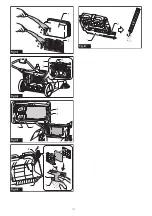
Page 9: ...9 1 2 Fig 48 1 2 Fig 49 Fig 50 Fig 51 Fig 52 1 1 A B Fig 53 Fig 54 Fig 55...
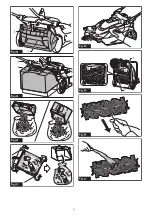
Page 10: ...10 1 2 3 2 3 Fig 56 1 Fig 57 Fig 58 Fig 59 Fig 60 1 2 Fig 61 1 2 Fig 62...
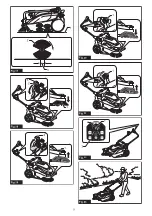
Page 11: ...11 1 2 Fig 63 1 2 3 4 Fig 64 1 2 3 4 Fig 65 1 2 3 Fig 66 1 2 Fig 67...
Page 112: ...112 7 8 9 10 11 12 13 14 15 16 17 18 19 20 21 22 23 24 25 26 1 2 3 4 5 6 130 C 7...
Page 115: ...115 Makita Makita 1 2 2 1 2 3 3 1 4 5 1 2 3 1 6 1 2 2 2 6 7 1 2 2 6 8 1...
Page 116: ...116 9 1 2 75 100 50 75 25 50 0 25 3 50 100 20 50 0 20 10 1 2 11 1...
Page 117: ...117 1 2 3 Makita 12 1 13 1 2 1 3 2 1 1 2 1 2 1 2...
Page 118: ...118 14 1 15 1 2 16 1 2 1 2 15 30 3 25 40 1 1 9 16 17 1 2 3 18 1 2 3 19 1 2 20 1 21 1...
Page 119: ...119 1 I 22 1 2 3 2 3 23 4 O 24 1 2...
Page 120: ...120 15 25 1 30 26 1 1 2 27 1 3 28 1 2 1 29 1 2 2 30 1 2 1 31 1 2 2 32 1 2 3 3 33 4 34 1 2...
Page 123: ...123 52 1 2 53 1 3 4 5 54 6 55 7 56 1 2 3 8 57 1 9 58 7 10 59 1 2 60 3 1 2 61 1 2...
Page 125: ...125...
Page 126: ...126...
Page 127: ...127...


