22 ENGLISH
PDC01
1.
Remove the plug of the adapter (for the XGT
battery) from the socket of the portable power pack and
remove the cord.
NOTICE:
Do not pull the cord when removing
from the plug of adapter. Also, do not carry the
portable power pack by holding only the cord.
The cord may break or otherwise be damaged.
2.
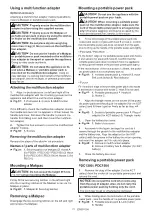
Disengage hooks C and pull the portable power
pack out and then up.
►
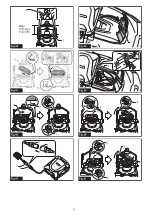
Fig.47:
1.
Portable power pack
2.
Hooks C
3.
Handle
Handling after use
CAUTION:
If the appliance will not be in use,
make sure the ON/OFF switch is turned off and
the batteries have been removed.
Discarding refuse
CAUTION:
Always wear protective equipment
such as a mask and gloves when disposing of
refuse.
There is a danger you may touch sharp
objects in the refuse, possibly causing injury.
CAUTION:
Discard refuse early, before too
much accumulates.
The suction power could be
reduced.
1.
Remove the hook and then remove the waste
container from the appliance.
►
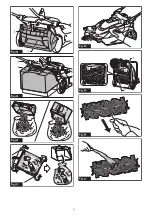
Fig.48:
1.
Waste container
2.
Hook
When using the dust bag, raise the grip and lift out the
dust bag.
►
Fig.49:
1.
Grip (for dust bag)
2.
Dust bag
2.
Transport the waste container or dust bag to the
refuse collection are and discard the refuse.
►
Fig.50
When using the dust bag, attaching a polyethylene
bag inside allows you to discard the polyethylene bag
together with the refuse.
►
Fig.51
3.
After discarding refuse, mount the waste container
or dust bag to the appliance. Make sure that the hook is
properly locked.
MAINTENANCE
CAUTION:
Always be sure that the appli-
ance is switched off and the battery cartridge is
removed before attempting to perform inspection
or maintenance.
NOTICE:
Never use gasoline, benzine, thinner,
alcohol or the like. Discoloration, deformation or
cracks may result.
Maintenance
Cleaning the appliance body
CAUTION:
Do not wash the appliance body
with water.
Doing so may cause a breakdown.
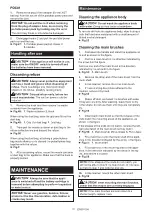
To remove dirt from the appliance body, wipe it using a
cloth that has been moistened with a small amount of
diluted neutral detergent.
►
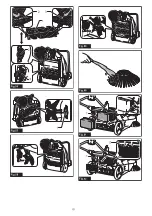
Fig.52
Cleaning the main brushes
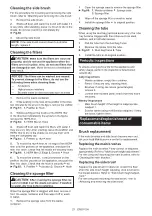
1.
Fold down the handle and stand the appliance on
its end as shown in the figure.
2.
Push in a main brush in the direction indicated by
the arrow A in the figure.
Remove one end of the main brush in the direction
indicated by the arrow B in the figure.
►
Fig.53:
1.
Main brush
3.
Remove the other end of the main brush from the
brush shaft.
4.
In like manner, remove the other main brush.
5.
If there is string-like refuse adhered to the
brushes, remove it by hand.
►
Fig.54
6.
Shake off dust, and wash the brushes with water
if they are very dirty. After washing, leave them to dry
in the shade; do not use them until they are completely
dry.
►
Fig.55
7.
Orient each main brush so that the shapes of the
ends match the mounting areas of the appliance, as
shown in the figure.
If the shapes of the ends do not match, reverse the left-
right orientation of the main brush so they match.
►
Fig.56:
1.
Main brush
2.
Minus shape
3.
Plus shape
8.
Fit a main brush onto the brush shaft of the appli-
ance in the direction indicated by the arrow in the figure.
►
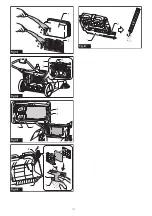
Fig.57:
1.
Brush shaft
9.
Fit a main brush into mounting area of the appli-
ance, in the direction indicated by the arrow in the fig
-
ure, and secure it in place.
►
Fig.58
NOTE:
If the shapes of the ends do not match, you
will not be able to mount the main brush. In this case,
go back to step 7 and redo the process.
10.
In like manner, mount the other main brush.
►
Fig.59
CAUTION:
After mounting the main brushes,
check that the shapes are correctly engaged.
NOTE:
If the main brushes are worn down to a
shorter length, replace them.
Summary of Contents for VS001G
Page 3: ...3 1 2 3 Fig 5 1 Fig 6 1 2 Fig 7 1 Fig 8 1 2 Fig 9 1 2 Fig 10...
Page 4: ...4 1 Fig 11 1 Fig 12 2 3 1 Fig 13 1 Fig 14 1 2 Fig 15 1 2 Fig 16...
Page 5: ...5 1 3 2 Fig 17 1 2 3 Fig 18 2 1 Fig 19 1 Fig 20 1 Fig 21 1 2 3 Fig 22 Fig 23...
Page 6: ...6 1 2 Fig 24 1 1 Fig 25 1 Fig 26 1 Fig 27 1 2 Fig 28 1 2 Fig 29 1 2 Fig 30 1 2 Fig 31...
Page 9: ...9 1 2 Fig 48 1 2 Fig 49 Fig 50 Fig 51 Fig 52 1 1 A B Fig 53 Fig 54 Fig 55...
Page 10: ...10 1 2 3 2 3 Fig 56 1 Fig 57 Fig 58 Fig 59 Fig 60 1 2 Fig 61 1 2 Fig 62...
Page 11: ...11 1 2 Fig 63 1 2 3 4 Fig 64 1 2 3 4 Fig 65 1 2 3 Fig 66 1 2 Fig 67...
Page 112: ...112 7 8 9 10 11 12 13 14 15 16 17 18 19 20 21 22 23 24 25 26 1 2 3 4 5 6 130 C 7...
Page 115: ...115 Makita Makita 1 2 2 1 2 3 3 1 4 5 1 2 3 1 6 1 2 2 2 6 7 1 2 2 6 8 1...
Page 116: ...116 9 1 2 75 100 50 75 25 50 0 25 3 50 100 20 50 0 20 10 1 2 11 1...
Page 117: ...117 1 2 3 Makita 12 1 13 1 2 1 3 2 1 1 2 1 2 1 2...
Page 118: ...118 14 1 15 1 2 16 1 2 1 2 15 30 3 25 40 1 1 9 16 17 1 2 3 18 1 2 3 19 1 2 20 1 21 1...
Page 119: ...119 1 I 22 1 2 3 2 3 23 4 O 24 1 2...
Page 120: ...120 15 25 1 30 26 1 1 2 27 1 3 28 1 2 1 29 1 2 2 30 1 2 1 31 1 2 2 32 1 2 3 3 33 4 34 1 2...
Page 123: ...123 52 1 2 53 1 3 4 5 54 6 55 7 56 1 2 3 8 57 1 9 58 7 10 59 1 2 60 3 1 2 61 1 2...
Page 125: ...125...
Page 126: ...126...
Page 127: ...127...

