background image

7

ENGLISH

NOTE:

 When the tool is overheated, the tool stops 

automatically and the lamp starts flashing. In this 

case, release the switch trigger. The lamp turns off in 

1 minute(s).

NOTE:

 Use a dry cloth to wipe the dirt off the lens of 

the lamp. Be careful not to scratch the lens of lamp, or 
it may lower the illumination.

Reversing switch action

CAUTION:


Always check the direction of 

rotation before operation.

CAUTION:


Use the reversing switch only after 

the tool comes to a complete stop.

 Changing the 

direction of rotation before the tool stops may dam-
age the tool.

CAUTION:


When not operating the tool, 

always set the reversing switch lever to the neu-
tral position.

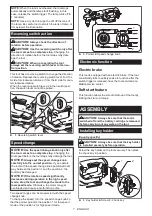
This tool has a reversing switch to change the direction 
of rotation. Depress the reversing switch lever from the 
A side for clockwise rotation or from the B side for coun-
terclockwise rotation.
When the reversing switch lever is in the neutral posi-
tion, the switch lever cannot be pulled.

1

A

B

►    

1.

 Reversing switch lever

Speed change

NOTICE:


Use the speed change knob only after 

the tool comes to a complete stop.

 Changing the 

tool speed before the tool stops may damage the tool.

NOTICE:


Always set the speed change knob 

carefully into the correct position.

 If you operate 

the tool with the speed change knob positioned half-
way between the position 1 and the position 2, the 
tool may be damaged.

NOTICE:


If the rotation speed significantly 

decreases during operation in the high speed 
mode, stop the tool and change the mode to the 
low speed mode.

 Otherwise, the motor may get 

overloaded and cause a malfunction or fire.

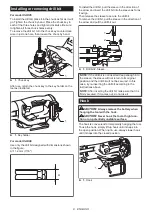
Two speed ranges can be preselected with the speed 
change knob.
To change the speed, turn the speed change knob so 
that the pointer points to the position 1 for low speed 
mode or the position 2 for high speed mode.

1

2

►    

1.

 Pointer 

2.

 Speed change knob

Electronic function

Electric brake

This tool is equipped with an electric brake. If the tool 
consistently fails to quickly cease to function after the 
switch trigger is released, have the tool serviced at a 
Makita service center.

Soft start feature

This function allows the smooth start-up of the tool by 
limiting the start-up torque.

ASSEMBLY

CAUTION:


Always be sure that the tool is 

switched off and the battery cartridge is removed 

before carrying out any work on the tool.

Installing key holder

(Country specific)

CAUTION:


Always be sure that the key holder 

is installed securely before operation.

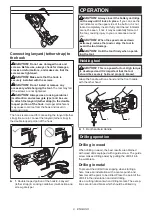
Screw the key holder on the tool securely. Then place 
the chuck key in position.

1

2

3

►    

1.

 Key holder 

2.

 Screw 

3.

 Chuck key

Summary of Contents for XAD05

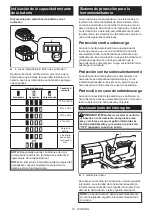
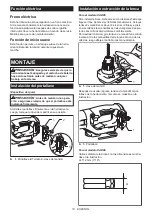
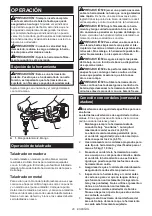
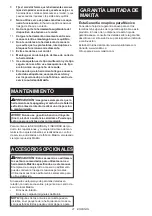
Page 1: ...INSTRUCTION MANUAL MANUAL DE INSTRUCCIONES Cordless Angle Drill Taladro Angular Inalámbrico XAD05 XAD06 IMPORTANT Read Before Using IMPORTANTE Lea antes de usar ...

Page 2: ...Failure to follow all instructions listed below may result in electric shock fire and or serious injury Save all warnings and instruc tions for future reference The term power tool in the warnings refers to your mains operated corded power tool or battery operated cordless power tool Work area safety 1 Keep work area clean and well lit Cluttered or dark areas invite accidents 2 Do not operate powe...

Page 3: ...m the power tool before making any adjust ments changing accessories or storing power tools Such preventive safety measures reduce the risk of starting the power tool accidentally 4 Store idle power tools out of the reach of chil dren and do not allow persons unfamiliar with the power tool or these instructions to operate the power tool Power tools are dangerous in the hands of untrained users 5 M...

Page 4: ...eeds the bit is likely to bend if allowed to rotate freely without contacting the workpiece resulting in personal injury 2 Always start drilling at low speed and with the bit tip in contact with the workpiece At higher speeds the bit is likely to bend if allowed to rotate freely without contacting the workpiece resulting in personal injury 3 Apply pressure only in direct line with the bit and do n...

Page 5: ...n the battery bursting causing fires personal injury and damage It will also void the Makita warranty for the Makita tool and charger Tips for maintaining maximum battery life 1 Charge the battery cartridge before completely discharged Always stop tool operation and charge the battery cartridge when you notice less tool power 2 Never recharge a fully charged battery cartridge Overcharging shortens...

Page 6: ...ent the tool stops automatically In this situation turn the tool off and stop the application that caused the tool to become overloaded Then turn the tool on to restart Overheat protection When the tool battery is overheated the tool stops automatically and the lamp will blink In this situation let the tool cool down before turning the tool on again Overdischarge protection When the battery capaci...

Page 7: ...change knob carefully into the correct position If you operate the tool with the speed change knob positioned half way between the position 1 and the position 2 the tool may be damaged NOTICE If the rotation speed significantly decreases during operation in the high speed mode stop the tool and change the mode to the low speed mode Otherwise the motor may get overloaded and cause a malfunction or ...

Page 8: ... as far as it will go Then release the sleeve to secure the drill bit To remove the drill bit pull the sleeve in the direction of the arrow and pull the drill bit out 1 2 1 Drill bit 2 Sleeve NOTE If the drill bit is not inserted deep enough into the sleeve the sleeve will not return to its original position and the drill bit will not be secured In this case try re inserting the drill bit accordin...

Page 9: ...f you can see the red indicator on the upper side of the button it is not locked completely Insert it fully until the red indicator cannot be seen If not it may accidentally fall out of the tool causing injury to you or someone around you CAUTION When the speed comes down extremely reduce the load or stop the tool to avoid the tool damage CAUTION Hold the tool firmly when operat ing the tool Holdi...

Page 10: ...8 Attach the lanyard so that the tool will move away from the operator if it falls Dropped tools will swing on the lanyard which could cause injury or loss of balance 9 Do not use near moving parts or running machinery Failure to do so may result in a crush or entanglement hazard 10 Do not carry the tool by the attachment device or the lanyard 11 Only transfer the tool between your hands while you...

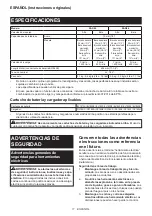
Page 11: ...DC18RE DC18SD DC18SE DC18SF DC18SH Algunos de los cartuchos de batería y cargadores enumerados arriba podrían no estar disponibles depen diendo de su área de residencia ADVERTENCIA Use únicamente los cartuchos de batería y los cargadores indicados arriba El uso de cualquier otro cartucho de batería y cargador podría ocasionar una lesión y o un incendio ADVERTENCIAS DE SEGURIDAD Advertencias genera...

Page 12: ...posición de apagado antes de conectar a la alimentación eléctrica y o de colocar el cartucho de batería así como al levantar o cargar la herramienta Cargar las herramientas eléctricas con su dedo en el interruptor o enchufarlas con el interrup tor encendido hace que los accidentes sean comunes 4 Retire cualquier llave de ajuste o llave de apriete antes de encender la herramienta Una llave de ajust...

Page 13: ...a sionar una situación inesperada provocando un incendio explosión o riesgo de lesiones 6 No exponga la herramienta ni la batería al fuego ni a una temperatura excesiva La expo sición al fuego o a una temperatura superior a los 130 C podría causar una explosión 7 Siga todas las instrucciones para la carga y evite cargar la herramienta o la batería fuera del rango de temperatura especificado en las...

Page 14: ... bate ría Podría ocurrir un incendio calor excesivo o una explosión 3 Si el tiempo de operación se ha acortado en exceso deje de operar de inmediato Podría correrse el riesgo de sobrecalentamiento posibles quemaduras e incluso explosión 4 En caso de que ingresen electrolitos en sus ojos enjuáguelos bien con agua limpia y con sulte de inmediato a un médico Esto podría ocasionar pérdida de visión 5 ...

Page 15: ...cia en la herramienta 2 No cargue nunca un cartucho de batería que esté completamente cargado La sobrecarga acortará la vida de servicio de la batería 3 Cargue el cartucho de batería a una tempera tura ambiente de 10 C 40 C 50 F 104 F Si un cartucho de batería está caliente déjelo enfriar antes de cargarlo 4 Cuando no utilice el cartucho de batería sáquelo de la herramienta o del cargador 5 Cargue...

Page 16: ...ón contra sobrecarga Cuando la herramienta batería sea operada de tal forma que cause que use una cantidad de corriente anormalmente alta la herramienta se detendrá auto máticamente En esta situación apague la herramienta y detenga la aplicación que haya causado que la herramienta se sobrecargara Luego encienda la herra mienta para reiniciarla Protección contra sobrecalentamiento Cuando la herrami...

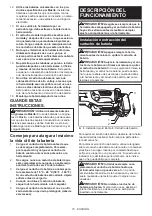
Page 17: ...ione la palanca del conmutador de inversión desde el lado A para una rotación en sentido de las manecillas del reloj o desde el lado B para una rotación en sentido inverso al de las manecillas del reloj Cuando la palanca del interruptor de inversión esté en la posición neutral la palanca interruptora no podrá ser jalada 1 A B 1 Palanca del interruptor de inversión Cambio de velocidad AVISO Utilice...

Page 18: ...ente Atornille el portallave firmemente en la herramienta Luego coloque la llave de mandril en su posición 1 2 3 1 Portallave 2 Tornillo 3 Llave de mandril Instalación o extracción de la broca Para el modelo XAD05 Para instalar la broca colóquela en el portabrocas hasta que llegue al tope Apriete el portabrocas manualmente Coloque la llave de mandril en cada uno de los tres orificios y apriete en ...

Page 19: ...do no lo vaya a utilizar siempre bájelo hasta que quede trabado en la posición cerrada 1 1 Gancho Conexión del cordel de seguridad correa de amarre al gancho PRECAUCIÓN No utilice un gancho y tor nillos que ya estén dañados Antes de usarlos verifique la existencia de daños roturas o defor maciones y asegúrese de que los tornillos estén apretados PRECAUCIÓN Asegúrese de que el gancho esté instalado...

Page 20: ...a pieza de trabajo La fuerza ejercida en la herramienta broca de taladro al momento de la penetración es enorme PRECAUCIÓN Para extraer una broca de tala dro atorada basta simplemente con ajustar el inte rruptor de inversión en rotación inversa para hacerla retroceder Sin embargo la herramienta puede retro ceder bruscamente si no la sujeta con firmeza PRECAUCIÓN Asegure siempre las piezas de traba...

Page 21: ...ina diluyente tíner alcohol o sustancias similares Puede que esto ocasione grietas o descoloramiento Para mantener la SEGURIDAD y FIABILIDAD del pro ducto las reparaciones y cualquier otra tarea de man tenimiento o ajuste deberán ser realizadas en centros de servicio autorizados o de fábrica Makita empleando siempre repuestos Makita ACCESORIOS OPCIONALES PRECAUCIÓN Estos accesorios o aditamen tos ...

Page 22: ...22 ...

Page 23: ...23 ...

Page 24: ...ados por el lijado aserrado esmerilado taladrado y otras actividades de la construcción contienen sustancias químicas reconocidas por el Estado de California como causantes de cáncer defectos de nacimiento y otros peligros de reproducción Algunos ejemplos de estos productos químicos son plomo de pinturas a base de plomo sílice cristalino de ladrillos y cemento y otros productos de albañilería y ar...

Reviews: