


16 ENGLISH
The overview of the wireless activation function
setting is as follows. Refer to each section for detail
procedures.
1.
Installing the wireless unit
2.
Tool registration for the vacuum cleaner
3.
Starting the wireless activation function
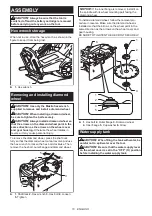
Installing the wireless unit
Optional accessory
CAUTION:
Place the tool on a flat and stable
surface when installing the wireless unit.
NOTICE:
Clean the dust and dirt on the tool
before installing the wireless unit.
Dust or dirt
may cause malfunction if it comes into the slot of the
wireless unit.
NOTICE:
To prevent the malfunction caused by
static, touch a static discharging material, such
as a metal part of the tool, before picking up the
wireless unit.
NOTICE:
When installing the wireless unit,
always be sure that the wireless unit is inserted
in the correct direction and the lid is completely
closed.
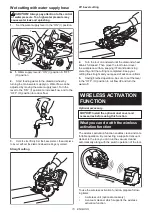
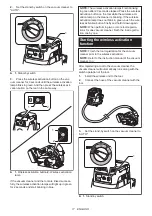
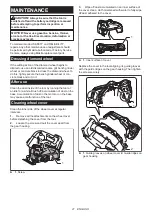
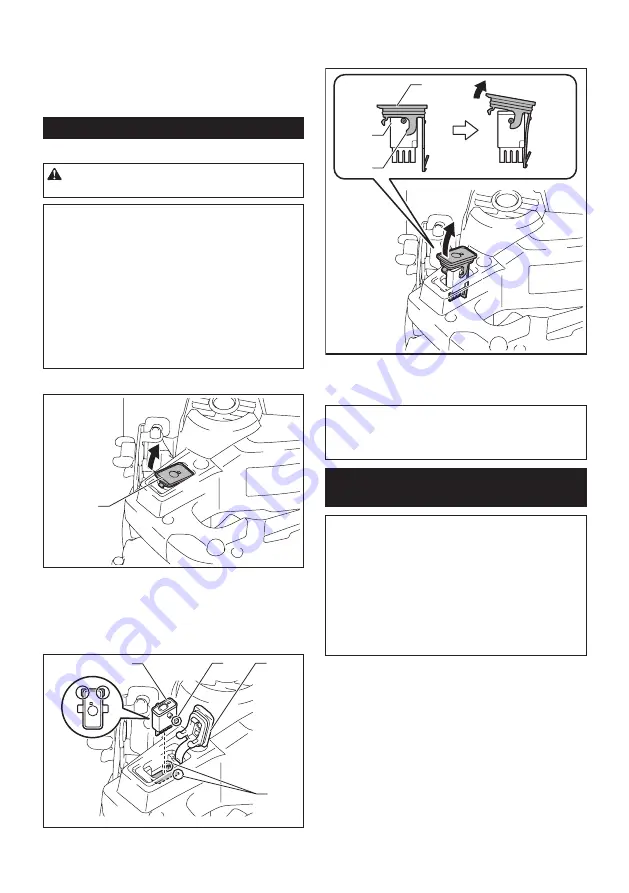
1.
Open the lid on the tool as shown in the figure.
1
►
1.
Lid
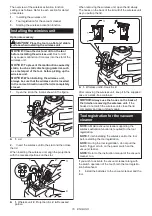
2.
Insert the wireless unit to the slot and then close
the lid.
When inserting the wireless unit, align the projections
with the recessed portions on the slot.
1
2
3
4
►
1.
Wireless unit
2.
Projection
3.
Lid
4.
Recessed
portion
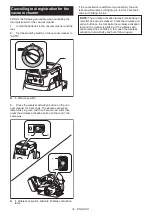
When removing the wireless unit, open the lid slowly.
The hooks on the back of the lid will lift the wireless unit
as you pull up the lid.
1
2
3
►
1.
Wireless unit
2.
Hook
3.
Lid
After removing the wireless unit, keep it in the supplied
case or a static-free container.
NOTICE:
Always use the hooks on the back of
the lid when removing the wireless unit.
If the
hooks do not catch the wireless unit, close the lid
completely and open it slowly again.
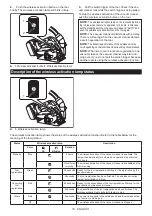
Tool registration for the vacuum
cleaner
NOTE:
A Makita vacuum cleaner supporting the
wireless activation function is required for the tool
registration.
NOTE:
Finish installing the wireless unit to the tool
before starting the tool registration.
NOTE:
During the tool registration, do not pull the
switch trigger or turn on the power switch on the
vacuum cleaner.
NOTE:
Refer to the instruction manual of the vacuum
cleaner, too.
If you wish to activate the vacuum cleaner along with
the switch operation of the tool, finish the tool registra
-
tion beforehand.
1.
Install the batteries to the vacuum cleaner and the
tool.
Summary of Contents for XCC01
Page 47: ...47 ...


