background image

11 ENGLISH

2

1

►    

1.

 Lever 

2.

 Sprocket cover

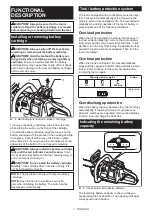
Adjusting saw chain tension

CAUTION:


Carry out the procedure of install-

ing or removing saw chain in a clean place free 

from sawdust and the like.

CAUTION:


Do not tighten the saw chain too 

much.

 Excessively high tension of saw chain may 

cause breakage of saw chain, wear of the guide bar 

and breakage of the adjusting dial.

CAUTION:


A chain which is too loose can 

jump off the bar and it may cause an injury 

accident.

The saw chain may become loose after many hours 

of use. From time to time check the saw chain tension 

before use.

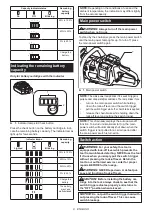
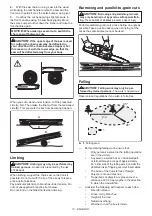
1.


Press and fully open the lever until it clicks. Turn it 

counterclockwise a little to loosen sprocket cover lightly.

1

2

►    

1.

 Lever 

2.

 Sprocket cover

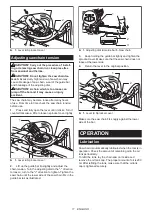
2.

  Lift up the guide bar tip slightly and adjust the 

chain tension. Turn the adjusting dial to the "-" direction 

to loosen, turn to the "+" direction to tighten. Tighten the 

saw chain until the lower side of the saw chain fits in the 

guide bar rail as illustrated.

2

3

1

►    

1.

 Adjusting dial 

2.

 Guide bar 

3.

 Saw chain

3.


Keep holding the guide bar lightly and tighten the 

sprocket cover. Make sure that the saw chain does not 

loose at the lower side.

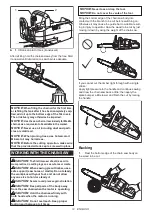
4.


Return the lever to the original position.

2

1

►    

1.

 Lever 

2.

 Sprocket cover

Make sure the saw chain fits snugly against the lower 

side of the bar.

OPERATION

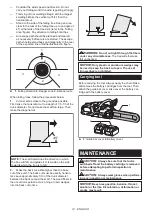
Lubrication

Saw chain is automatically lubricated when the tool is in 

operation. Check the amount of remaining oil in the oil 

tank periodically.

To refill the tank, lay the chain saw on its side and 

remove the oil tank cap. The proper amount of oil is 200 

ml. After refilling the tank, make sure that the oil tank 

cap is tightened securely.

Summary of Contents for XCU04

Page 1: ...INSTRUCTION MANUAL MANUAL DE INSTRUCCIONES Cordless Chain Saw Electrosierra Inalámbrica XCU03 XCU04 IMPORTANT Read Before Using IMPORTANTE Lea antes de usar ...

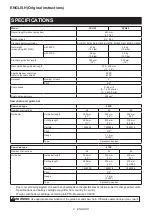
Page 2: ...n type 90PX Number of drive links 46 52 56 Guide bar Guide bar length 300 mm 12 350 mm 14 400 mm 16 Cutting length 280 mm 11 330 mm 13 375 mm 14 3 4 Part No 165245 8 165246 6 165247 4 Pitch 3 8 Gauge 1 1 mm 0 043 Type Sprocket nose bar Saw chain type 91PX Number of drive links 46 52 56 Guide bar Guide bar length 300 mm 12 350 mm 14 400 mm 16 Cutting length 280 mm 11 330 mm 13 375 mm 14 3 4 Part No...

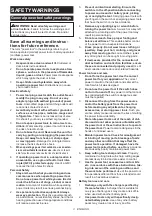
Page 3: ... battery pack picking up or carrying the tool Carrying power tools with your finger on the switch or energising power tools that have the switch on invites accidents 4 Remove any adjusting key or wrench before turning the power tool on A wrench or a key left attached to a rotating part of the power tool may result in personal injury 5 Do not overreach Keep proper footing and balance at all times T...

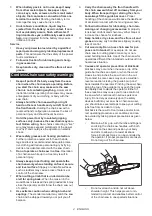
Page 4: ...back When the tension in the wood fibres is released the spring loaded limb may strike the operator and or throw the chain saw out of control 8 Use extreme caution when cutting brush and saplings The slender material may catch the saw chain and be whipped toward you or pull you off balance 9 Carry the chain saw by the front handle with the chain saw switched off and away from your body When transp...

Page 5: ...oss of your eyesight 5 Do not short the battery cartridge 1 Do not touch the terminals with any con ductive material 2 Avoid storing battery cartridge in a con tainer with other metal objects such as nails coins etc 3 Do not expose battery cartridge to water or rain A battery short can cause a large current flow overheating possible burns and even a breakdown 6 Do not store the tool and battery ca...

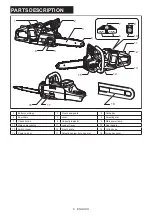
Page 6: ... 2 Front hand guard 3 Guide bar 4 Saw chain 5 Lever 6 Adjusting dial 7 Check button 8 Capacity indicator 9 Main power lamp 10 Main power switch 11 Lock off lever 12 Rear handle 13 Switch trigger 14 Front handle 15 Oil tank cap 16 Chain catcher 17 Adjusting screw for oil pump 18 Guide bar cover ...

Page 7: ...eing inserted correctly NOTE The tool does not work with only one battery cartridge NOTE Pay attention to the position of your fin gers when installing the battery The button will be depressed unintentionally Tool battery protection system The tool is equipped with a tool battery protection sys tem This system automatically cuts off power to the motor to extend tool and battery life The tool will ...

Page 8: ...itions The lamp blinks if you turn on the main power switch while holding down the lock off lever and the switch trigger pull the switch trigger while the chain brake is applied release the chain brake while holding down the lock off lever and pulling the switch trigger NOTE This chain saw employs the auto power off function To avoid unintentional start up the main power switch will automatically ...

Page 9: ...till 2 3 1 2 3 1 1 Front hand guard 2 Unlocked position 3 Locked position Checking the run down brake CAUTION If the saw chain does not stop within one second in this test stop using the chain saw and consult our authorized service center Run the chain saw then release the switch trigger com pletely The saw chain must come to a standstill within one second Adjusting the chain lubrication You can a...

Page 10: ...f the saw chain on the top of the guide bar and the other end around the sprocket 1 1 Sprocket 3 Rest the guide bar in place on the chain saw 4 Turn the adjusting dial to direction to slide the adjusting pin in the direction of arrow 1 1 Adjusting pin 5 Place the sprocket cover on the chain saw so that the adjusting pin is positioned in a small hole on the guide bar 2 1 3 1 Sprocket cover 2 Guide ...

Page 11: ...ift up the guide bar tip slightly and adjust the chain tension Turn the adjusting dial to the direction to loosen turn to the direction to tighten Tighten the saw chain until the lower side of the saw chain fits in the guide bar rail as illustrated 2 3 1 1 Adjusting dial 2 Guide bar 3 Saw chain 3 Keep holding the guide bar lightly and tighten the sprocket cover Make sure that the saw chain does no...

Page 12: ...ber use a safe support saw horse or cradle Do not steady the workpiece with your foot and do not allow anyone else to hold or steady it CAUTION Secure round pieces against rotation CAUTION Keep all parts of the body away from the saw chain when the motor is operating CAUTION Hold the chain saw firmly with both hands when the motor is running CAUTION Do not overreach Keep proper footing and balance...

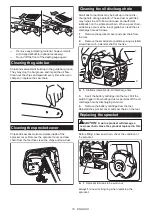
Page 13: ...n to branches under tension Do not cut unsupported branches from below Do not stand on the felled trunk when limbing Burrowing and parallel to grain cuts CAUTION Burrowing and parallel to grain cuts may only be carried out by persons with special train ing The possibility of kickback presents a risk of injury Perform parallel to grain cuts at as shallow an angle as possible Take an extra caution w...

Page 14: ... will fall and guides it It is made on the side towards which the tree is to fall 2 Make the back cut a little higher than the base cut of the scarf The back cut must be exactly horizon tal Leave approximately 1 10 of the trunk diameter between the back cut and the scarf The wood fibers in the uncut trunk portion act as a hinge Insert wedges into the back cut in time WARNING Do not cut right throu...

Page 15: ...ts are obtained with following distance between cutting edge and depth gauge Chain blade 90PX 0 65 mm 0 025 Chain blade 91PX 0 65 mm 0 025 30 30 55 55 The sharpening angle of 30 must be the same on all cut ters Different cutter angles cause the chain to run roughly and unevenly accelerate wear and lead to chain breaks Use a suitable round file so that the proper sharp ening angle is kept against t...

Page 16: ...o flow and cause an insufficient lubrication on the whole saw chain When a poor chain oil delivery occurs at the top of guide bar clean the oil discharge hole as follows 1 Remove the sprocket cover and saw chain from the tool 2 Remove the small dust or particles using a slotted screwdriver with a slender shaft or the like 2 1 1 Slotted screwdriver 2 Oil discharge hole 3 Insert the battery cartridg...

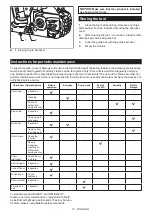
Page 17: ...ork can lead to accidents The user of the chain saw must not perform maintenance work which is not described in the instruction manual All such work must be carried out by our authorized service center Check item Operating time Before operation Everyday Every week Every 3 month Annually Before storage Chain saw Inspection Cleaning Check at authorized service center Saw chain Inspection Sharpening ...

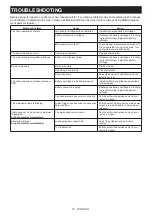
Page 18: ...ttery cartridge No oil on the chain Oil tank is empty Fill the oil tank Oil guide groove is dirty Clean the groove Poor oil delivery Adjust the amount of oil delivery with the adjusting screw The chain saw does not reach maximum RPM Battery cartridge is installed improperly Install the battery cartridges as described in this manual Battery power is dropping Recharge the battery cartridges If recha...

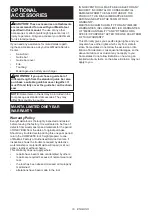
Page 19: ...d any trouble develop during this one year period return the COMPLETE tool freight prepaid to one of Makita s Factory or Authorized Service Centers If inspection shows the trouble is caused by defective workmanship or material Makita will repair or at our option replace without charge This Warranty does not apply where repairs have been made or attempted by others repairs are required because of n...

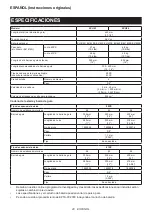
Page 20: ...200 cm3 Cadena de la sierra y barra de guía Tipo de cadena de la sierra 90PX Número de eslabones motorices 46 52 56 Barra de guía Longitud de la barra de guía 300 mm 12 350 mm 14 400 mm 16 Longitud de corte 280 mm 11 330 mm 13 375 mm 14 3 4 No de pieza 165245 8 165246 6 165247 4 Paso 3 8 Calibre 1 1 mm 0 043 Tipo Barra dentada Tipo de cadena de la sierra 91PX Número de eslabones motorices 46 52 56...

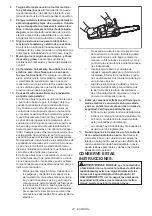
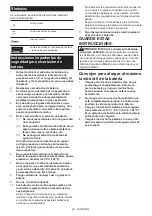
Page 21: ...ite objetos cortantes o piezas móvi les Los cables dañados o enredados aumentan el riesgo de sufrir una descarga eléctrica 5 Cuando utilice una herramienta eléctrica en exteriores utilice un cable de extensión apro piado para uso en exteriores La utilización de un cable apropiado para uso en exteriores reducirá el riesgo de que se produzca una descarga eléctrica 6 Si no es posible evitar usar una ...

Page 22: ...ales de la batería Originar un cortocircuito en las terminales puede causar quemaduras o incendios 4 En condiciones abusivas podrá escapar líquido de la batería evite tocarlo Si lo toca accidentalmente enjuague con agua Si hay contacto del líquido con los ojos busque asis tencia médica Puede que el líquido expulsado de la batería cause irritación o quemaduras Servicio 1 Haga que una persona califi...

Page 23: ...medidas para mantener sus trabajos de corte libres de accidentes o lesiones El retroceso brusco es el resultado de un mal uso de la herramienta y o de procedimientos o condi ciones de operación incorrectos y puede evitarse tomando las precauciones adecuadas tal como se indica a continuación Mantenga una sujeción firme rodeando con los pulgares y los dedos los mangos de la sierra eléctrica con amba...

Page 24: ...r si se tira al fuego 8 Tenga cuidado de no dejar caer ni golpear la batería 9 No use una batería dañada 10 Las baterías de ión de litio están sujetas a los requisitos reglamentarios en materia de bie nes peligrosos Para el trasporte comercial por ej mediante terceros o agentes de transporte se deben tomar en cuenta los requisitos especiales relativos al empaque y el etiquetado Para efectuar los p...

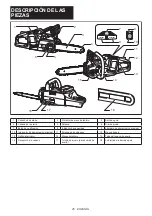
Page 25: ...rra 5 Palanca 6 Dial de ajuste 7 Botón de verificación 8 Indicador de capacidad 9 Lámpara de alimentación principal 10 Interruptor de alimentación principal 11 Palanca de desbloqueo 12 Mango trasero 13 Gatillo interruptor 14 Mango delantero 15 Tapa del tanque de aceite 16 Receptor de la cadena 17 Tornillo de ajuste para bomba de aceite 18 Cubierta de la barra de guía ...

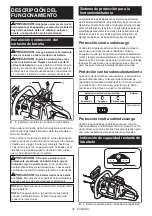
Page 26: ... herramienta no funciona con un solo cartu cho de batería NOTA Ponga atención a la posición de sus dedos cuando instale la batería El botón se oprimirá de manera no intencional Sistema de protección para la herramienta batería La herramienta está equipada con un sistema de protección para la herramienta batería Este sistema corta en forma auto mática el suministro de energía al motor para prolonga...

Page 27: ...erruptor de alimentación principal ADVERTENCIA Siempre apague el interrup tor de alimentación principal cuando no lo vaya a utilizar Para poner en espera la sierra eléctrica oprima el inte rruptor de alimentación principal hasta que la lámpara de alimentación principal se encienda Para apagarla oprima nuevamente el interruptor de alimentación principal 1 1 Interruptor de alimentación principal NOT...

Page 28: ...ación del freno de la cadena PRECAUCIÓN Sujete la sierra eléctrica con ambas manos cuando vaya a encenderla Sujete el mango trasero con su mano derecha y el mango delantero con su mano izquierda La barra y la cadena no deberán estar haciendo contacto con ningún objeto PRECAUCIÓN En caso de que la cadena de la sierra no se detenga de inmediato al realizar esta prueba la sierra no deberá usarse bajo...

Page 29: ...e hacia la dirección para liberar la tensión de la cadena de la sierra 1 1 Dial de ajuste 3 Gire la palanca en sentido inverso al de las mane cillas del reloj hasta que la cubierta de la pieza dentada se desprenda 1 2 1 Palanca 2 Cubierta de la pieza dentada 4 Retire la cubierta de la pieza dentada y luego extraiga la cadena de la sierra y la barra de guía del cuerpo de la sierra eléctrica Para in...

Page 30: ...aste y que el dial de ajuste se dañe PRECAUCIÓN Una cadena demasiado suelta puede salirse de la barra y ocasionar lesio nes por accidentes La cadena de la sierra puede aflojarse tras varias horas de uso De vez en cuando revise la tensión de la cadena de la sierra antes de usarla 1 Presione y abra completamente la palanca hasta que se escuche un clic Gírela ligeramente en sentido inverso al de las ...

Page 31: ...rese de que la tapa del tanque de aceite provista se encuentre atornillada en su lugar OPERACIÓN DE LA SIERRA ELÉCTRICA PRECAUCIÓN El usuario sin experiencia deberá como práctica mínima cortar leña sobre un caballete o base PRECAUCIÓN Al aserrar madera precor tada utilice un apoyo seguro como un caballete o base No utilice su pie para mantener la pieza de trabajo fija ni permita que alguien más la...

Page 32: ...ra que esté bajo tensión corte primero el lado presionado A Luego realice el corte final desde el lado tensionado B Esto evitará que la barra quede atascada A B A B Desmembrado PRECAUCIÓN El desmembrado solo deberá ser realizado por personas capacitadas Puede presentarse algún peligro debido al riesgo de un retroceso brusco Al desmembrar apoye la sierra eléctrica sobre el tronco de ser posible No ...

Page 33: ...ntal Ubíquese a un costado del árbol que está por caer Mantenga el área despejada por detrás del árbol que está por caer hasta un ángulo de 45 en cada lado del eje del árbol consulte la ilustración de Área de talado Ponga atención a las ramas que estén cayendo Se debe planificar una ruta de escape que esté despejada según se requiera antes de iniciar los cortes La ruta de escape deberá extenderse ...

Page 34: ...nte dañado La sierra se desvíe hacia la izquierda o la derecha en la madera a causa de un afilado no uniforme de la cadena de la sierra o daño en sólo uno de los lados Afile la cadena de la sierra con frecuencia pero sólo un poco cada vez Por lo general sólo dos o tres pasadas con una lima son suficientes para un reafilado de rutina Cuando la cadena de la sierra haya sido reafilada varias veces ll...

Page 35: ...pués la longitud de esta parte más pequeña se volverá el estándar para todas las demás partes cortadoras en la cadena de la sierra Guíe la lima tal como se muestra en la ilustración 1 2 1 Lima 2 Cadena de la sierra La lima puede guiarse más fácilmente si se emplea un sujetador de limas accesorio opcio nal El sujetador de limas cuenta con marcas para el ángulo de afilado correcto de 30 alinee las m...

Page 36: ...en la herramienta Jale el gatillo interruptor para eliminar la acumulación de polvo o partículas del orificio de descarga de aceite descargando el aceite de la cadena 4 Retire el cartucho de batería de la herramienta Reinstale la cubierta de la pieza dentada y la cadena de la sierra en la herramienta Reemplazo de la pieza dentada PRECAUCIÓN Una pieza dentada desgas tada dañará una cadena nueva de ...

Page 37: ... de operación Antes de la operación Diariamente Semanalmente Cada 3 meses Anualmente Antes del almacena miento Sierra eléctrica Inspección Limpieza Inspección en el centro de servicio autorizado Cadena de la sierra Inspección Afilamiento en caso necesario Barra de guía Inspección Retirar de la sierra eléctrica Freno de la cadena Revisar el fun cionamiento Hacer que lo inspeccionen regularmente en ...

Page 38: ...ite está vacío Llene el tanque de aceite La ranura de la guía de aceite está sucia Limpie la ranura Suministro de aceite deficiente Ajuste la cantidad de suministro de aceite con el tornillo de ajuste La sierra eléctrica no alcanza el nivel máximo de RPM El cartucho de batería está instalado incorrectamente Instale los cartuchos de batería tal como se describe en este manual La potencia de la bate...

Page 39: ...i ginal de compra Si durante este período de un año se desarrollara algún problema devuelva la herramienta COMPLETA con el envío prepagado a un centro de servicio autorizado o de fábrica Makita Si la inspección muestra que el problema ha sido a causa de un defecto de mano de obra o material Makita hará la reparación o a su discreción el reemplazo sin ningún cargo Esta garantía no aplica cuando las...

Page 40: ...s creados por el lijado aserrado esmerilado taladrado y otras actividades de la construcción contienen sustancias químicas reconocidas por el Estado de California como causantes de cáncer defectos de nacimiento y otros peligros de reproducción Algunos ejemplos de estos productos químicos son plomo de pinturas a base de plomo sílice cristalino de ladrillos y cemento y otros productos de albañilería...

Reviews: