background image

INSTRUCTION MANUAL

MANUAL DE INSTRUCCIONES

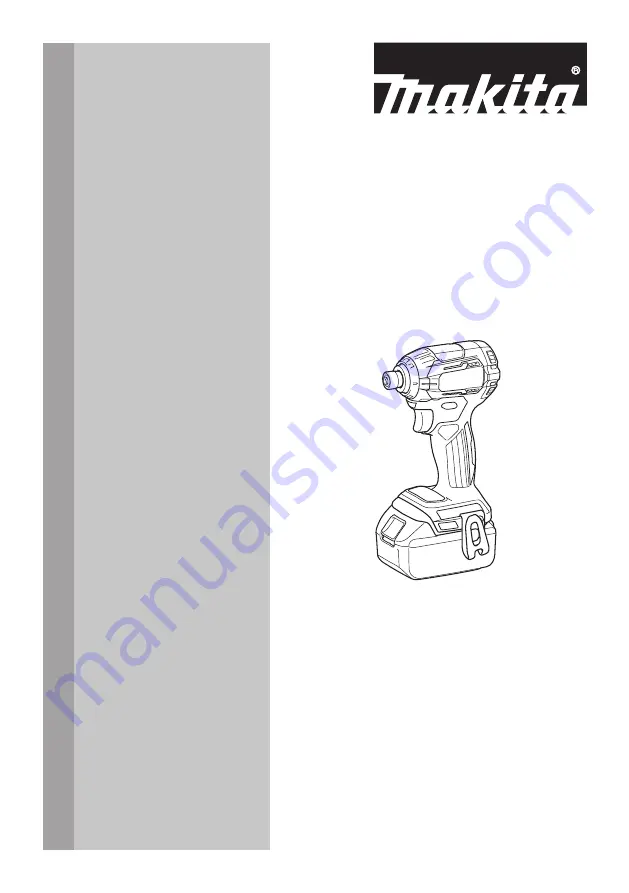
Cordless Impact Driver

Atornillador de Impacto 

Inalámbrico

XDT12

IMPORTANT:

 Read Before Using.

IMPORTANTE:

 Lea antes de usar.

Summary of Contents for XDT12Z

Page 1: ...INSTRUCTION MANUAL MANUAL DE INSTRUCCIONES Cordless Impact Driver Atornillador de Impacto Inalámbrico XDT12 IMPORTANT Read Before Using IMPORTANTE Lea antes de usar ...

Page 2: ...tery operated cordless power tool Work area safety 1 Keep work area clean and well lit Cluttered or dark areas invite accidents 2 Do not operate power tools in explosive atmo spheres such as in the presence of flammable liquids gases or dust Power tools create sparks which may ignite the dust or fumes 3 Keep children and bystanders away while operating a power tool Distractions can cause you to lo...

Page 3: ...her condition that may affect the power tool s operation If damaged have the power tool repaired before use Many accidents are caused by poorly maintained power tools 6 Keep cutting tools sharp and clean Properly maintained cutting tools with sharp cutting edges are less likely to bind and are easier to control 7 Use the power tool accessories and tool bits etc in accordance with these instruction...

Page 4: ...ing and labeling must be observed For preparation of the item being shipped consult ing an expert for hazardous material is required Please also observe possibly more detailed national regulations Tape or mask off open contacts and pack up the battery in such a manner that it cannot move around in the packaging 11 Follow your local regulations relating to dis posal of battery SAVE THESE INSTRUCTIO...

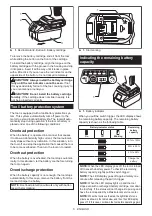
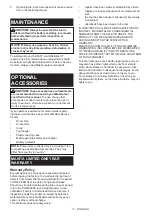
Page 5: ...top the application that caused the tool to become overloaded Then turn the tool on to restart Overheat protection When the battery is overheated the tool stops automat ically In this situation let the battery cool before turning the tool on again Overdischarge protection When the battery capacity is not enough the tool stops automatically In this case remove the battery from the tool and charge t...

Page 6: ...r slightly from the actual capacity Switch action 1 1 Switch trigger CAUTION Before installing the battery car tridge into the tool always check to see that the switch trigger actuates properly and returns to the OFF position when released To start the tool simply pull the switch trigger Tool speed is increased by increasing pressure on the switch trigger Release the switch trigger to stop NOTE Th...

Page 7: ...tion of rotation before operation CAUTION Use the reversing switch only after the tool comes to a complete stop Changing the direction of rotation before the tool stops may dam age the tool CAUTION When not operating the tool always set the reversing switch lever to the neu tral position This tool has a reversing switch to change the direction of rotation Depress the reversing switch lever from th...

Page 8: ...er releasing the switch trigger the impact force can be changed Impact force grade displayed on panel Maximum blows Purpose Example of application Max 3 800 min 1 min Tightening with the maximum force and speed Tightening underwork mate rials tightening long screws tightening bolts Hard 3 600 min 1 min Tightening with less force and speed than Max mode easier to control than Max mode Tightening un...

Page 9: ...removed before carrying out any work on the tool Installing or removing driver bit socket bit 12 mm 15 32 9 mm 3 8 Use only the driver bit socket bit shown in the figure Do not use any other driver bit socket bit 1 2 1 Driver bit 2 Sleeve To install the driver bit insert it into the sleeve as far as it will go 1 2 1 Driver bit 2 Sleeve To remove the driver bit pull the sleeve in the direction of t...

Page 10: ...ry to continue the operation rest the tool at least 15 min NOTE Use the proper bit for the head of the screw bolt that you wish to use NOTE When fastening M8 or smaller screw carefully adjust pressure on the switch trigger so that the screw is not damaged NOTE Hold the tool pointed straight at the screw NOTE If the impact force is too strong or you tighten the screw for a time longer than shown in...

Page 11: ...ughly inspected and tested before leaving the factory It is warranted to be free of defects from workmanship and materials for the period of ONE YEAR from the date of original purchase Should any trouble develop during this one year period return the COMPLETE tool freight prepaid to one of Makita s Factory or Authorized Service Centers If inspection shows the trouble is caused by defective workman...

Page 12: ...rica un incendio y o lesiones graves Conserve todas las advertencias e instrucciones como referencia en el futuro En las advertencias el término herramienta eléctrica se refiere a su herramienta eléctrica de funcionamiento con conexión a la red eléctrica con cableado eléctrico o herramienta eléctrica de funcionamiento a batería inalámbrica Seguridad en el área de trabajo 1 Mantenga el área de trab...

Page 13: ...ón de polvo puede reducir los riesgos relacionados con el polvo Mantenimiento y uso de la herramienta eléctrica 1 No fuerce la herramienta eléctrica Utilice la herramienta eléctrica correcta para su aplica ción La herramienta eléctrica adecuada hará un mejor trabajo y de forma más segura a la veloci dad para la que ha sido fabricada 2 No utilice la herramienta eléctrica si el inte rruptor no la en...

Page 14: ... de batería lea todas las instrucciones e indicaciones de precaución en el 1 el cargador de batería 2 la batería y 3 el producto con el que se utiliza la batería 2 No desarme el cartucho de batería 3 Si el tiempo de operación se ha acortado en exceso deje de operar de inmediato Podría correrse el riesgo de sobrecalentamiento posibles quemaduras e incluso explosión 4 En caso de que ingresen electro...

Page 15: ...tón 3 Cartucho de batería Para quitar el cartucho de batería deslícelo de la herra mienta mientras desliza el botón sobre la parte delan tera del cartucho Para colocar el cartucho de batería alinee la lengüeta sobre el cartucho de batería con la ranura en la carcasa y deslice en su lugar Inserte por completo hasta que se fije en su lugar con un pequeño clic Si puede ver el indicador rojo del lado ...

Page 16: ...activa aproxi madamente un minuto después de haber soltado el gatillo interruptor NOTA Si la luz LED indicadora se enciende y la herramienta se detiene incluso con un cartucho de batería recargado permita que la herramienta se enfríe por completo Si el estado no cambia deje de usar la herramienta y llévela a un centro de servicio Makita de su localidad para que la reparen NOTA Cuando la herramient...

Page 17: ...a constantemente en detenerse tras soltar el gatillo interruptor lleve la herramienta a mante nimiento a un centro de servicio Makita Iluminación de la luz delantera PRECAUCIÓN No mire a la luz ni vea a la fuente de luz directamente 1 1 Luz 1 1 Botón Jale el gatillo interruptor para encender la lámpara Para apagarla suéltelo La lámpara se apagará aproxi madamente 10 segundos después de haber solta...

Page 18: ... la palanca del conmutador de inversión desde el lado A para una rotación en sentido de las manecillas del reloj o desde el lado B para una rotación en sentido inverso al de las manecillas del reloj Cuando la palanca del conmutador de inversión esté en la posición neutral no se podrá jalar el gatillo conmutador Modo A El modo A modo de asistencia es un modo fácil de usar para insertar tornillos co...

Page 19: ...nte un minuto después de haber sol tado el gatillo interruptor la fuerza de impacto puede cambiarse Grado de la fuerza de impacto mostrado en el panel Golpes máximos Propósito Ejemplo de aplicación Máx 3 800 ipm Apriete con la máxima fuerza y velocidad Apriete en materiales de base apriete de tornillos grandes apriete de pernos Duro 3 600 ipm Apriete con menos fuerza y velocidad que el modo máx es...

Page 20: ...cho de batería haya sido extraído antes de realizar cualquier trabajo en la misma Instalación o extracción de la punta de destornillador punta de atornillar 12 mm 15 32 9 mm 3 8 Utilice únicamente la punta de destornillador punta de atornillar que se muestra en la figura No utilice ninguna otra punta de destornillador punta de atornillar 1 2 1 Punta de destornillador 2 Mandril Para instalar la pun...

Page 21: ...mm 3 8 12 mm 1 2 12 mm 1 2 140 N m 101 ft lbs 120 N m 100 N m 80 N m 60 N m 40 N m 20 N m 0 1 2 1 2 87 ft lbs 72 ft lbs 58 ft lbs 43 ft lbs 29 ft lbs 14 ft lbs 1 Tiempo de apriete segundos 2 Torsión de apriete Torsión de apriete apropiada para un perno de alta resistencia N m ft lbs 2 1 200 N m 145 ft lbs 180 N m 130 ft lbs 160 N m 116 ft lbs 140 N m 101 ft lbs 120 N m 87 ft lbs 100 N m 72 ft lbs ...

Page 22: ... man tenimiento o ajuste deberán ser realizadas en centros de servicio autorizados o de fábrica Makita empleando siempre repuestos Makita ACCESORIOS OPCIONALES PRECAUCIÓN Estos accesorios o aditamen tos están recomendados para utilizarse con su herramienta Makita especificada en este manual El empleo de cualquier otro accesorio o aditamento puede conllevar el riesgo de lesiones personales Utilice ...

Page 23: ... estados no permiten la exclusión o limitación de daños incidentales o con secuentes por lo que la limitación o exclusión arriba mencionada podría no aplicar para usted Algunos estados no permiten la limitación sobre la duración de una garantía implícita por lo que la limitación arriba mencionada podría no aplicar para usted 23 ESPAÑOL ...

Page 24: ...ados por el lijado aserrado esmerilado taladrado y otras actividades de la construcción contienen sustancias químicas reconocidas por el Estado de California como causantes de cáncer defectos de nacimiento y otros peligros de reproducción Algunos ejemplos de estos productos químicos son plomo de pinturas a base de plomo sílice cristalino de ladrillos y cemento y otros productos de albañilería y ar...

Reviews: