background image

Hi

gh


tens

il

e


bo

l

t

0

12

0

1

00

80

60

40

2

0

m

F

asten

i

ng


tor

q

ue

F

asten

i

ng


t

i

me

S

)

P

roper


fasten

i

ng


tor

q

ue

(ft

 l

bs)

(

8

7)

(72)

(

58

)

(

43

)

(29)

(1

4

)

(

M12(1

/

2

"

)

M1

0

(

3/8"

)

(M12)

M

8

(

5/

1

6"

)

(M1

0

)

(M

8

)

(1

/

2

"

)

(

3/8"

)

(

5/

1

6"

)

0

1

.0

2

.0

3.0


007319 

NOTE: 

• 

Use the proper bit for the head of the screw/bolt 
that you wish to use. 

• 

When fastening screw M8 or smaller, carefully 
adjust pressure on the switch trigger so that the 
screw is not damaged. 

• 

Hold the tool pointed straight at the screw. 

• 

If you tighten the screw for a time longer than shown 
in the figures, the screw or the point of the driver bit 
may be overstressed, stripped, damaged, etc. Before 
starting your job, always perform a test operation to 
determine the proper fastening time for your screw. 

CAUTION: 

• 

If the tool is operated continuously until the battery 
cartridge has discharged, allow the tool to rest for 
15 minutes before proceeding with a fresh battery. 

The fastening torque is affected by a wide variety of 
factors including the following. After fastening, always 
check the torque with a torque wrench. 

1. 

When the battery cartridge is discharged almost 
completely, voltage will drop and the fastening 
torque will be reduced. 

2. 

Driver bit or socket bit 
Failure to use the correct size driver bit or socket 
bit will cause a reduction in the fastening torque. 

3. Bolt 

• 

Even though the torque coefficient and the class 
of bolt are the same, the proper fastening torque 
will differ according to the diameter of bolt. 

• 

Even though the diameters of bolts are the 
same, the proper fastening torque will differ 
according to the torque coefficient, the class of 
bolt and the bolt length. 

4. 

The manner of holding the tool or the material of 
driving position to be fastened will affect the 
torque. 

5.  Operating the tool at low speed will cause a 

reduction in the fastening torque. 

Hammer drilling operation 


CAUTION: 

• 

There is a tremendous and sudden twisting force 
exerted on the tool/bit at the time of hole 
break-through, when the hole becomes clogged 
with chips and particles, or when striking reinforcing 
rods embedded in the concrete. 

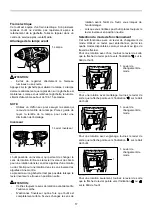
To drill in the concrete or tiles, first, turn the action mode 
changing lever so that the arrow on the lever points to the 

 mark on the tool body. The adjusting ring can be 

aligned in any torque levels for this operation. 
Be sure to use a tungsten-carbide tipped bit. 
Position the bit at the desired location for the hole, then 
pull the switch trigger. Do not force the tool. Light 
pressure gives best results. Keep the tool in position and 
prevent it from slipping away from the hole. 
Do not apply more pressure when the hole becomes 
clogged with chips or particles. Instead, run the tool at an 
idle, then remove the bit partially from the hole. By 
repeating this several times, the hole will be cleaned out 
and normal drilling may be resumed. 


CAUTION: 

• 

If the tool is operated continuously until the battery 
cartridge has discharged, allow the tool to rest for 
15 minutes before proceeding with a fresh battery. 

Screwdriving operation 


CAUTION: 

• 

Adjust the adjusting ring to the proper torque level 
for your work. 

When driving small wood screws or machine screws. 
set the action mode changing lever to the 

 mark. 

Adjust the adjusting ring to the proper torque level for 
your work. 
Place the point of the driver bit in the screw head and 
apply pressure to the tool. Start the tool slowly and then 
increase the speed gradually. Release the switch trigger 
as soon as the clutch cuts in. 


CAUTION: 

• 

Make sure that the driver bit is inserted straight in 
the screw head, or the screw and/or bit may be 
damaged. 

• 

If the tool is operated continuously until the battery 
cartridge has discharged, allow the tool to rest for 
15 minutes before proceeding with a fresh battery. 

NOTE: 

• 

When driving wood screws, predrill pilot holes to 
make driving easier and to prevent splitting of the 
workpiece. See the chart. 

Summary of Contents for XPT03

Page 1: ...ON MANUAL DE INSTRUCCIONES IMPORTANT Read Before Using IMPORTANT Lire avant usage IMPORTANTE Leer antes de usar Cordless 4 Mode Impact Driver Visseuse à choc 4 fonctions sans Fil Atornillador de Impacto Multifunción Inalámbrico XPT03 014132 ...

Page 2: ...arnings and instructions for future reference The term power tool in the warnings refers to your mains operated corded power tool or battery operated cordless power tool Work area safety 1 Keep work area clean and well lit Cluttered or dark areas invite accidents 2 Do not operate power tools in explosive atmospheres such as in the presence of flammable liquids gases or dust Power tools create spar...

Page 3: ...s Such preventive safety measures reduce the risk of starting the power tool accidentally 20 Store idle power tools out of the reach of children and do not allow persons unfamiliar with the power tool or these instructions to operate the power tool Power tools are dangerous in the hands of untrained users 21 Maintain power tools Check for misalignment or binding of moving parts breakage of parts a...

Page 4: ...artridge read all instructions and cautionary markings on 1 battery charger 2 battery and 3 product using battery 2 Do not disassemble battery cartridge 3 If operating time has become excessively shorter stop operating immediately It may result in a risk of overheating possible burns and even an explosion 4 If electrolyte gets into your eyes rinse them out with clear water and seek medical attenti...

Page 5: ...cibly If the cartridge does not slide in easily it is not being inserted correctly Battery protection system Lithium ion battery with star marking 1 012128 Lithium ion batteries with a star marking are equipped with a protection system This system automatically cuts off power to the tool to extend battery life The tool will automatically stop during operation if the tool and or battery are placed ...

Page 6: ...e pulled CAUTION Always check the direction of rotation before operation Use the reversing switch only after the tool comes to a complete stop Changing the direction of rotation before the tool stops may damage the tool When not operating the tool always set the reversing switch lever to the neutral position Selecting the action mode This tool employs an action mode changing lever Select one of th...

Page 7: ...terial to determine which torque level is required for a particular application NOTE In modes other than screwdriving mode the adjusting ring can be placed at any position because it does not work ASSEMBLY CAUTION Always be sure that the tool is switched off and the battery cartridge is removed before carrying out any work on the tool Installing or removing driver bit or socket bit 004521 Use only...

Page 8: ...dge all the way until it locks in place If you can see the red part on the upper side of the button it is not locked completely Insert it fully until the red part cannot be seen If not it may accidentally fall out of the tool causing injury to you or someone around you Impact driver operation When driving wood screws or bolts set the action mode changing lever to the mark The adjusting ring can be...

Page 9: ...n CAUTION There is a tremendous and sudden twisting force exerted on the tool bit at the time of hole break through when the hole becomes clogged with chips and particles or when striking reinforcing rods embedded in the concrete To drill in the concrete or tiles first turn the action mode changing lever so that the arrow on the lever points to the mark on the tool body The adjusting ring can be a...

Page 10: ...ip of your bit decrease the tool performance and shorten the service life of the tool There is a tremendous force exerted on the tool bit at the time of hole break through Hold the tool firmly and exert care when the bit begins to break through the workpiece A stuck bit can be removed simply by setting the reversing switch to reverse rotation in order to back out However the tool may back out abru...

Page 11: ...nty Policy Every Makita tool is thoroughly inspected and tested before leaving the factory It is warranted to be free of defects from workmanship and materials for the period of ONE YEAR from the date of original purchase Should any trouble develop during this one year period return the COMPLETE tool freight prepaid to one of Makita s Factory or Authorized Service Centers If inspection shows the t...

Page 12: ...ctions L ignorance des mises en garde et des instructions comporte un risque de choc électrique d incendie et ou de blessure grave Conservez toutes les mises en garde et instructions pour référence future Le terme outil électrique qui figure dans les avertissements fait référence à un outil électrique branché sur une prise de courant par un cordon d alimentation ou alimenté par batterie sans fil S...

Page 13: ...blessure 14 Maintenez une bonne position Assurez vous d une bonne prise au sol et d une bonne position d équilibre en tout temps Cela vous permettra d avoir une meilleure maîtrise de l outil dans les situations imprévues 15 Portez des vêtements adéquats Ne portez ni vêtements amples ni bijoux Vous devez maintenir cheveux vêtements et gants à l écart des pièces en mouvement Les pièces en mouvement ...

Page 14: ...À CHOC 4 FONCTIONS SANS FIL 1 Portez des protections d oreilles lorsque vous utilisez une perceuse à percussion L exposition au bruit peut entraîner des lésions de l ouïe 2 Utilisez la ou les poignées auxiliaires si elles sont fournies avec l outil Toute perte de maîtrise comporte un risque de blessure 3 Tenez l outil par ses surfaces de prise isolées pendant toute opération où l accessoire de fix...

Page 15: ...it de la batterie pourrait provoquer un fort courant une surchauffe parfois des brûlures et même une panne 6 Ne rangez pas l outil ou la batterie dans des endroits où la température risque d atteindre ou de dépasser 50 ゚ C 122 ゚ F 7 Ne jetez pas la batterie au feu même si elle est sérieusement endommagée ou complètement épuisée La batterie peut exploser au contact du feu 8 Prenez garde d échapper ...

Page 16: ...st qu elle n est pas insérée correctement Système de protection de la batterie batterie lithium ion marquée d une étoile 1 012128 Les batteries lithium ion marquées d une étoile sont équipées d un système de protection Ce système coupe automatiquement l alimentation de l outil pour augmenter la durée de vie de la batterie L outil s arrête automatiquement pendant l utilisation lorsque l outil et ou...

Page 17: ...e le levier inverseur se trouve en position neutre ATTENTION Vérifiez toujours le sens de rotation avant de mettre l outil en marche N actionnez l inverseur qu une fois que l outil est complètement arrêté Si vous changez le sens de rotation avant l arrêt de l outil vous risquez de l endommager Lorsque vous n utilisez pas l outil placez toujours le levier inverseur en position neutre Sélection du m...

Page 18: ... numéro 16 est aligné sur l index L engrenage glisse à divers niveaux de couple suivant le numéro de 1 à 16 sur lequel il est réglé Avant d exécuter le travail posez une vis d essai dans le matériau ou dans une autre pièce similaire pour connaître le niveau de couple requis pour le travail en question NOTE Dans les modes autres que le mode de vissage vous pouvez placer la bague de réglage sur n im...

Page 19: ...ler le crochet insérez le dans les rainures situées de chaque côté du carter de l outil puis serrez le avec une vis Pour le retirer desserrez la vis et enlevez la UTILISATION ATTENTION Insérez toujours la batterie jusqu au fond jusqu à ce qu elle verrouille en place Si vous pouvez voir la partie rouge de la face supérieure du bouton la batterie n est pas parfaitement verrouillée Insérez la à fond ...

Page 20: ...era une réduction du couple de serrage 3 Boulon Même si le coefficient du couple et la catégorie du boulon sont les mêmes le couple de serrage variera en fonction du diamètre de boulon Même si les diamètres des boulons sont les mêmes le couple de serrage variera en fonction du coefficient de couple de la catégorie du boulon et de la longueur du boulon 4 Le couple de serrage est affecté par la faço...

Page 21: ...isation Procédez ensuite comme suit Avant l utilisation assurez vous toujours que le levier est bien placé sur l indication du mode désiré et utilisez l outil à la vitesse qui convient au type de travail à exécuter Procédez ensuite comme suit Perçage du bois Quand vous percez dans du bois vous obtiendrez de meilleurs résultats avec des forets en bois munies d une vis guide Celle ci rend le perçage...

Page 22: ...lâchement de la gâchette Si le frein électrique ne fonctionne pas bien faites une demande de réparation auprès du centre de service après vente Makita le plus près Pour maintenir la SÉCURITÉ et la FIABILITÉ du produit les réparations tout autre travail d entretien ou de réglage doivent être effectués dans un centre de service Makita agréé ou un centre de service de l usine Makita exclusivement ave...

Page 23: ...IT CET AVIS DE NON RESPONSABILITÉ S APPLIQUE À LA FOIS PENDANT ET APRÈS LA PÉRIODE COUVERTE PAR CETTE GARANTIE MAKITA DÉCLINE TOUTE RESPONSABILITÉ QUANT À TOUTE GARANTIE TACITE INCLUANT LES GARANTIES TACITES DE QUALITÉ MARCHANDE ET ADÉQUATION À UN USAGE PARTICULIER APRÈS LA PÉRIODE D UN AN COUVERTE PAR CETTE GARANTIE Cette garantie vous donne des droits spécifiques reconnus par la loi et possiblem...

Page 24: ...ara herramientas eléctricas ADVERTENCIA lea todas las advertencias de seguridad e instrucciones Si no sigue todas las advertencias e instrucciones indicadas a continuación podrá ocasionar una descarga eléctrica un incendio y o lesiones graves Guarde todas las advertencias e instrucciones para su futura referencia El término herramienta eléctrica se refiere en todas las advertencias que aparecen a ...

Page 25: ...r o enchufarlas con el interruptor encendido hace que los accidentes sean propensos 13 Retire cualquier llave de ajuste o llave de apriete antes de encender la herramienta Una llave de ajuste o llave de apriete que haya sido dejada puesta en una parte giratoria de la herramienta eléctrica podrá resultar en heridas personales 14 No utilice la herramienta donde no alcance Mantenga los pies sobre sue...

Page 26: ...ad de la herramienta eléctrica 29 Siga las instrucciones para la lubricación y cambio de accesorios 30 Mantenga las agarraderas secas limpias y sin aceite o grasa GEB078 2 ADVERTENCIAS DE SEGURIDAD PARA EL ATORNILLADOR DE IMPACTO MULTIFUNCIÓN INALÁMBRICO 1 Utilice protectores de oídos al usar el taladro de percusión La exposición al ruido puede producir pérdida auditiva 2 Utilice el los mango s au...

Page 27: ...s con ningún material conductor 2 Evite guardar el cartucho de batería en un cajón junto con otros objetos metálicos tales como clavos monedas etc 3 No exponga la batería de cartucho a la lluvia o nieve Un corto circuito en la batería puede causar un flujo grande de corriente sobrecalentamiento posibles quemaduras y aún descomposturas 6 No guarde la herramienta ni el cartucho de batería en lugares...

Page 28: ...l cartucho no se desliza al interior fácilmente se debe a que no está siendo insertado correctamente Sistema de protección de batería batería de ión de litio con marca de estrella 1 012128 Las baterías de ión de litio con una marca de estrella están equipadas con un sistema de protección Este sistema corta en forma automática el suministro de energía a la herramienta para prolongar la vida útil de...

Page 29: ... del lado A para giro hacia la derecha o del lado B para giro hacia la izquierda Cuando la palanca del conmutador de inversión esté en la posición neutral no se podrá apretar el gatillo interruptor PRECAUCIÓN Confirme siempre la dirección de giro antes de la operación Utilice el conmutador de inversión solamente después de que la herramienta haya parado completamente Si cambia la dirección de giro...

Page 30: ...eadas con el puntero sobre el cuer po de la herramienta La torsión de fijación es mínima cuando el número 1 está alineado con el puntero y máxima cuando el número 16 está alineado con el puntero El embrague se deslizará en varios niveles de torsión cuando se configure del número 1 al 16 Antes de la operación real coloque un tornillo de prueba sobre una pieza del mismo material para determinar cuál...

Page 31: ...on las indicaciones dadas Gancho accesorio 2 3 1 006251 PRECAUCIÓN Al instalar el gancho apriete el tornillo con firmeza No hacerlo puede que cause avería en la herramienta o lesiones personales El gancho resulta útil para colgar temporalmente la herramienta Se puede instalar en cualquiera de los lados de la herramienta Para instalar el gancho insértelo en una ranura del alojamiento de la herramie...

Page 32: ...e hasta descargar el cartucho de batería deje descansar la herramienta durante 15 minutos antes de proceder con una batería fresca La torsión de apriete se ve afectada por una amplia variedad de factores incluyendo los siguientes Después del apriete compruebe siempre la torsión de apriete con una llave de torsión 1 Cuando el cartucho de batería esté casi completamente descargado caerá la tensión y...

Page 33: ...mm 5 32 4 5 mm 11 64 4 8 mm 3 16 5 1 mm 13 64 5 5 mm 7 32 5 8 mm 7 32 6 1 mm 15 64 Tamaño recomendado para el orificio piloto mm 2 0 mm 2 2 mm 5 64 3 32 2 2 mm 2 5 mm 3 32 3 32 2 5 mm 2 8 mm 3 32 7 64 2 9 mm 3 2 mm 7 64 1 8 3 1 mm 3 4 mm 1 8 9 64 3 3 mm 3 6 mm 1 8 9 64 3 7 mm 3 9 mm 9 64 5 32 4 0 mm 4 2 mm 5 32 11 64 001904 Operación de taladrado Primero coloque la palanca de cambio del modo de ac...

Page 34: ...miento con un destornillador de punta plana de eje largo y fino o similar 1 2 3 006260 Utilice unas pinzas para quitar las tapas de las escobillas de carbón Extraiga las escobillas de carbón desgastadas inserte las nuevas y vuelva a colocar las tapas de las escobillas de carbón en su sitio 1 006261 Asegúrese de que las tapas de las escobillas de carbón hayan encajado en los agujeros de los portaes...

Page 35: ...herramienta COMPLETA porte pagado con antelación a una de las fábricas o centros de servicio autorizados Makita Si la inspección muestra que el problema ha sido causado por mano de obra o material defectuoso Makita la reparará o a nuestra opción reemplazará sin cobrar Esta garantía no será aplicable cuando EN NINGÚN CASO MAKITA SE HARÁ RESPONSABLE DE NINGÚN DAÑO INDIRECTO FORTUITO O CONSECUENCIAL ...

Page 36: ...polvos creados por el lijado aserrado esmerilado taladrado y otras actividades de la construcción contienen sustancias químicas reconocidas por el Estado de California como causantes de cáncer defectos de nacimiento y otros peligros de reproducción Algunos ejemplos de estos productos químicos son plomo de pinturas a base de plomo sílice cristalino de ladrillos y cemento y otros productos de albañi...

Reviews: