background image

To start the tool, grasp the rear handle (the lock-off lever 
is released by the grasp) and then pull the switch trigger. 
To stop the tool, release the switch trigger. 

NOTE: 

• 

The tool is automatically turned off after the tool is
left one minute without any operations. 

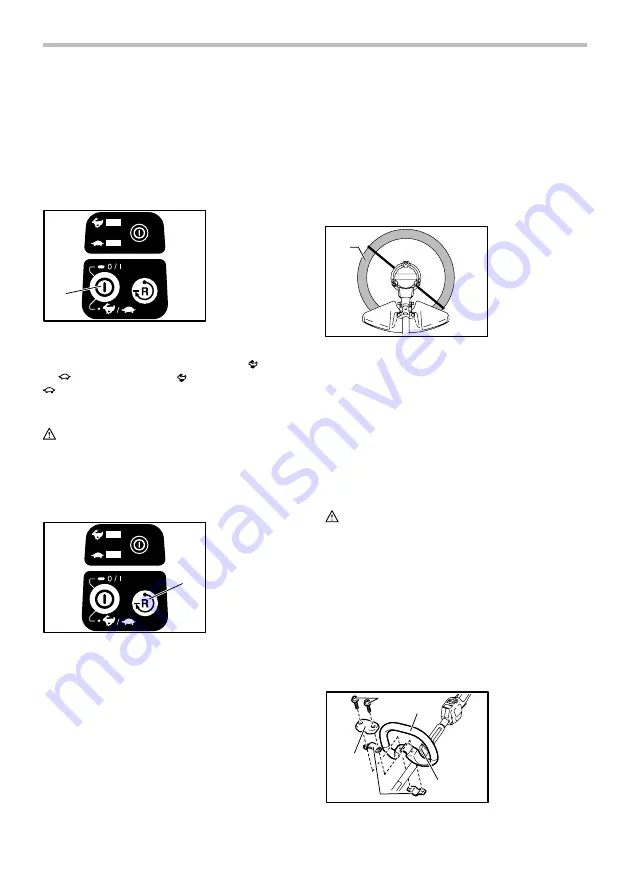
Speed adjusting 

1

015790 

You can adjust the tool speed by tapping the main 
power button. 
Each time you tap the main power button, 

 indicator 

or 

 indicator lights up. 

 is for high speed and 

  for low speed. 

Reverse button for debris removal 

WARNING: 

• 

Switch off the tool and remove the battery cartridge
before you remove entangled weeds or debris which
the reverse rotation function can not remove.

 Failure

to switch off and remove the battery cartridge may result
in serious personal injury from accidental start-up. 

1

015791 

This tool has a reverse button to change the direction of 
rotation. It is only for removing weeds and debris 
entangled in the tool. 
To reverse the rotation, tap the reverse button and pull 
the trigger when the tool’s head is stopped. The power 
lamp starts blinking, and the tool's head rotates in 
reverse direction when you pull the switch trigger. 
To return to regular rotation, release the trigger and wait 
until the tool's head stops. 

NOTE: 

• 

During the reverse rotation, the tool operates only for
a short period of time and then automatically stops. 

• 

Once the tool is stopped, the rotation returns to
regular direction when you start the tool again.

• 

If you tap the reverse button while the tool's head
is still rotating, the tool comes to stop and to be
ready for reverse rotation. 

Nylon cutting head (optional accessory) 

NOTICE: 

• 

The bump feed will not operate properly if the
head is not rotating. 

1

015788 

The nylon cutting head is a dual string trimmer head 
provided with a bump & feed mechanism. 
To cause the nylon cord to feed out, the cutting head 
should be bumped against the ground while rotating. 

NOTE: 

If the nylon cord does not feed out while bumping the 
head, rewind/replace the nylon cord by following the 
procedures described under “Maintenance” . 

ASSEMBLY 

WARNING: 

• 

Always be sure that the tool is switched off
and battery cartridge is removed before
carrying out any work on the tool.

 Failure to

switch off and remove the battery cartridge may
result in serious personal injury from accidental
start-up. 

• 

Never start the tool unless it is completely
assembled.

 Operation of the tool in a partially

assembled state may result in serious personal
injury from accidental start-up. 

Installing the grip 

2

1

5

3

4

015390 

1. Grip 
2. Hex bolt 
3. Cover 
4. Clamp 
5. Hanger 

1. Most effective 

cutting area 

1. Reverse button

1. Main power 

button 

Summary of Contents for XRU09PT

Page 1: ...1 IMPORTANT Read Before Using INSTRUCTION MANUAL Cordless Grass Trimmer XRU09 015384 ...

Page 2: ...are and attention 4 Operate the string trimmer only if you are in good physical condition Perform all work calmly and carefully Use common sense and keep in mind that the operator or user is responsible for accidents or hazards occurring to other people or their property 5 Never operate the string trimmer when tired feeling ill or under the influence of alcohol or drugs 6 Avoid accidentally starti...

Page 3: ...rain Water entering the tool will increase the risk of electric shock 2 Recharge only with the charger specified by the manufacturer A charger that is suitable for one type of battery pack may create a risk of fire when used with another battery pack 3 Use power tools only with specifically designated battery packs Use of any other battery packs may create a risk of injury and fire 4 When battery ...

Page 4: ...with the guard Never run the tool with damaged guards or without guards in place 12 All protective equipment such as guards supplied with the string trimmer must be used during operation 13 Except in case of emergency never drop or cast the tool to the ground or this may severely damage the tool 14 Never drag the tool on the ground when moving from place to place the tool may become damaged if mov...

Page 5: ... a breakdown 6 Do not store the tool and battery cartridge in locations where the temperature may reach or exceed 50 ゚ C 122 ゚ F 7 Do not incinerate the battery cartridge even if it is severely damaged or is completely worn out The battery cartridge can explode in a fire 8 Be careful not to drop or strike battery 9 Do not use a damaged battery 10 The contained lithium ion batteries are subject to ...

Page 6: ...6 PARTS DESCRIPTION 1 3 5 7 9 2 4 6 8 1 2 3 4 5 6 8 7 9 Battery cartridge Switch trigger Main power button Hanger Grip Lock off lever Power lamp Reverse button Protector cutting tool guard 015789 ...

Page 7: ...does not slide in easily it is not being inserted correctly NOTE The tool does not work with only one battery cartridge Tool battery protection system The tool is equipped with a tool battery protection system This system automatically cuts off power to the motor to extend tool and battery life The tool will automatically stop during operation if the tool or battery is placed under one of the foll...

Page 8: ...cator status Remaining battery capacity 50 100 20 50 0 20 Charge the battery On Off Blinking 015452 Power switch action WARNING Before inserting the battery cartridge into the tool always check to see that the switch trigger actuates properly and returns to the OFF position when released Operating a tool with a switch that does not actuate properly can lead to loss of control and serious personal ...

Page 9: ...ol s head stops NOTE During the reverse rotation the tool operates only for a short period of time and then automatically stops Once the tool is stopped the rotation returns to regular direction when you start the tool again If you tap the reverse button while the tool s head is still rotating the tool comes to stop and to be ready for reverse rotation Nylon cutting head optional accessory NOTICE ...

Page 10: ...and tighten it by turning it counterclockwise Remove the hex wrench To remove the nylon cutting head turn it clockwise while holding the receive washer with the hex wrench Hex wrench storage 1 015399 When not in use store the hex wrench as shown in the figure to keep it from being lost OPERATION Correct handling of tool Correct posture WARNING Always position the tool on your right hand side Corre...

Page 11: ...o the notch located at the center of the spool between the 2 channels provided for the nylon cord Wind both ends firmly around the spool in the direction marked on the head for left hand direction indicated by LH 013825 Wind all but about 100 mm 4 of the cords leaving the ends temporarily hooked through a notch on the side of the spool 013826 Mount the spool on the cover so that the grooves and pr...

Page 12: ... cord has been broken The drive system does not work correctly Foreign object such as a branch is jammed between the guard and the nylon cutting head The drive system does not work correctly Battery is installed improperly Battery s charge level is low The drive system does not work correctly Recharge the battery If recharging is not effective replace battery Ask your local authorized service cent...

Page 13: ...ed in this manual The use of any other accessories or attachments might present a risk of injury to persons Only use accessory or attachment for its stated purpose If you need any assistance for more details regarding these accessories ask your local Makita Service Center Nylon cutting head Nylon cord cutting line Makita genuine battery and charger NOTE Some items in the list may be included in th...

Reviews: