background image

5 ENGLISH

Indicating the remaining battery 

capacity

Only for battery cartridges with "B" at the end of the 

model number

1

2

►    

1.

 Indicator lamps 

2.

 Check button

Press the check button on the battery cartridge to indi-

cate the remaining battery capacity. The indicator lamps 

light up for few seconds.

Indicator lamps

Remaining 

capacity

Lighted

Off

Blinking

75% to 100%

50% to 75%

25% to 50%

0% to 25%

Charge the 

battery.

The battery 

may have

malfunctioned.

NOTE:

 Depending on the conditions of use and the 

ambient temperature, the indication may differ slightly 

from the actual capacity.

Tool / battery protection system

The tool is equipped with a tool/battery protection sys

-

tem. This system automatically cuts off power to the 

motor to extend tool and battery life. The tool will auto

-

matically stop during operation if the tool or battery is 

placed under one of the following conditions:

Overload protection

When the battery is operated in a manner that causes 

it to draw an abnormally high current, the tool automat-

ically stops without any indication. In this situation, turn 

the tool off and stop the application that caused the tool 

to become overloaded. Then turn the tool on to restart.

Overheat protection

When the tool/battery is overheated, the tool stops 

automatically. In this situation, let the battery cool 

before turning the tool on again.

Overdischarge protection

When the battery capacity is not enough, the tool stops 

automatically. In this case, remove the battery from the 

tool and charge the battery.

NOTE:

 Overload protection will work only with batter-

ies with star marking.

1

►    

1.

 Star marking

Switch action

1

►    

1.

 Switch trigger

CAUTION:


Before installing the battery car-

tridge into the tool, always check to see that the 

switch trigger actuates properly and returns to 

the "OFF" position when released.

To start the tool, simply pull the switch trigger. Tool 

speed is increased by increasing pressure on the switch 

trigger. Release the switch trigger to stop.

Electric brake

This tool is equipped with an electric brake. If the tool 

consistently fails to quickly stop after the switch trigger 

is released, have the tool serviced at a Makita service 

center.

Summary of Contents for XT281S

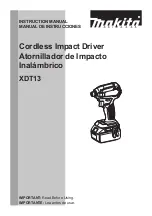
Page 1: ...INSTRUCTION MANUAL MANUAL DE INSTRUCCIONES Cordless Impact Driver Atornillador de Impacto Inalámbrico XDT13 IMPORTANT Read Before Using IMPORTANTE Lea antes de usar ...

Page 2: ...ill reduce risk of electric shock 2 Avoid body contact with earthed or grounded surfaces such as pipes radiators ranges and refrigerators There is an increased risk of elec tric shock if your body is earthed or grounded 3 Do not expose power tools to rain or wet con ditions Water entering a power tool will increase the risk of electric shock 4 Do not abuse the cord Never use the cord for carrying ...

Page 3: ...r A charger that is suitable for one type of battery pack may create a risk of fire when used with another battery pack 2 Use power tools only with specifically desig nated battery packs Use of any other battery packs may create a risk of injury and fire 3 When battery pack is not in use keep it away from other metal objects like paper clips coins keys nails screws or other small metal objects tha...

Page 4: ...rsonal injury and damage It will also void the Makita warranty for the Makita tool and charger Tips for maintaining maximum battery life 1 Charge the battery cartridge before completely discharged Always stop tool operation and charge the battery cartridge when you notice less tool power 2 Never recharge a fully charged battery car tridge Overcharging shortens the battery service life 3 Charge the...

Page 5: ... high current the tool automat ically stops without any indication In this situation turn the tool off and stop the application that caused the tool to become overloaded Then turn the tool on to restart Overheat protection When the tool battery is overheated the tool stops automatically In this situation let the battery cool before turning the tool on again Overdischarge protection When the batter...

Page 6: ...ol CAUTION When not operating the tool always set the reversing switch lever to the neu tral position This tool has a reversing switch to change the direction of rotation Depress the reversing switch lever from the A side for clockwise rotation or from the B side for coun terclockwise rotation When the reversing switch lever is in the neutral posi tion the switch trigger cannot be pulled ASSEMBLY ...

Page 7: ...w and then take it out OPERATION The proper fastening torque may differ depending upon the kind or size of the screw bolt the material of the workpiece to be fastened etc The relation between fas tening torque and fastening time is shown in the figures Proper fastening torque for standard bolt 140 103 120 89 100 74 80 59 60 44 40 30 20 15 0 M16 5 8 M10 3 8 M8 5 16 M14 9 16 M12 1 2 2 1 2 0 1 0 M16 ...

Page 8: ...ta replacement parts OPTIONAL ACCESSORIES CAUTION These accessories or attachments are recommended for use with your Makita tool specified in this manual The use of any other accessories or attachments might present a risk of injury to persons Only use accessory or attachment for its stated purpose If you need any assistance for more details regarding these accessories ask your local Makita Servic...

Page 9: ...ientas eléctricas crean chispas que pueden prender fuego al polvo o los humos 3 Mantenga a los niños y curiosos alejados mientras utiliza una herramienta eléctrica Las distracciones le pueden hacer perder el control Seguridad eléctrica 1 Las clavijas de conexión de las herramientas eléctricas deberán encajar perfectamente en la toma de corriente No modifique nunca la cla vija de conexión de ningun...

Page 10: ...léctrica que no use fuera del alcance de los niños y no permita que las personas que no están familiarizadas con ella o con las instrucciones la operen Las herramientas eléctricas son peligrosas en manos de personas que no saben operarlas 5 Realice el mantenimiento a las herramientas eléctricas Compruebe que no haya partes móvi les desalineadas o estancadas piezas rotas y cualquier otra condición ...

Page 11: ...ar un flujo grande de corriente sobrecalenta miento posibles quemaduras e incluso una descompostura 6 No guarde la herramienta ni el cartucho de batería en lugares donde la temperatura pueda alcanzar o exceder los 50 C 122 F 7 Nunca incinere el cartucho de batería incluso en el caso de que esté dañado seriamente o ya no sirva en absoluto El cartucho de batería puede explotar si se tira al fuego 8 ...

Page 12: ...com pletamente el cartucho de batería hasta que el indicador rojo no pueda verse Si no podría accidentalmente salirse de la herramienta y caer al suelo causando una lesión a usted o alguien a su alrededor PRECAUCIÓN No instale el cartucho de batería a la fuerza Si el cartucho no se desliza al interior fácilmente se debe a que no está siendo insertado correctamente Indicación de la capacidad restan...

Page 13: ...PRECAUCIÓN Antes de insertar el cartucho de batería en la herramienta compruebe siem pre y cerciórese de que el gatillo interruptor se acciona debidamente y que vuelve a la posición OFF apagado cuando lo suelta Para poner en marcha la herramienta simplemente apriete el gatillo interruptor La velocidad de la herra mienta aumenta incrementando la presión en el gatillo Para detenerla suelte el gatill...

Page 14: ...l reloj o desde el lado B para una rotación en sentido inverso al de las manecillas del reloj Cuando la palanca del conmutador de inversión esté en la posición neutral no se podrá jalar el gatillo conmutador MONTAJE PRECAUCIÓN Asegúrese siempre de que la herramienta esté apagada y el cartucho de batería haya sido extraído antes de realizar cualquier trabajo en la misma Instalación o extracción de ...

Page 15: ...ara quitarlo afloje el tornillo y después sáquelo OPERACIÓN La torsión de apriete adecuada podrá variar depen diendo del tipo o tamaño del tornillo perno el material de la pieza de trabajo a apretar etc La relación entre la torsión de apriete y el tiempo de apriete se muestra en las figuras Torsión de apriete apropiada para un tornillo estándar 140 N m 103 ft lbs 120 N m 89 ft lbs 100 N m 74 ft lb...

Page 16: ... PRECAUCIÓN Asegúrese siempre de que la herramienta esté apagada y el cartucho de batería extraído antes de intentar realizar una inspección o mantenimiento AVISO Nunca use gasolina bencina diluyente tíner alcohol o sustancias similares Puede que esto ocasione grietas o descoloramiento Para mantener la SEGURIDAD y FIABILIDAD del pro ducto las reparaciones y cualquier otra tarea de man tenimiento o...

Page 17: ...N PARA UN PROPÓSITO ESPECÍFICO DESPUÉS DEL PLAZO DE UN AÑO DE ESTA GARANTÍA Esta garantía le concede derechos legales específicos y usted podrá tener también otros derechos que varían de un estado a otro Algunos estados no permiten la exclusión o limitación de daños incidentales o con secuentes por lo que la limitación o exclusión arriba mencionada podría no aplicar para usted Algunos estados no p...

Page 18: ...18 ...

Page 19: ...19 ...

Page 20: ...ados por el lijado aserrado esmerilado taladrado y otras actividades de la construcción contienen sustancias químicas reconocidas por el Estado de California como causantes de cáncer defectos de nacimiento y otros peligros de reproducción Algunos ejemplos de estos productos químicos son plomo de pinturas a base de plomo sílice cristalino de ladrillos y cemento y otros productos de albañilería y ar...

Page 21: ...INSTRUCTION MANUAL MANUAL DE INSTRUCCIONES Cordless Driver Drill Atornillador Taladro Inalámbrico XFD13 IMPORTANT Read Before Using IMPORTANTE Lea antes de usar ...

Page 22: ...ammable liquids gases or dust Power tools create sparks which may ignite the dust or fumes 3 Keep children and bystanders away while operating a power tool Distractions can cause you to lose control Electrical Safety 1 Power tool plugs must match the outlet Never modify the plug in any way Do not use any adapter plugs with earthed grounded power tools Unmodified plugs and matching outlets will red...

Page 23: ...condition that may affect the power tool s operation If dam aged have the power tool repaired before use Many accidents are caused by poorly maintained power tools 6 Keep cutting tools sharp and clean Properly maintained cutting tools with sharp cutting edges are less likely to bind and are easier to control 7 Use the power tool accessories and tool bits etc in accordance with these instructions t...

Page 24: ...te gets into your eyes rinse them out with clear water and seek medical attention right away It may result in loss of your eyesight 5 Do not short the battery cartridge 1 Do not touch the terminals with any con ductive material 2 Avoid storing battery cartridge in a con tainer with other metal objects such as nails coins etc 3 Do not expose battery cartridge to water or rain A battery short can ca...

Page 25: ... CAUTION Do not install the battery cartridge forcibly If the cartridge does not slide in easily it is not being inserted correctly Indicating the remaining battery capacity Only for battery cartridges with the indicator 1 2 1 Indicator lamps 2 Check button Press the check button on the battery cartridge to indi cate the remaining battery capacity The indicator lamps light up for a few seconds Ind...

Page 26: ...tch trigger NOTE When the tool is overheated the tool stops auto matically and the lamp starts flashing In this case release the switch trigger The lamp turns off in one minute NOTE Use a dry cloth to wipe the dirt off the lens of the lamp Be careful not to scratch the lens of lamp or it may lower the illumination Reversing switch action 1 A B 1 Reversing switch lever CAUTION Always check the dire...

Page 27: ...slip at various torque levels when set at the number 1 to 21 The clutch does not work at the marking Before actual operation drive a trial screw into your material or a piece of duplicate material to determine which torque level is required for a particular application The following shows the rough guide of the relationship between the screw size and graduation Graduation 1 2 3 4 5 6 7 8 9 10 11 1...

Page 28: ...tor on the upper side of the button it is not locked completely Insert it fully until the red indicator cannot be seen If not it may accidentally fall out of the tool causing injury to you or someone around you CAUTION When the speed comes down extremely reduce the load or stop the tool to avoid the tool damage Hold the tool firmly with one hand on the grip and the other hand on the bottom of the ...

Page 29: ...rated continuously until the battery cartridge has discharged allow the tool to rest for 15 minutes before proceeding with a fresh battery MAINTENANCE CAUTION Always be sure that the tool is switched off and the battery cartridge is removed before attempting to perform inspection or maintenance NOTICE Never use gasoline benzine thinner alcohol or the like Discoloration deformation or cracks may re...

Page 30: ...s indi cadas a continuación podría ocasionar una descarga eléctrica incendio y o lesiones graves Conserve todas las advertencias e instrucciones como referencia en el futuro En las advertencias el término herramienta eléctrica se refiere a su herramienta eléctrica de funcionamiento con conexión a la red eléctrica con cableado eléctrico o herramienta eléctrica de funcionamiento a batería inalámbric...

Page 31: ...ejor control de la herramienta eléctrica en situaciones inesperadas 6 Use una vestimenta apropiada No use ropa suelta ni alhajas Mantenga el cabello la ropa y los guantes alejados de las piezas móviles Las prendas de vestir holgadas las alhajas y el cabello largo suelto podrían engancharse en estas piezas móviles 7 Si dispone de dispositivos para la conexión de equipos de extracción y recolección ...

Page 32: ... persona calificada repare la herramienta eléctrica utilizando sólo piezas de repuesto idénticas Esto asegura que se man tenga la seguridad de la herramienta eléctrica 2 Nunca dé servicio a baterías que estén daña das El servicio a las baterías solamente deberá ser efectuado por el fabricante o un agente de servicio autorizado 3 Siga las instrucciones para la lubricación y cambio de accesorios 4 N...

Page 33: ...ón de litio están sujetas a los requisitos reglamentarios en materia de bie nes peligrosos Para el trasporte comercial por ej mediante terceros o agentes de transporte se deben tomar en cuenta los requisitos especiales relativos al empaque y el etiquetado Para efectuar los preparativos del artículo que se va a enviar se requiere consultar a un experto en materiales peligrosos Si es posible consult...

Page 34: ... siempre com pletamente el cartucho de batería hasta que el indicador rojo no pueda verse Si no podría accidentalmente salirse de la herramienta y caer al suelo causando una lesión a usted o alguien a su alrededor PRECAUCIÓN No instale el cartucho de batería a la fuerza Si el cartucho no se desliza al interior fácilmente se debe a que no está siendo insertado correctamente Indicación de la capacid...

Page 35: ...icamente si continúa jalando el gatillo interruptor alrededor de 6 minutos Freno eléctrico La herramienta está equipada con un freno eléctrico Si la herramienta falla constantemente en detenerse tras soltar el gatillo interruptor lleve la herramienta a mante nimiento a un centro de servicio Makita Iluminación de la luz delantera 1 1 Luz PRECAUCIÓN No mire a la luz ni vea a la fuente de luz directa...

Page 36: ...con la palanca de cambio de velocidad puesta a medias entre la posición 1 y 2 la herramienta puede dañarse PRECAUCIÓN No utilice la palanca de cam bio de velocidad mientras la herramienta está en marcha La herramienta puede dañarse Número desplegado Velocidad Torsión Operación aplicable 1 Baja Alta Operación de carga pesada 2 Alta Baja Operación de carga ligera Para cambiar la velocidad apague pri...

Page 37: ...áquina 4 mm 5 mm 6 mm Tornillo para madera Madera blanda Ej pino ɸ3 5 mm x 22 mm ɸ4 1 mmx 38 mm Madera dura Ej lauan ɸ3 5 mm x 22 mm ɸ4 1 mmx 38 mm MONTAJE PRECAUCIÓN Asegúrese siempre de que la herramienta esté apagada y el cartucho de batería haya sido extraído antes de realizar cualquier trabajo en la misma Instalación o extracción de la punta de destornillador broca de taladro 1 2 3 1 Mandril ...

Page 38: ...ta y oca sionarle lesiones a usted o a alguien a su alrededor PRECAUCIÓN Cuando la velocidad baje demasiado reduzca la carga o detenga la herra mienta para evitar daños en ésta Sujete firmemente la herramienta con una mano en la agarradera y otra en la parte inferior del cartucho de batería para controlar la acción de torsión AVISO No tape las aberturas de ventilación o puede provocar un sobrecale...

Page 39: ...ramienta durante 15 minutos antes de proceder con una batería llena MANTENIMIENTO PRECAUCIÓN Asegúrese siempre de que la herramienta esté apagada y el cartucho de batería extraído antes de intentar realizar una inspección o mantenimiento AVISO Nunca use gasolina bencina diluyente tíner alcohol o sustancias similares Puede que esto ocasione grietas o descoloramiento Para mantener la SEGURIDAD y FIA...

Page 40: ...ados por el lijado aserrado esmerilado taladrado y otras actividades de la construcción contienen sustancias químicas reconocidas por el Estado de California como causantes de cáncer defectos de nacimiento y otros peligros de reproducción Algunos ejemplos de estos productos químicos son plomo de pinturas a base de plomo sílice cristalino de ladrillos y cemento y otros productos de albañilería y ar...

Reviews: