background image

106 09/02

RIMOZIONE

RIMOZIONE

RIMOZIONE

RIMOZIONE

RIMOZIONE
CARTER DESTRO

CARTER DESTRO

CARTER DESTRO

CARTER DESTRO

CARTER DESTRO
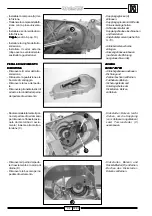
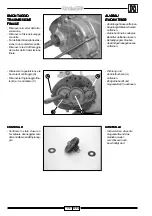
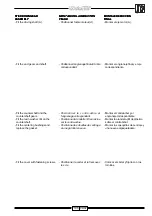
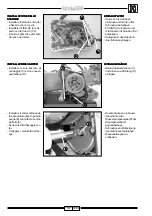
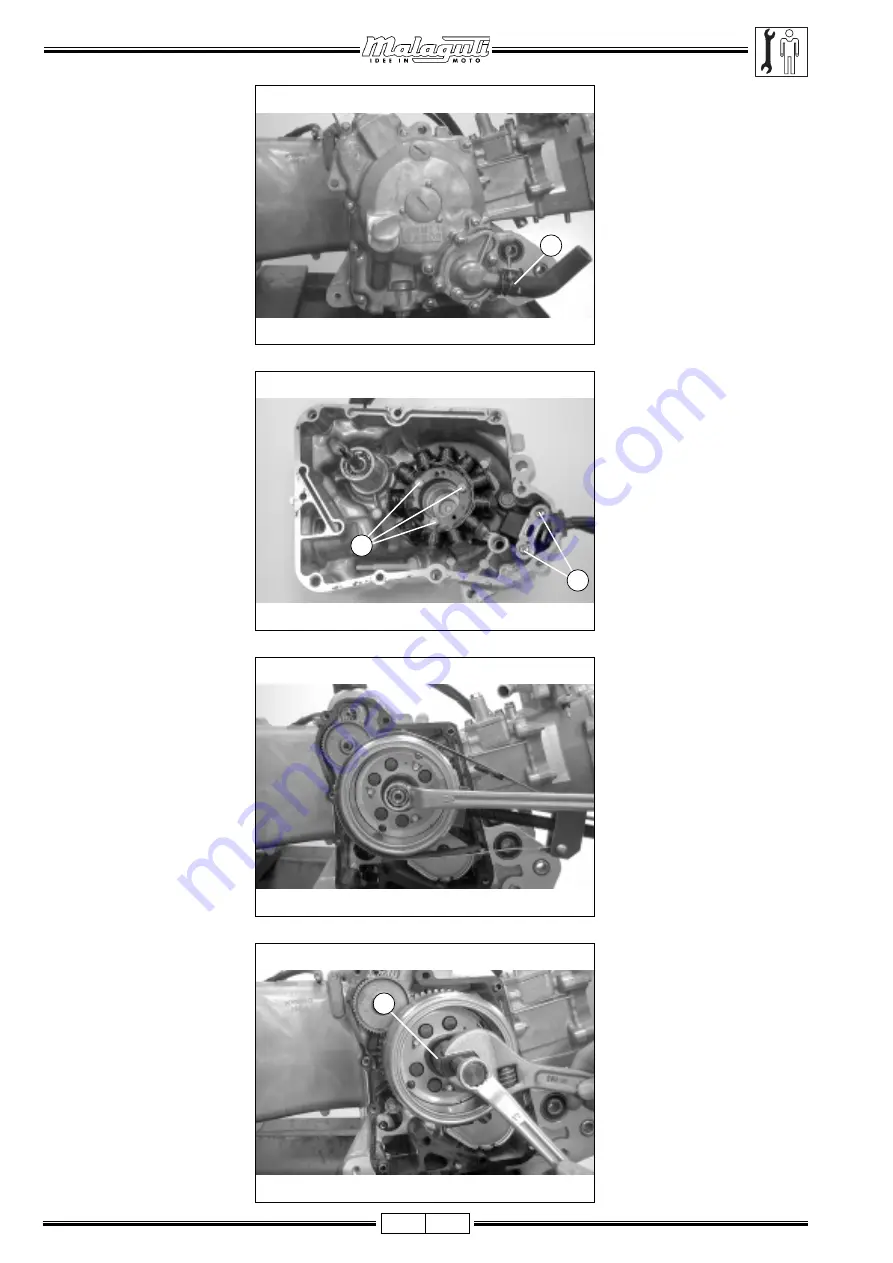
- Scollegare i manicotti dell’ac-

qua (A).

- Rimuovere le viti che fissano

il carter.

RIMOZIONE DELLO

RIMOZIONE DELLO

RIMOZIONE DELLO

RIMOZIONE DELLO

RIMOZIONE DELLO
STATORE

STATORE

STATORE

STATORE

STATORE
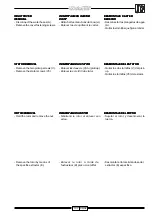
- Rimuovere le due viti (V) del

(PICK-UP).

- Rimuovere le viti (V3) dello

statore.

RIMOZIONE DEL ROTORE

RIMOZIONE DEL ROTORE

RIMOZIONE DEL ROTORE

RIMOZIONE DEL ROTORE

RIMOZIONE DEL ROTORE
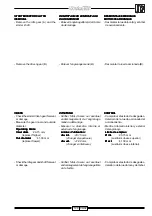
- Trattenere il rotore e rimuover-

ne il dado.

- Rimuovere il rotore con l’ap-

posito estrattore (E).

A

A

A

A

A

V

V

V

V

V

V

V

V

V

V

3

33

33

E

E

E

E

E

AUSBAU  RECHTES

AUSBAU  RECHTES

AUSBAU  RECHTES

AUSBAU  RECHTES

AUSBAU  RECHTES
GEHÄUSE

GEHÄUSE

GEHÄUSE

GEHÄUSE

GEHÄUSE
- Wasserleitungen (A)

abtrennen.

- Schrauben zur Befestigung

des Gehäuses
ausschrauben.

AUSBAU STATOR

AUSBAU STATOR

AUSBAU STATOR

AUSBAU STATOR

AUSBAU STATOR
- Beide  Schrauben (V) des

pickup’s entfernen.

- Schrauben (V3) des Stators

entfernen.

AUSBAU ROTOR

AUSBAU ROTOR

AUSBAU ROTOR

AUSBAU ROTOR

AUSBAU ROTOR
- Rotor halten und

Schraubenmutter
ausschrauben.

- Rotor mit Hilfe des

entsprechenden Ausziehers
(E) herausnehmen.

Summary of Contents for KYMCO 125 - KY - MA 12

Page 1: ...ing system Liquid cooling system Liquid cooling system Refroidissement à air Refroidissement à air Refroidissement à air Refroidissement à air Refroidissement à air Refroidissement par liquide Refroidissement par liquide Refroidissement par liquide Refroidissement par liquide Refroidissement par liquide Refrigeración por aire Refrigeración por aire Refrigeración por aire Refrigeración por aire Ref...

Page 2: ... Rimozione volano Ausbau Schwungrad Flywheel removal Levée du volant Desmontaje volante 16 Rimozione statore Ausbau Stator Stator removal Levée du stator Desmontaje estator 18 Rimozione ruota libera Ausbau Freilauf Freewheel removal Levée roue libre Desmontaje rueda libre 20 Rimozione Ausbau Chain tensioner Levée du tendeur Desmontaje tensor 22 tendicatena Kettenspanner removal de chaine de cadena...

Page 3: ... y Polea motriz y Polea motriz y Polea motriz y 72 condotta condotta condotta condotta condotta Antriebsrie Antriebsrie Antriebsrie Antriebsrie Antriebsrie drive pulley kick drive pulley kick drive pulley kick drive pulley kick drive pulley kick menée Pedal de menée Pedal de menée Pedal de menée Pedal de menée Pedal de conducida Pedal de conducida Pedal de conducida Pedal de conducida Pedal de con...

Page 4: ...écanique mécanique mécanique cigueñal cigueñal cigueñal cigueñal cigueñal Possibili risposte ad Mögliche Lösungen für Troubleshooting Réponses possibles à Remedios posibles para 114 alcune domande bestimmte Probleme certaines questions ciertos problemas Separazione Trennen des Crankcase Séparation Separación bloque 116 basamento Motorblocks dismantling carter motor Controllo albero Kontrolle Crank...

Page 5: ...rage demarrage demarrage demarrage Desmontaje arranque Desmontaje arranque Desmontaje arranque Desmontaje arranque Desmontaje arranque automatico automatico automatico automatico automatico Automatik Starter Automatik Starter Automatik Starter Automatik Starter Automatik Starter Removal Removal Removal Removal Removal automatique automatique automatique automatique automatique automático automátic...

Page 6: ...TA VERLÄNGERUNGSSTÜCK AUSZIEHER LAUFBAHN ESTRATTORE PISTA AUSZIEHER LAUFBAHN COMPRESSORE MOLLA FEDERSPANNER E014 DISPOSITIVO DI TENUTA DICHTUNG FÜR POMPA ACQUA WASSERPUMPE RIMOZIONE INGRANAGGI AUSBAU ZAHNRÄDER MOTORINO DI AVVIAMENTO ANLASSER E012 REGOLATOREVALVOLE VENTILEINSTELLEHRE CALIBRO LIVELLO GALLEGGIANTE KALIBER SCHWIMMERSTAND FRESA INCLINATA 45 FRÄSE 45 GENEIGT PER SEDE VALVOLA FÜR VENTILS...

Page 7: ...RPISTADERODADURA RACE EXTRACTOR EXTRACTEUR CHEMIN EXTRACTORPISTADERODADURA SPRING COMPRESSOR COMPRESSEUR RESSORT COMPRESOR DE MUELLE WATER PUMP SEAL DISPOSITIF D ETANCHEITE DE DISPOSITIVO DE OBTURACION LA POMPE A EAU BOMBA DE AGUA STARTER MOTOR GEAR LEVEE DES ENGRENAGES DESMONTAJE ENGRANAJES REMOVAL DU DEMARREUR MOTOR DE ARRANQUE VALVE GOVERNOR REGULATEUR DES SOUPAPES REGLAJE VALVULAS FLOAT LEVEL ...

Page 8: ...CIE SPORGENTE HERAUSRAGENDE FLÄCHE ALBERO A CAMME NOCKENWELLE CATENA GUIDA ALBERO A CAMME FÜHRUNGSKETTE NOCKENWELLE BULLONERIA DEL BLOCCAGGIO SCHRAUBEN UND MUTTERN ZUR DEL CILINDRO BEFESTIGUNG DES ZYLINDERS AREA CIRCOSTANTE ED UMLIEGENDER BEREICH UND ANELLO GROOVES DEL PISTONE GROOVES RING DES KOLBENS AREA CIRCOSTANTE UM DEN KOLBENBOLZEN PERNO PISTONE LIEGENDER BEREICH PARTE INTERNA CILINDRO INNEN...

Page 9: ...ET ZONA ALREDEDOR Y ANILLO AND GROOVE RING BAGUE ELASTIQUE DU PISTON GROOVES DEL PISTON PISTON PIN ZONE AUTOUR DE ZONA ALREDEDOR DEL PERNO SURROUNDING AREA L AXE DU PISTON DEL EMBOLO CYLINDER BORE PARTIE INTERIEURE DU CYLINDRE PARTE INTERNA CILINDRO STEM PISTON CONNECTING TROU DE CONNEXION PIVOT DE TALADRO DE CONEXION PERNO PIN HOLE CONNEXION TIGE ET PISTON DE UNION VARILLA Y PISTON CONNECTING GRA...

Page 10: ...tena Schraube Kettenspannschuh 12 7 Tappoolio Ölstopfen 53 9 Dado esterno frizione Aussenmutter Kupplung 53 9 Dado guida frizione Schraubenmutter Kupplungsführung 53 9 Dado volano Schraubenmutter Schwungrad 3 9 Viti pompa olio Schrauben Ölpumpe 11 8 Viti coperchio testa cilindro Schrauben Zylinderkopfhaube 11 8 Candela Zündkerze 13 7 Girante pompa acqua FlügelradWasserpumpe Nota Nota Nota Nota Not...

Page 11: ...uchon huile Tapón aceite Clutch external nut Ecrou extérieur embrayage Tuerca exterior embrague Clutch guide nut Ecrou glissière embrayage Tuerca guía embrague Flywheel nut Ecrou volant Tuerca volante Oil pump screws Vis pompe à huile Tornillos bomba de aceite Cylinder head cover screws Vis couvercle culasse de cylindre Tornillos tapa culata Spark plug Bougie Bujía Water pump impeller Roue pompe à...

Page 12: ... 52 4x57 8 per corsa mm mal Hub mm mm course mm carrera mm 57 4x57 8 Cilindrata cm3 Hubraum cm3 Displacement cm3 Cylindrée cm3 Cilindrada cm3 125 150 Rapporto di Kompression Compression Rapport de Relación de 9 6 1 compressione sverhältnis ratio compression compresión 9 2 1 Accensione Elektronische Electronic Allumage Encendido elettronica Zündung ignition électronique electrónico CAPACITÀ FASSUNG...

Page 13: ... 1 Alesaggio Bohrung Bore for stroke Alésage pour la Diámetro por 52 4x57 8 per corsa mm mal Hub mm mm course mm carrera mm 57 4x57 8 Cilindrata cm3 Hubraum cm3 Displacement cm3 Cylindrée cm3 Cilindrada cm3 125 150 Rapporto di Kompression Compression Rapport de Relación de 10 1 compressione sverhältnis ratio compression compresión 10 6 1 Accensione Elektronische Electronic Allumage Encendido elett...

Page 14: ...E VENTOLA VENTOLA VENTOLA VENTOLA VENTOLA Svitare le viti V4 e rimuove re il coperchio A A A A A A V V V V V4 4 4 4 4 B B B B B C C C C C V V V V V4 4 4 4 4 E E E E E D D D D D Vergaser lösen und herausnehmen Beim Wiedereinbau Beim Wiedereinbau Beim Wiedereinbau Beim Wiedereinbau Beim Wiedereinbau des Vergasers den des Vergasers den des Vergasers den des Vergasers den des Vergasers den Zustand der...

Page 15: ...ntical one if necessary new identical one if necessary new identical one if necessary new identical one if necessary new identical one if necessary Remove the upper C and lower D air conveyor Unscrew the screws V4 and extract the fan E AIR COOLED AIR COOLED AIR COOLED AIR COOLED AIR COOLED ENGINES ENGINES ENGINES ENGINES ENGINES Note Note Note Note Note The following pages contains the instruction...

Page 16: ...e nel carter D D D D D1 1 1 1 1 A A A A A B B B B B C C C C C D D D D D V V V V V Darauf achten die Darauf achten die Darauf achten die Darauf achten die Darauf achten die Unterlegscheibe C Unterlegscheibe C Unterlegscheibe C Unterlegscheibe C Unterlegscheibe C nicht zu verlieren nicht zu verlieren nicht zu verlieren nicht zu verlieren nicht zu verlieren AUSBAUSCHWUNGRAD AUSBAUSCHWUNGRAD AUSBAUSCH...

Page 17: ...eel A loose the nut D1 and screw the specific extractor Note Note Note Note Note The flywheel can be removed by means of the extractor B the same used for Madison 125 150 Minarelli Yamaha engine removal Flywheel is timed when the notch Flywheel is timed when the notch Flywheel is timed when the notch Flywheel is timed when the notch Flywheel is timed when the notch D matches the V on the cover D m...

Page 18: ...pick up B Liberare il cavo C senza l ausilio di attrezzi ed estrar re il gruppo statore V V V V V A A A A A V V V V V V V V V V2 2 2 2 2 B B B B B C C C C C AUSBAUSTATOR AUSBAUSTATOR AUSBAUSTATOR AUSBAUSTATOR AUSBAUSTATOR Beide Schrauben V lockern Schrauben V2 lockern Plättchen A entfernen Beide Befestigungsschrauben lockern und Pickup B entfernen Kabel C lösen ohne Werkzeuge zu verwenden und Stat...

Page 19: ... STATORREMOVAL STATORREMOVAL Unscrew the two screws V Unscrew the screws V2 Remove the plate A Unscrew the two fastening screws and remove the pickup B Release the cable C without using any tool and extract the stator unit DESMONTAJE ESTATOR DESMONTAJE ESTATOR DESMONTAJE ESTATOR DESMONTAJE ESTATOR DESMONTAJE ESTATOR Aflojar los dos tornillos V Aflojar los tornillos V2 Quitar la plaquita A Aflojar ...

Page 20: ...langia D comprensiva di ruota libera prestando at tenzione alla chiavetta sull al bero V V V V V8 8 8 8 8 A A A A A B B B B B C C C C C V V V V V3 3 3 3 3 D D D D D AUSBAU FREILAUF AUSBAU FREILAUF AUSBAU FREILAUF AUSBAU FREILAUF AUSBAU FREILAUF Schrauben V8 lockern Hinweis Hinweis Hinweis Hinweis Hinweis Zwei Schrauben sind länger A B Um das Gehäuse zu lösen mit dem Gummihammer leicht darauf klopf...

Page 21: ...crews V8 Note Note Note Note Note Two of the screws are longer A B Release the cover by tapping it gently by a rubber hammer and extract it Loose the ring nut C clockwise Remove the shim Extract the sprocket Unscrew the screws V3 and remove the flanges D along with the freewheel handling with care the key on the shaft Aflojar el casquillo C en el sentido de las agujas del reloj Quitar el anillo de...

Page 22: ...i che seguono si riferisco no ai motori a liquido A A A A A V V V V V V V V V V2 2 2 2 2 B B B B B AUSBAU KETTENSPANNER AUSBAU KETTENSPANNER AUSBAU KETTENSPANNER AUSBAU KETTENSPANNER AUSBAU KETTENSPANNER Um Zugriff auf den Kettenspanner zu erhalten den Stopfen A ausschrauben Schraube V im Uhrzeigersinn drehen Schrauben V2 lockern Kettenspanner B entfernen Position des Kettenspanners beim Wiederein...

Page 23: ...urn the screw V clockwise Unscrew the screws V2 Remove the chain tensioner unit B Chain tensioner position during reassemby Chain tensioner operating position Note Note Note Note Note From now on engine timing and tune up procedures are practically the same for both air and liquid cooled engines The pictures refer to liquid cooled engines DESMONTAJE TENSOR DE DESMONTAJE TENSOR DE DESMONTAJE TENSOR...

Page 24: ...simetro C Bloccare il dado e ricontrolla re il gioco valvole A A A A A V V V V V4 4 4 4 4 1 1 1 1 1 2 2 2 2 2 T T T T T P M S P M S P M S P M S P M S C C C C C B B B B B PRÜFUNG PRÜFUNG PRÜFUNG PRÜFUNG PRÜFUNG EINSTELLUNG EINSTELLUNG EINSTELLUNG EINSTELLUNG EINSTELLUNG VENTILSPIEL VENTILSPIEL VENTILSPIEL VENTILSPIEL VENTILSPIEL Diese Arbeit bei kaltem Motor ausführen Zylinderkopfhaube A abnehmen d...

Page 25: ... 1 2 on the flywheel cover Insert the key on the flywheel check nut and turn it clockwise until the T notch punched on the rotor matches the reference on the cover Also check that the piston reaches the top dead center TDC Check and adjust valve clearance Intake 0 1 mm Intake 0 1 mm Intake 0 1 mm Intake 0 1 mm Intake 0 1 mm Exhaust 0 1 mm Exhaust 0 1 mm Exhaust 0 1 mm Exhaust 0 1 mm Exhaust 0 1 mm...

Page 26: ...dro pistone usurati Se la compressione è troppo elevata significa che si sono formati dei depositi di carbonio nella camera della com bustione e sulla testa del pistone A A A A A F F F F F B B B B B ZÜNDUNGSEINSTELLUNG ZÜNDUNGSEINSTELLUNG ZÜNDUNGSEINSTELLUNG ZÜNDUNGSEINSTELLUNG ZÜNDUNGSEINSTELLUNG Die CDI Einheit ist nicht justierbar Sollte die Zündungseinstellung nicht richtig sein das Zündsystem...

Page 27: ... ignition advance Speed up idling to 4000 rpm CYLINDER COMPRESSION CYLINDER COMPRESSION CYLINDER COMPRESSION CYLINDER COMPRESSION CYLINDER COMPRESSION Warm the engine up before checking compression Remove the central cover the spark plug nipple and the spark plug Insert the pressure gauge Open the throttle completely and press the starter button Compression Compression Compression Compression Comp...

Page 28: ...interno verso l esterno von innen nach aussen Gioco girante Spiel Flügelrad 0 15 0 20 0 25 esterno verso la pompa von aussen zur Pumpe Gioco parte terminale girante Spiel Endstück Flügelrad 0 04 0 09 0 12 verso la pompa zur Pumpe OLIO MOTORE OLIO MOTORE OLIO MOTORE OLIO MOTORE OLIO MOTORE Capacità olio motore In fase di smontaggio 1 1 litri 1 1 litri 1 1 litri 1 1 litri 1 1 litri Al cambio 0 9 lit...

Page 29: ...etely when it reaches its operating limits After assembling the oil pump check it for leaking TROUBLESHOOTING TROUBLESHOOTING TROUBLESHOOTING TROUBLESHOOTING TROUBLESHOOTING Low oil level Low oil level Low oil level Low oil level Low oil level Oil natural consumption Oil dripping Worn seals Worn valve guide Worn valve guide seal Oil contamination Oil contamination Oil contamination Oil contaminati...

Page 30: ...Nota Nota Nota Nota Nota Praticare un segno di ri ferimento sulla catena in modo che possa essere rimontata nello stesso senso di rotazio ne V V V V V A A A A A B B B B B A A A A A C C C C C AUSBAU ÖLPUMPE AUSBAU ÖLPUMPE AUSBAU ÖLPUMPE AUSBAU ÖLPUMPE AUSBAU ÖLPUMPE Kühlflüssigkeit abfließen lassen Wasserpumpe entfernen Seite 126 Rechte Schutzhaube Motorblock entfernen Seite 114 Den vom Anlassmotor...

Page 31: ... controlled by the AC generator starter motor page 108 Unscrew the screw V Remove the oil separator cover A Remove the circlip B Remove chain sprocket C Extract the chain sprocket spindle Remove the chain Note Note Note Note Note We suggest you to mark the chain so that it will be easier to fit it back according to the same direction of rotation DESMONTAJE BOMBA DE ACEITE DESMONTAJE BOMBA DE ACEIT...

Page 32: ...esterna A Gioco massimo Gioco massimo Gioco massimo Gioco massimo Gioco massimo vedi tabella pag 28 B B B B B V V V V V2 2 2 2 2 A A A A A B B B B B A A A A A A A A A A A A A A A B B B B B Schrauben V2 lockern Ölabscheider A entfernen und Ölpumpe B herausnehmen KONTROLLE KONTROLLE KONTROLLE KONTROLLE KONTROLLE ÖLPUMPE ÖLPUMPE ÖLPUMPE ÖLPUMPE ÖLPUMPE Spiel zwischen Pumpengehäuse und externem Flügel...

Page 33: ...he clearance between the pump body and the outside impeller A Maximum clearance Maximum clearance Maximum clearance Maximum clearance Maximum clearance see table at page 28 Measure the clearance between the inner B and outside A impellers Maximum clearance Maximum clearance Maximum clearance Maximum clearance Maximum clearance see table at page 28 Aflojar los tornillos V2 Quitar el separador de ac...

Page 34: ...ne della pompa Verificare che l albero della pompa ruoti liberamente sen za attriti anomali A A A A A B B B B B E E E E E B B B B B D D D D D C C C C C Spiel zwischen Flügelradende und Pumpengehäuse messen Höchstspiel Höchstspiel Höchstspiel Höchstspiel Höchstspiel siehe Tabelle S 28 ZUSAMMENBAU ZUSAMMENBAU ZUSAMMENBAU ZUSAMMENBAU ZUSAMMENBAU ÖLPUMPE ÖLPUMPE ÖLPUMPE ÖLPUMPE ÖLPUMPE Das externe und...

Page 35: ...OIL PUMP OIL PUMP ASSEMBLY ASSEMBLY ASSEMBLY ASSEMBLY ASSEMBLY Fit the outside impeller the inner impeller and the pump spindle A inside the pump body Fit the pump spindle aligning its flat part with the internal impeller flat part Fit the pin B Fit the pump cover C aligning the hole D with the dowel B Tighten the screw E to secure the pump cover Check that pump spindle turns freely without irregu...

Page 36: ...lio Avvitare e serrare la vite V Installare il meccanismo co mandato dal motorino di av viamento del generatore A C pag 108 B B B B B A A A A A V V V V V2 2 2 2 2 E E E E E C C C C C D D D D D V V V V V F F F F F EINBAU ÖLPUMPE EINBAU ÖLPUMPE EINBAU ÖLPUMPE EINBAU ÖLPUMPE EINBAU ÖLPUMPE Ölpumpe und Abscheider A installieren Schrauben V2 einschrauben und festziehen Sicherstellen dass die Pumpenwell...

Page 37: ...ator A Screw and tighten the screws V2 Check that the pump spindle turns freely Set the oil pump arrow B up Fit the oil pump transmission chain C and the crown gear D Fit the circlip E on the pump spindle Fit the oil separator cover F Screw and tighten the screw V Remove the device controlled by the AC generator starter motor page 108 INSTALACION BOMBA DE INSTALACION BOMBA DE INSTALACION BOMBA DE ...

Page 38: ...i mo libdeno o olio motore alle parti mobili guida valvola e alle superfici scorrevoli del braccio valvola per una lubrifica zione iniziale ZYLINDERKOPF VENTILE ZYLINDERKOPF VENTILE ZYLINDERKOPF VENTILE ZYLINDERKOPF VENTILE ZYLINDERKOPF VENTILE HINWEISE HINWEISE HINWEISE HINWEISE HINWEISE Die Eingriffe am Zylinderkopf können mit im Rahmen eingebautem Motor vorgenommen werden Vorerst die Kühlflüssi...

Page 39: ...without dismantling the engine from the frame First drain the coolant During disassembly place the removed components in order then fit them according to the reverse order when reassembly Afterdisassembly cleantheremoved components and dry them with compressed air Valve rockers get lubricated by the engine oil through specific holes on the cylinder head For an effective lubrication grease the valv...

Page 40: ...anciere Kipphebelwelle outside diameter l arbre du balancier del balancín Larghezza sede Breite Width of Largeur du siège de Ancho asiento de valvola Ventilsitz valve seat soupape válvula Diametro esterno Aussendurchmesser Valve stem Diamètre externe de Diámetro exterior stelo valvola Ventilschaft outside diameter la tige de soupape vástago de válvula Diametro interno Innendurchmesser Valve guide ...

Page 41: ... 30 8763 30 75 30 75 EX 30 4081 30 4081 30 26 30 26 IN 10 00 10 018 10 00 10 018 10 10 10 10 EX 10 00 10 018 10 00 10 018 10 10 10 10 IN 9 972 9 987 9 972 9 987 9 9 9 9 EX 9 972 9 987 9 972 9 987 9 9 9 9 IN 1 2 1 2 1 8 1 8 EX 1 2 1 2 1 8 1 8 IN 4 990 4 975 4 990 4 975 4 925 4 925 EX 4 970 4 955 4 970 4 955 4 915 4 915 IN 5 00 5 012 5 00 5 012 5 03 5 03 EX 5 00 5 012 5 00 5 012 5 03 5 03 IN 0 010 0...

Page 42: ... della valvola rotta Albero a camme e bilanciere usurati Tensionatore catena camma usurato Albero a camme danneggiato o usurato MÖGLICHE LÖSUNGEN FÜR BESTIMMTE MÖGLICHE LÖSUNGEN FÜR BESTIMMTE MÖGLICHE LÖSUNGEN FÜR BESTIMMTE MÖGLICHE LÖSUNGEN FÜR BESTIMMTE MÖGLICHE LÖSUNGEN FÜR BESTIMMTE PROBLEME PROBLEME PROBLEME PROBLEME PROBLEME Eine Prüfung der Verdichtung bzw ungewöhnliche Motorgeräusche könne...

Page 43: ...orrect valve timing Valve spring failure Valve bad running along the seat Cylinder head gasket leak Cylinder head failure or buckling Spark plug incorrect fitting High compression High compression High compression High compression High compression Too much carbon in the combustion chamber White fumes from the exhaust White fumes from the exhaust White fumes from the exhaust White fumes from the ex...

Page 44: ...re le viti V2 Rimuovere i quattro dadi C Rimuovere la sede D dell al bero a camme A A A A A V V V V V4 4 4 4 4 B B B B B E E E E E V V V V V2 2 2 2 2 C C C C C D D D D D AUSBAU AUSBAU AUSBAU AUSBAU AUSBAU ZYLINDERKOPFHAUBE ZYLINDERKOPFHAUBE ZYLINDERKOPFHAUBE ZYLINDERKOPFHAUBE ZYLINDERKOPFHAUBE Haube A abnehmen dazu die Schrauben V4 lockern AUSBAU NOCKENWELLE AUSBAU NOCKENWELLE AUSBAU NOCKENWELLE A...

Page 45: ... REMOVAL REMOVAL REMOVAL REMOVAL Remove the cover A unscrewing the screws V4 CAMSHAFT REMOVAL CAMSHAFT REMOVAL CAMSHAFT REMOVAL CAMSHAFT REMOVAL CAMSHAFT REMOVAL Turn the magnet flywheel until the T on the flywheel is aligned with the index on the cover Set the hole B determining TDC as indicated in the picture Remove the chain tensioner E Remove the screws V2 Remove the four nuts C Remove the cam...

Page 46: ...E ALBERO A CAMME Estrarre l albero B del bilan ciere valvola utilizzando una vite M6 C Rimuovere il bilanciere della valvola D A A A A A B B B B B C C C C C D D D D D Kette vom Getriebe abnehmen und Nockenwelle entfernen KONTROLLE KONTROLLE KONTROLLE KONTROLLE KONTROLLE NOCKENWELLE NOCKENWELLE NOCKENWELLE NOCKENWELLE NOCKENWELLE Jede einzelne Nockennase auf Verschleiss bzw Ausbrüche prüfen Nockene...

Page 47: ...ION INSPECTION INSPECTION INSPECTION Check cam lobes for wear or damage Measure the height of the cam lobes Check each cam bearing A clearance Also check them for any possible damage CAMSHAFT HOUSING CAMSHAFT HOUSING CAMSHAFT HOUSING CAMSHAFT HOUSING CAMSHAFT HOUSING DISASSEMBLY DISASSEMBLY DISASSEMBLY DISASSEMBLY DISASSEMBLY Extract the valve rocker spindle B by means of a M6 screw C Remove the v...

Page 48: ...O CILINDRO Liberareilcarburatoreerimuo verlo Rimuovere il manicotto del l acqua Sfilare il gruppo testa cilindro con cautela A A A A A B B B B B KONTROLLE AUFNAHME KONTROLLE AUFNAHME KONTROLLE AUFNAHME KONTROLLE AUFNAHME KONTROLLE AUFNAHME DER NOCKENWELLE DER NOCKENWELLE DER NOCKENWELLE DER NOCKENWELLE DER NOCKENWELLE Prüfen ob die Aufnahme der Nockenwelle A und der Kipphebelwellen B Verschleiss b...

Page 49: ... spindles B for wear or possible damage Check the inner diameter of each valve rocker Operating limits Operating limits Operating limits Operating limits Operating limits IN 10 10 mm OUT 10 10 mm Check the outside diameter of each rocker spindle Operating limits Operating limits Operating limits Operating limits Operating limits IN 9 90 mm OUT 9 90 mm CYLINDER HEAD CYLINDER HEAD CYLINDER HEAD CYLI...

Page 50: ...uarnizione E Impedire l accesso di corpi estranei all interno del moto re ponendo un panno attorno alla biella B B B B B A A A A A C C C C C D D D D D E E E E E Dichtung A und Zentrierbuchsen B entfernen Schlauch C lösen Zylinder vorsichtig herausnehmen Dabei den Kolben halten und darauf achten dass keine Fremdkörper in den Motor eindringen Zentrierbuchsen D entfernen Dichtung E entfernen Einen Tu...

Page 51: ...ease the hose C Extract the cylinder with care holding the piston in a vice and preventing any foreign body from entering the engine Remove the centering bushings D Remove the gasket E Place a piece of cloth around the connecting rod to prevent any foreign body from entering the engine Quitar la empaquetadura A y los casquillos de centraje B Soltar el manguito C Extraer el cilindro con cuidado suj...

Page 52: ...tilizzo Limiti d utilizzo Limiti d utilizzo Interno IN EX 29 3 mm sostituire se inferiore Esterno IN EX 32 0 mm sostituire se inferiore B B B B B A A A A A AUSBAU ZYLINDERKOPF AUSBAU ZYLINDERKOPF AUSBAU ZYLINDERKOPF AUSBAU ZYLINDERKOPF AUSBAU ZYLINDERKOPF Querkeile der Ventilfeder Ventilteller Ventilfedern Ventilsitze und Dichtungsringe des Ventilschafts entfernen Federn mit Hilfe eines Presswerkz...

Page 53: ...hamber B combustion chamber B Handle with care the cylinder Handle with care the cylinder Handle with care the cylinder Handle with care the cylinder Handle with care the cylinder head overlapping surfaces head overlapping surfaces head overlapping surfaces head overlapping surfaces head overlapping surfaces CHECK CHECK CHECK CHECK CHECK Cylinder head Cylinder head Cylinder head Cylinder head Cyli...

Page 54: ...re la guida catena A Installare le boccole di cen traggio B edunanuovaguar nizione C testa cilindro Installare la testa cilindro e posizionare la catena C C C C C A A A A A B B B B B VENTIL VENTILFÜHRUNG VENTIL VENTILFÜHRUNG VENTIL VENTILFÜHRUNG VENTIL VENTILFÜHRUNG VENTIL VENTILFÜHRUNG Sicherstellen dassdieVentilenicht verbogen sind bzw Brandspuren oder Kratzer aufweisen und dass dieSchäftekeinen...

Page 55: ...rating limits IN 4 925 mm replace if lower OUT 4 915 mm replace if lower CYLINDER HEAD CYLINDER HEAD CYLINDER HEAD CYLINDER HEAD CYLINDER HEAD ASSEMBLY ASSEMBLY ASSEMBLY ASSEMBLY ASSEMBLY Fit the valve spring housing and the stem seal Grease each valve stem with engine oil and fit the valves inside the guides Make sure to replace the valve stem seals with new ones Tap the valve stems lightly by me...

Page 56: ... re A valvola di scarico sulla parte della sede dell albero a camme contrassegnata da EX Pulire l albero del bilanciere valvola di aspirazione da ogni traccia di grasso prima del l installazione Aufnahme der Nockenwelle einsetzen Erst die Kipphebel der Ein und Auslassventile unddanndieKipphebelwellen einbauen EINBAU EINBAU EINBAU EINBAU EINBAU NOCKENWELLE NOCKENWELLE NOCKENWELLE NOCKENWELLE NOCKEN...

Page 57: ... the exhaust valve rocker spindle A on the EX marked on the camshaft housing Before assembly clean any grease residue off the intake valve rocker spindle CAMSHAFT CAMSHAFT CAMSHAFT CAMSHAFT CAMSHAFT FITTING FITTING FITTING FITTING FITTING Turn the flywheel until the T is aligned with the cover index Set the hole B as shown in the picture Fit the centering bushings C Montar el alojamiento del árbol...

Page 58: ... Coppia Coppia Coppia vedi tab pag 10 A A A A A A A A A A V V V V V2 2 2 2 2 B B B B B C C C C C D D D D D E E E E E V V V V V F F F F F Nockenwellenaufnahme Unterlegscheiben und Schraubenmuttern in den Zylinderkopf einlegen Die vier Schraubenmuttern A und die Schrauben V2 festziehen Motoröl auf die Gewinde auftragen Schraubenmutternkreuzweise festziehen 2 oder 3 mal ErstdieSchraubenmutternam Zyli...

Page 59: ... then the screws V2 Replace the chain tensioner gasket B Release the catch circlip C and press on the stem D Fit the chain tensioner and tighten the screws V Fit the tensioner spring E and tighten the fastening screws Torque Torque Torque Torque Torque see table at page 10 CYLINDER HEAD CYLINDER HEAD CYLINDER HEAD CYLINDER HEAD CYLINDER HEAD COVER FITTING COVER FITTING COVER FITTING COVER FITTING ...

Page 60: ...erno pistone e foro del perno usurati Pistone installato in modo non corretto KOLBEN KOLBEN KOLBEN KOLBEN KOLBEN HINWEISE HINWEISE HINWEISE HINWEISE HINWEISE Eingriffe am Zylinder und am Kolben können auch mit im Rahmen eingebautem Motor ausgeführt werden Beim Einbau des Zylinders eine neue Dichtung einlegen undsicherstellen dassdieZentrierbuchsenrichtiggelagert sind Nach dem Ausbau die entfernten...

Page 61: ...ar compression compression compression compression compression Worn or demaged compression rings and cylinder Worn stuck or broken piston rings High compression High compression High compression High compression High compression Too much carbon in the combustion chamber or on the piston head High grade of smoke from the High grade of smoke from the High grade of smoke from the High grade of smoke ...

Page 62: ...elastiche durante re le fasce elastiche durante la rimozione la rimozione la rimozione la rimozione la rimozione Pulire i depositi di carbonio dalle scanalature delle fasce elastiche sul pistone A A A A A AUSBAU KOLBEN AUSBAU KOLBEN AUSBAU KOLBEN AUSBAU KOLBEN AUSBAU KOLBEN Haltering des Kolbenbolzens Zapfen entfernen Kolbenbolzen herausziehen Kolben entfernen Beim Wiedereinbau Beim Wiedereinbau B...

Page 63: ... with a new one when reassembling the cylinder reassembling the cylinder reassembling the cylinder reassembling the cylinder reassembling the cylinder Check the piston the piston pin and the piston rings Remove the piston rings Handle with care the piston Handle with care the piston Handle with care the piston Handle with care the piston Handle with care the piston rings during removal rings durin...

Page 64: ...etro esterno del perno del pistone spinot to Limite d utilizzo Limite d utilizzo Limite d utilizzo Limite d utilizzo Limite d utilizzo 14 96 mm sostituire se inferiore Kolbenringe in den Kolben einlegen und das Spiel Kolbenring Nut messen Einsatzgrenze Einsatzgrenze Einsatzgrenze Einsatzgrenze Einsatzgrenze Hoch Hoch Hoch Hoch Hoch 0 09 mm Falls der Wert größer ist au stauschen Niedrig Niedrig Nie...

Page 65: ... the base of the cylinder Pull each piston ring inside the cylinder by means of the piston head Measure the piston ring gap Operating limits Operating limits Operating limits Operating limits Operating limits 0 5 mm replace if higher Measure the piston hole inner diameter Operating limits Operating limits Operating limits Operating limits Operating limits 15 04 mm replace if higher Measure the pis...

Page 66: ...imite d utilizzo 0 05 mm sostituire se superiore 1 1 1 1 1 2 2 2 2 2 3 3 3 3 3 Aussendurchmesser des Kolbens messen Die Messung erfolgt bei einem Abstand von 9 mm vom Boden und einer Winkelstellung von 90 dem Kolbenbolzenaugegegenüber Einsatzgrenze Einsatzgrenze Einsatzgrenze Einsatzgrenze Einsatzgrenze 57 90 mm Falls der Wert kleiner ist austauschen Spiel Kolben Kolbenbolzen messen Einsatzgrenze ...

Page 67: ...ting limits 58 10 mm replace if lower Measure piston piston pin clearance Operating limits Operating limits Operating limits Operating limits Operating limits 0 1 mm replace if higher The real roundness The real roundness The real roundness The real roundness The real roundness results from the difference between the values measured in X and Y directions Cylindricity Cylindricity Cylindricity Cyli...

Page 68: ...TONE PISTONE PISTONE PISTONE Installare il pistone il perno pistone e un nuovo fermo per no pistone Posizionare il marchio IN del pistone sul lato della valvola di aspirazione Mettere uno straccio sul ba samento per evitare che il fer mo del perno pistone cada nel basamento A A A A A B B B B B A A A A A B B B B B Innendurchmesser des Pleuelkopfes messen Einsatzgrenze Einsatzgrenze Einsatzgrenze Ei...

Page 69: ...mbling the piston rings After reassembling the piston rings make sure that the pistons turn make sure that the pistons turn make sure that the pistons turn make sure that the pistons turn make sure that the pistons turn freely without unusual frictions freely without unusual frictions freely without unusual frictions freely without unusual frictions freely without unusual frictions Stagger the pis...

Page 70: ...parallele o a 90 rispetto al perno del pistone rispetto al perno del pistone rispetto al perno del pistone rispetto al perno del pistone rispetto al perno del pistone Avvitare e serrare la vite V A A A A A B B B B B C C C C C V V V V V EINBAU ZYLINDER EINBAU ZYLINDER EINBAU ZYLINDER EINBAU ZYLINDER EINBAU ZYLINDER Die Oberfläche A sorgfältig säubern bevor man eine neue Dichtung einlegt Zentrierbuc...

Page 71: ...ton rings with Handle the piston rings with care care care care care The piston ring gaps must not be The piston ring gaps must not be The piston ring gaps must not be The piston ring gaps must not be The piston ring gaps must not be parallel or at 90 with respect to the parallel or at 90 with respect to the parallel or at 90 with respect to the parallel or at 90 with respect to the parallel or at...

Page 72: ... 19 0 17 5 Spessore guarnizione frizione Dicke Kupplungsdichtung 3 963 4 037 2 0 Dia int campana frizione InnendurchmesserKupplungsglocke 130 0 130 2 130 5 Lungh non compressa Entspannte Länge 88 3 83 2 molla puleggia motrice Feder Antriebsriemenscheibe Dia est puleggia condotta AussendurchmesserAbtriebscheibe 33 965 33 985 33 94 Dia int puleggia condotta Innendurchmesser Abtriebscheibe 34 00 34 0...

Page 73: ...AND DRIVING AND DRIVING AND DRIVING AND DRIVING AND DRIVE PULLEY KICK DRIVE PULLEY KICK DRIVE PULLEY KICK DRIVE PULLEY KICK DRIVE PULLEY KICK STARTER STARTER STARTER STARTER STARTER WARNING WARNING WARNING WARNING WARNING You can operate on the driving pulley the clutch and the driven pulley without dismantling the engine Try to avoid staining the transmission chain or the pulley surface with grea...

Page 74: ...hia di trasmissione non presenti screpolature o segni evidenti di usura eccessiva In caso contrario sostituirla A A A A A B B B B B C C C C C D D D D D D D D D D AUSBAU AUSBAU AUSBAU AUSBAU AUSBAU ANTRIEBSGEHÄUSE ANTRIEBSGEHÄUSE ANTRIEBSGEHÄUSE ANTRIEBSGEHÄUSE ANTRIEBSGEHÄUSE Schrauben zur Befestigung des Gehäuses lösen Zentrierbuchsen A entfernen Dichtung B entfernen Hinweis Hinweis Hinweis Hinwe...

Page 75: ...bushings A Remove the gasket B Note Note Note Note Note Replace the gasket when reassembling DRIVING PULLEY DRIVING PULLEY DRIVING PULLEY DRIVING PULLEY DRIVING PULLEY REMOVAL REMOVAL REMOVAL REMOVAL REMOVAL Hold the driving pulley by means of cutting pliers C and remove the driving pulley nut and washer Remove the driving pulley external part D Remove the toothed chain from the driving pulley Che...

Page 76: ... di utilizzo Limite di utilizzo Limite di utilizzo Limite di utilizzo vedi tab pag 72 sostituire se supe riore A A A A A B B B B B D D D D D C C C C C Antriebsriemenscheibe A ausbauen Nabe B der Antriebsriemenscheibe entfernen Haube C abnehmen Rollen D entfernen KONTROLLE KONTROLLE KONTROLLE KONTROLLE KONTROLLE Prüfen ob die Rollen Verschleiss oder Ausbrüche aufweisen Aussendurchmesser jeder einze...

Page 77: ...CK CHECK CHECK CHECK Check each roller for wear or damage Measure each roller outside diameter Operating limits Operating limits Operating limits Operating limits Operating limits 16 00 mm replace if lower Measure the inner diameter of the driving pulley hub hole Operating limits Operating limits Operating limits Operating limits Operating limits see table at page 72 replace if higher Desmontar el...

Page 78: ...NTAGGIO MONTAGGIO MONTAGGIO MONTAGGIO Installare i rulli A nella pu leggia motrice mobile Installare la calotta B A A A A A B B B B B Prüfen ob die Nabe der Antriebsriemenscheibe Verschleiss oder Ausbrüche aufweist Aussendurchmesser messen Einsatzgrenze Einsatzgrenze Einsatzgrenze Einsatzgrenze Einsatzgrenze siehe Tab S 72 Falls der Wert kleiner ist austauschen EINBAU EINBAU EINBAU EINBAU EINBAU R...

Page 79: ...lley hub for wear o damage Measure its outside diameter Operating limits Operating limits Operating limits Operating limits Operating limits see table at page 72 replace if lower ASSEMBLY ASSEMBLY ASSEMBLY ASSEMBLY ASSEMBLY Fit the rollers A into the movable driving pulley Fit the cover B Controlar el estado de desgaste o deterioro del cubo polea motriz Medir el diámetro exterior Límite de empleo ...

Page 80: ...gia motrice puleggia motrice puleggia motrice puleggia motrice puleggia motrice A A A A A Nabe A in die bewegliche Antriebsriemenscheibe einlegen EINBAU EINBAU EINBAU EINBAU EINBAU Die bewegliche Antriebsriemenscheibe in die Antriebswelle einbauen Zahnriemen wieder einlegen Aussenteil der Antriebsriemenscheibe einbauen Unterlegscheibe und Schraubenmutter einlegen Antriebsriemenscheibe mit Hilfe de...

Page 81: ...cutting pliers tighten to the specified torque Torque Torque Torque Torque Torque see tab at page 10 Do not pour oil or drip grease Do not pour oil or drip grease Do not pour oil or drip grease Do not pour oil or drip grease Do not pour oil or drip grease onto the transmission chain onto the transmission chain onto the transmission chain onto the transmission chain onto the transmission chain or t...

Page 82: ...te di utilizzo Limite di utilizzo Limite di utilizzo Limite di utilizzo Limite di utilizzo 130 5 mm sostituire nel caso risulti maggiore B B B B B A A A A A KUPPLUNG ABTRIEBSCHEIBE KUPPLUNG ABTRIEBSCHEIBE KUPPLUNG ABTRIEBSCHEIBE KUPPLUNG ABTRIEBSCHEIBE KUPPLUNG ABTRIEBSCHEIBE Antriebsgehäuse entfernen Antriebsriemenscheibe und Antriebsriemen entfernen Kupplungsglocke A mit Hilfe der Universalzange...

Page 83: ...over Remove the driving pulley and the transmission chain Hold the clutch housing A with cutting pliers and remove the clutch housing nut B Remove the clutch housing CHECK CHECK CHECK CHECK CHECK Check the clutch housing for wear or damage Measure the clutch housing inner diameter Operating limits Operating limits Operating limits Operating limits Operating limits 130 5 mm replace if higher EMBRAG...

Page 84: ...Allentare il compressore mol la della frizione e smontare il gruppo frizione puleggia con dotta Rimuovere il mozzo A A A A A B B B B B Sicherstellen dass die Kupplungsbeläge keinen Verschleiss bzw Ausbrüche aufweisen DieStärkederReibungsfläche messen Einsatzgrenze Einsatzgrenze Einsatzgrenze Einsatzgrenze Einsatzgrenze 2 0 mm Falls der Wert kleiner ist au stauschen AUSBAU AUSBAU AUSBAU AUSBAU AUSB...

Page 85: ...VEN PULLEY CLUTCH DRIVEN PULLEY CLUTCH DRIVEN PULLEY CLUTCH DRIVEN PULLEY CLUTCH DRIVEN PULLEY DISASSEMBLY DISASSEMBLY DISASSEMBLY DISASSEMBLY DISASSEMBLY Hold the clutch driven pulley unit by means of the clutch spring compressor A Hold the compressor in a vice and remove the clutch threaded plate Nut key 39 mm B Loose the clutch spring compressor and disassemble the clutch driven pulley unit Rem...

Page 86: ...i utilizzo Limite di utilizzo Limite di utilizzo Limite di utilizzo Limite di utilizzo 33 94 mm sostituire se inferiore A A A A A B B B B B C C C C C D D D D D Stifte A der Führungsrollen und anschließend die Führungsrollen B herausnehmen Den Zustand der O Ring Dichtung C prüfen und ggf austauschen Ölabdichtung D der beweglichen Abtriebscheibe entfernen KONTROLLE KONTROLLE KONTROLLE KONTROLLE KONT...

Page 87: ...pulley CHECK CHECK CHECK CHECK CHECK Measure the length of the driven pulley spring when released Operating limits Operating limits Operating limits Operating limits Operating limits 83 2 mm replace if lower Check the driven pulley unit for wear or damage Measure the driven pulley outside diameter Operating limits Operating limits Operating limits Operating limits Operating limits 33 94 mm replace...

Page 88: ...posita scanalatura Applicare grasso nell area in terna della puleggia condotta Inserire un nuovo cuscinetto ad aghi all interno della puleg gia condotta Dispositivo monta cuscinetto A A A A A B B B B B C C C C C Sicherstellen dass die bewegliche Abtriebscheibe keinen Verschleiss oder Ausbrüche aufweist Innendurchmesser der Riemenscheibe messen Einsatzgrenze Einsatzgrenze Einsatzgrenze Einsatzgrenz...

Page 89: ...ace the removed Replace the removed Replace the removed Replace the removed Replace the removed bearing bearing bearing bearing bearing Grease the external bearing Fit a new external bearing with the closed end up Bearing extractor Fit the spring ring in the specific groove Grease the inside of the driven pulley Fit a new bearing inside the driven pulley Bearing extractor Comprobar el estado de de...

Page 90: ...ccia di grasso Applicare grasso agli O ring ed installarli sulla puleggia condotta mobile A A A A A C C C C C B B B B B AUSBAU KUPPLUNG AUSBAU KUPPLUNG AUSBAU KUPPLUNG AUSBAU KUPPLUNG AUSBAU KUPPLUNG Zum Ausbau der Kupplung die Sicherungsfedern A und die Kupplungsbeläge B entfernen WIEDEREINBAU WIEDEREINBAU WIEDEREINBAU WIEDEREINBAU WIEDEREINBAU Die Ausgleichsscheiben auf die Bolzen der Antriebsri...

Page 91: ...LY REASSEMBLY Fit the shims on the timing cover pins C Fit the clutch weights pads and clutch springs on the cover Fit the clutch shoes ensuring them with the circlips CLUTCH DRIVEN CLUTCH DRIVEN CLUTCH DRIVEN CLUTCH DRIVEN CLUTCH DRIVEN PULLEY UNIT PULLEY UNIT PULLEY UNIT PULLEY UNIT PULLEY UNIT Clean the pulley faces and wipe out any grease residue Grease the O rings and fit them on the movable ...

Page 92: ...re la frizione puleggia condotta sull albero A A A A A B B B B B C C C C C Beide Flanschen der Abtriebscheibe zusammenfügen Fett auf die Führungsrollen A und auf die Bolzen der Führungsrollen B auftragen und anschließend in die Bohrungen der Abtriebscheibe einlegen Dichtung C einlegen Fettreste entfernen Abtriebscheibe Feder an der Flanke der Abtriebscheibe und Kupplungsgruppe in das Werkzeug zum ...

Page 93: ...ulley unit the driven pulley face spring and the clutch unit inside the clutch spring compressor Align the the driven pulley face flat surface with the clutch timing cover Compress the unit and fit the clutch cover nut Hold the unit in a vice and tighten the cover nut to the indicated torque value Torque Torque Torque Torque Torque see tab page 10 FITTING FITTING FITTING FITTING FITTING Fit the cl...

Page 94: ...imuovere l innesto azio nato dal motorino di avvia mento insieme alla molla a torsione C Rimuovere il perno del peda le di avviamento e la molla di ritorno D Rimuovere la boccola perno pedale di avviamento A A A A A B B B B B C C C C C D D D D D Kupplungsglocke A einbauen Kupplungsglocke mit Hilfe der Universalzange halten Schraubenmutter der Kupplungshaube einschrauben und festziehen Anziehdrehmo...

Page 95: ...er replacing the gasket if necessary KICK STARTER KICK STARTER KICK STARTER KICK STARTER KICK STARTER REMOVAL REMOVAL REMOVAL REMOVAL REMOVAL Remove the transmission cover Remove the gasket and the centering bushings Remove the kick starter lever Remove gli circlips and the washer from the kick starter pin Turn slightly the kick starter pin to remove the clutch unit operated by thestartermotor alo...

Page 96: ... relativa molla come mostrato in figura Rimontare il carter ed il peda le di avviamento A A A A A B B B B B C C C C C D D D D D F F F F F E E E E E KONTROLLE KONTROLLE KONTROLLE KONTROLLE KONTROLLE Sicherstellen dass der Kickstarter Bolzen A und das Getriebe keinen Verschleiss bzw Ausbrüche aufweisen Sicherstellen dass die Rückstellfeder B nicht defekt oder beschädigt ist Sicherstellen dass die Bu...

Page 97: ...for defects or damage Check the gearbox for wear or damage Check the spring D for wear or demage Check the seats E F for wear FITTING FITTING FITTING FITTING FITTING Fit the kick starter pin bushings and the return spring on the transmission cover Fit the gear unit operated by the starter motor and the spring as shown in the picture Fit the cover and the kick starter back CONTROL CONTROL CONTROL C...

Page 98: ...lbero C CONTROLLO CONTROLLO CONTROLLO CONTROLLO CONTROLLO Verificare lo stato d usura o l eventuale danneggiamento delcontralberoedell ingranag gio A A A A A A A A A A B B B B B C C C C C AUSBAU AUSBAU AUSBAU AUSBAU AUSBAU ENDANTRIEB ENDANTRIEB ENDANTRIEB ENDANTRIEB ENDANTRIEB Antriebsgehäuse entfernen Kupplung Abtriebscheiben entfernen Getriebeöl in ein sauberes Behälter abfließen lassen Befestig...

Page 99: ...SSEMBLY DISASSEMBLY DISASSEMBLY Remove the transmission cover Remove the clutch driven pulleys Drain the transmission oil into a clean container Remove the end transmission cover fastening screws Remove the gasket and the centering bushings A Remove the end gears B and the countershaft C CHECK CHECK CHECK CHECK CHECK Check the countershaft and the gears for wear or damage DESMONTAJE DESMONTAJE DES...

Page 100: ... TRASMISSIONE CARTER DELLA TRASMISSIONE Rimuovere i cuscinetti del carter della trasmissione usan do l estrattore per cuscinetti Rimuovere il paraolio albero finale Sicherstellen dass das Endgetriebe und die entsprechende Welle weder verschlissen noch beschädigt sind Sicherstellen dass die Lager im Antrieb keinen übermäßigen Verschleiss aufweisen und die Ölabdichtung auf Verschleiss bzw Ausbrüche ...

Page 101: ... the oil seal for wear or damage Check the driving shaft for wear or damage BEARING REPLACEMENT BEARING REPLACEMENT BEARING REPLACEMENT BEARING REPLACEMENT BEARING REPLACEMENT TRANSMISSION COVER TRANSMISSION COVER TRANSMISSION COVER TRANSMISSION COVER TRANSMISSION COVER Remove the transmission cover bearings cover by means of a bearing extractor Remove the driving shaft oil seal Comprobar el estad...

Page 102: ... carter sinistro utilizzando l estrattore per cuscinetti Inserire nuovi cuscinetti nel carter sinistro Installareunnuovoparaolioal bero motore Neue Dichtungen in das Antriebsgehäuse einsetzen AUSTAUSCH LAGER LINKES GEHÄUSE AUSTAUSCH LAGER LINKES GEHÄUSE AUSTAUSCH LAGER LINKES GEHÄUSE AUSTAUSCH LAGER LINKES GEHÄUSE AUSTAUSCH LAGER LINKES GEHÄUSE Motorwelle ausbauen Ölabdichtung der Motorwelle entfe...

Page 103: ...T BEARING REPLACEMENT LEFT BEARING REPLACEMENT LEFT BEARING REPLACEMENT LEFT COVER COVER COVER COVER COVER Remove the driving shaft Remove the driving shaft oil seal Remove the left cover bearings by means of a bearing extractor Replace the left cover bearings Replace the driving shaft oil seal Insertar los nuevos cojinetes en la caja de transmisión SUSTITUCION COJINETE SUSTITUCION COJINETE SUSTIT...

Page 104: ...lare le boccole di cen traggio ed una nuova guarni zione Posizionare il carter e fissar lo con le viti A A A A A B B B B B EINBAU EINBAU EINBAU EINBAU EINBAU ENDUNTERSETZUNG ENDUNTERSETZUNG ENDUNTERSETZUNG ENDUNTERSETZUNG ENDUNTERSETZUNG Motorwelle A einbauen Endgetriebe und die entsprechende Welle einbauen Gegenwelle und das entsprechende Getriebe einbauen Unterlegscheibe B aus Kunststoff in die ...

Page 105: ... STEP DOWN GEAR STEP DOWN GEAR ASSEMBLY ASSEMBLY ASSEMBLY ASSEMBLY ASSEMBLY Fit the driving shaft A Fit the end gears and shaft Fit the countershaft and the countershaft gears Fit the resin washer B on the countershaft Fit the centering bushings and replace the gasket Fit the cover with fastening screws MONTAJE REDUCCION MONTAJE REDUCCION MONTAJE REDUCCION MONTAJE REDUCCION MONTAJE REDUCCION FINAL...

Page 106: ... DEL ROTORE RIMOZIONE DEL ROTORE Trattenereilrotoreerimuover ne il dado Rimuovere il rotore con l ap posito estrattore E A A A A A V V V V V V V V V V3 3 3 3 3 E E E E E AUSBAU RECHTES AUSBAU RECHTES AUSBAU RECHTES AUSBAU RECHTES AUSBAU RECHTES GEHÄUSE GEHÄUSE GEHÄUSE GEHÄUSE GEHÄUSE Wasserleitungen A abtrennen Schrauben zur Befestigung des Gehäuses ausschrauben AUSBAUSTATOR AUSBAUSTATOR AUSBAUSTA...

Page 107: ...astening screws STATORREMOVAL STATORREMOVAL STATORREMOVAL STATORREMOVAL STATORREMOVAL Remove the two pickup screws V Remove the stator screws V3 ROTORREMOVAL ROTORREMOVAL ROTORREMOVAL ROTORREMOVAL ROTORREMOVAL Hold the rotor and remove the nut Remove the rotor by means of the specific extractor E DESMONTAJE CARTER DESMONTAJE CARTER DESMONTAJE CARTER DESMONTAJE CARTER DESMONTAJE CARTER DERECHO DERE...

Page 108: ...Verificare lo stato d usura o l eventuale danneggiamento dell ingranaggio folle e dell al bero A A A A A B B B B B B B B B B AUSBAU AUSBAU AUSBAU AUSBAU AUSBAU KUPPLUNG KUPPLUNG KUPPLUNG KUPPLUNG KUPPLUNG ANLASSMOTOR ANLASSMOTOR ANLASSMOTOR ANLASSMOTOR ANLASSMOTOR Losrad A und Antriebswelle entfernen Das angetriebene Rad B entfernen KONTROLLE KONTROLLE KONTROLLE KONTROLLE KONTROLLE Sicherstellen d...

Page 109: ...e the driven gear B CHECK CHECK CHECK CHECK CHECK Check the starter driven gear for wear or damage Measure the gear inner and outside diameter Operating limits Operating limits Operating limits Operating limits Operating limits Inner diam Inner diam Inner diam Inner diam Inner diam 20 15 mm replace if higher Out diameter Out diameter Out diameter Out diameter Out diameter 41 00 mm replace if lower...

Page 110: ...o la chiavetta F con la scana latura G Trattenere il rotore e serrare il dado Coppia Coppia Coppia Coppia Coppia vedi tab pag 10 B B B B B C C C C C E E E E E D D D D D F F F F F G G G G G A A A A A Rollen des Freilaufs A Kolben B und Federn C entfernen Sicherstellen dass keine der RollenundKolbenVerschleiss bzw Ausbrüche aufweisen und prüfen ob die Federn verschlissen oder kaputt sind EINBAU EINB...

Page 111: ...re or wear FITTING FITTING FITTING FITTING FITTING Fit the driven gear D Fit the idle gear E and the starter shaft ROTOR FITTING ROTOR FITTING ROTOR FITTING ROTOR FITTING ROTOR FITTING Fit the rotor aligning the key F with the key way G Hold the rotor and tighten the nut Torque Torque Torque Torque Torque see tab at page 10 Desmontar los rodillos de la rueda libre A los pistones B y los muelles C ...

Page 112: ...o pompa acqua E con l albero pompa dell olio F Serrare le viti di fissaggio car ter Collegare i manicotti dell ac qua A A A A A B B B B B V V V V V2 2 2 2 2 C C C C C D D D D D F F F F F E E E E E EINBAUSTATOR EINBAUSTATOR EINBAUSTATOR EINBAUSTATOR EINBAUSTATOR Stator in das Gehäuse einbauen und mit den drei Schrauben befestigen PICKUP A einbauen und mit den zwei Schrauben V2 befestigen Haltegummi...

Page 113: ...he three screws Fit the PICKUP A and secure it by means of the two screws V2 Fit the cable supporting ring inside the cover COVER FITTING COVER FITTING COVER FITTING COVER FITTING COVER FITTING Fitthetwocenteringbushings C and replace the gasket D Fit the cover aligning the water pump spindle groove E with the oil pump spindle F Tighten the cover fastening screws Connect the water hoses INSTALACIO...

Page 114: ...more del motore Eccessivo rumore del motore Eccessivo gioco del cuscinetto Eccessivo gioco del cuscinetto perno biella Perno pistone e foro perno pistone usurati MOTORBLOCK KURBELWELLE MOTORBLOCK KURBELWELLE MOTORBLOCK KURBELWELLE MOTORBLOCK KURBELWELLE MOTORBLOCK KURBELWELLE HINWEISE HINWEISE HINWEISE HINWEISE HINWEISE In diesem Abschnitt werden die Arbeiten zum Ausbau des Motorblocks beschrieben...

Page 115: ...iver to lever on the matching surfaces When disassembling do not tap the crankcase by a metal hammer Remove the following components before removing the crankcase Cylinder head Cylinder piston Left crankcase cover driving and driven pulleys Alternate current generator starter clutch Rear wheel rear shock absorber Starter motor Oil pump TROUBLESHOOTING TROUBLESHOOTING TROUBLESHOOTING TROUBLESHOOTIN...

Page 116: ...imuovere le viti V5 Rimuovere la guarnizione e le boccole di centraggio Rimuovere l albero a gomiti V V V V V2 2 2 2 2 V V V V V5 5 5 5 5 TRENNEN DES TRENNEN DES TRENNEN DES TRENNEN DES TRENNEN DES MOTORBLOCKS MOTORBLOCKS MOTORBLOCKS MOTORBLOCKS MOTORBLOCKS Kettenspannschuh entfernen Kette herausnehmen Schrauben V2 lockern Schrauben V5 lockern Dichtung und Zentrierbuchsen entfernen Kurbelwelle ent...

Page 117: ...G CRANKCASE DISMANTLING CRANKCASE DISMANTLING CRANKCASE DISMANTLING Remove the chain tensioner shoe Remove the chain Remove the screws V2 Remove the screws V5 Remove the gasket and the centering bushings Remove the crankshaft SEPARACION BLOQUE MOTOR SEPARACION BLOQUE MOTOR SEPARACION BLOQUE MOTOR SEPARACION BLOQUE MOTOR SEPARACION BLOQUE MOTOR Quitar el patín tensor de cadena Quitar la cadena Aflo...

Page 118: ...massima dell albero a gomiti Limiti d utilizzo Limiti d utilizzo Limiti d utilizzo Limiti d utilizzo Limiti d utilizzo 0 10 mm sostituire se superiore A A A A A Ölabdichtung A entfernen KONTROLLE KONTROLLE KONTROLLE KONTROLLE KONTROLLE KURBELWELLE KURBELWELLE KURBELWELLE KURBELWELLE KURBELWELLE Den Raum an der Pleuelkopfseite messen Einsatzgrenze 0 6 mm Falls der Wert größer ist austauschen Innend...

Page 119: ...ECK CHECK CHECK Measure the connecting rod big end gap Operating limits Operating limits Operating limits Operating limits Operating limits 0 6 mm replace if higher Measure the connecting rod small end inner diameter Operating limits Operating limits Operating limits Operating limits Operating limits 15 06 mm replace if higher Measure the crankshaft max stroke Operating limits Operating limits Ope...

Page 120: ...mento sinistro Installare le due boccole di centraggio A ed una nuova guarnizione B 0 20 0 20 0 20 0 20 0 20 0 05 0 05 0 05 0 05 0 05 Assiale Radiale A A A A A B B B B B Spiel des Kurbelwellenlagers messen Einsatzgrenze Einsatzgrenze Einsatzgrenze Einsatzgrenze Einsatzgrenze Axial Axial Axial Axial Axial 0 20 mm Falls der Wert größer ist austauschen Radial Radial Radial Radial Radial 0 05 mm Falls...

Page 121: ...ial 0 20 mm replace if higher Radial Radial Radial Radial Radial 0 05 mm replace if higher CRANKCASE ASSEMBLY CRANKCASE ASSEMBLY CRANKCASE ASSEMBLY CRANKCASE ASSEMBLY CRANKCASE ASSEMBLY Clean the crankcase from any gasket residue Replace the left crankcase oil seal Fit the two centering bushings A and replace the gasket B Medir el juego del cojinete del cigueñal Límite de empleo Límite de empleo L...

Page 122: ...Coppia Coppia Coppia Coppia Coppia 7 8 11 8 Nm V V V V V2 2 2 2 2 A A A A A V V V V V Den rechten Motorblock auf die Kurbelwelle über den linken Motorblock legen Schrauben V2 einschrauben und festziehen Anziehdrehmoment Anziehdrehmoment Anziehdrehmoment Anziehdrehmoment Anziehdrehmoment 7 8 10 8 Nm Kette einlegen Kettenspannschuh A einsetzen Schraube V festziehen Anziehdrehmoment Anziehdrehmoment ...

Page 123: ...e Screw and tighten the screws V2 Torque Torque Torque Torque Torque 7 8 10 8 Nm Fit the chain Fit the chain tensioner shoe A Screw the screw V Torque Torque Torque Torque Torque 7 8 11 8 Nm Colocar el bloque motor derecho sobre el cigueñal encima del bloque motor izquierdo Enroscar y apretar los tornillos V2 Par de apriete Par de apriete Par de apriete Par de apriete Par de apriete 7 8 10 8 Nm Mo...

Page 124: ... Perdite liquido di raffreddamento Perdite liquido di raffreddamento Perdite liquido di raffreddamento Perdite liquido di raffreddamento Perdite liquido di raffreddamento Sigillo meccanico pompa acqua difettoso O ring deteriorati Manicotti acqua danneggiati o deteriorati KÜHLSYSTEM KÜHLSYSTEM KÜHLSYSTEM KÜHLSYSTEM KÜHLSYSTEM HINWEISE HINWEISE HINWEISE HINWEISE HINWEISE Um auf die Wasserpumpe eingr...

Page 125: ...ngerous Try to avoid pouring the coolant on varnished surfaces as it is corrosive to varnish If necessary wash immediately with water any coolant dripping After operating on the system check coolant dripping by means of a system analiser TROUBLESHOOTING TROUBLESHOOTING TROUBLESHOOTING TROUBLESHOOTING TROUBLESHOOTING High engine temperature High engine temperature High engine temperature High engin...

Page 126: ...tu ra sinistrosa ra sinistrosa ra sinistrosa ra sinistrosa ra sinistrosa B B B B B A A A A A C C C C C V V V V V4 4 4 4 4 D D D D D WASSERPUMPE WASSERPUMPE WASSERPUMPE WASSERPUMPE WASSERPUMPE KONTROLLE KONTROLLE KONTROLLE KONTROLLE KONTROLLE MECHANISCHE DICHTUNG MECHANISCHE DICHTUNG MECHANISCHE DICHTUNG MECHANISCHE DICHTUNG MECHANISCHE DICHTUNG Am Schauloch prüfen ob Kühlmittel aus der mechanische...

Page 127: ...R IMPELLER PUMP WATER IMPELLER PUMP WATER IMPELLER REPLACEMENT REPLACEMENT REPLACEMENT REPLACEMENT REPLACEMENT Remove the coolant intake B and exhaust C hoses Remove the screws V4 and the water pump cover the gasket and the two centering bushings Remove the water pump impeller D The rotor impeller has a left The rotor impeller has a left The rotor impeller has a left The rotor impeller has a left ...

Page 128: ... PARAOLIO GUARNIZIONE PARAOLIO GUARNIZIONE PARAOLIO GUARNIZIONE PARAOLIO Estrarreilparaolio F dalgrup po pompa dell acqua agendo dalla parte interna A A A A A B B B B B V V V V V3 3 3 3 3 E E E E E D D D D D C C C C C F F F F F Prüfen ob die Ölabdichtung A und das Keramikteil B Verschleiss oder Ausbrüche aufweisen Ölabdichtung und Keramikteil müssen zusammen ausgetauscht werden AUSBAU AUSBAU AUSBA...

Page 129: ...NDLE WATER PUMP SPINDLE REMOVAL REMOVAL REMOVAL REMOVAL REMOVAL Disconnect the water hose from the cover Remove the screws V3 Remove the water pump unit the gasket and the centering bushings Remove the spring ring C Remove the shaft D and the bearing E Remove the water pump external bearing OIL SEAL OIL SEAL OIL SEAL OIL SEAL OIL SEAL REPLACEMENT REPLACEMENT REPLACEMENT REPLACEMENT REPLACEMENT Ext...

Page 130: ...zione del gruppo pompa acqua alli neare la scanalatura E dell al bero pompa con la fresatura F dell albero pompa olio A A A A A D D D D D B B B B B C C C C C F F F F F E E E E E Eine neue Ölabdichtung mit Hilfe des dafür geeigneten Werkzeuges einlegen Dichtungsmaterial auf den Rand der neuen Ölabdichtung auftragen und diese dann auf das Gehäuse des rechten Motorblocks legen EINBAU EINBAU EINBAU EI...

Page 131: ...itted on the right crankcase WATER PUMP SPINDLE WATER PUMP SPINDLE WATER PUMP SPINDLE WATER PUMP SPINDLE WATER PUMP SPINDLE FITTING FITTING FITTING FITTING FITTING Replace the water pump spindle external bearing A Fit the pump spindle B and the internal bearing C Fit the spring ring D NOTE NOTE NOTE NOTE NOTE When fitting the water pump unit align the pump spindle groove E with the oil pump spindl...

Page 132: ...tatura si nistra Installare le due boccole di centraggio C ed una nuova guarnizione D V V V V V3 3 3 3 3 A A A A A B B B B B C C C C C D D D D D Zentrierbuchsen und eine neue Dichtung einlegen dann dieWasserpumpeindenlinken Motorblock einbauen Schrauben V3 festziehen um die Wasserpumpe zu befestigen EINBAU WASSERPUMPE EINBAU WASSERPUMPE EINBAU WASSERPUMPE EINBAU WASSERPUMPE EINBAU WASSERPUMPE FLÜG...

Page 133: ...WATER PUMP IMPELLER WATER PUMP IMPELLER WATER PUMP IMPELLER FITTING FITTING FITTING FITTING FITTING After replacing the oil seal replace the impeller washer A Fit the impeller B on the water pump spindle Torque Torque Torque Torque Torque 9 8 13 7 N m The rotor has a left hand thread Fitthetwocenteringbushings C and replace the gasket D Montar los casquillos de centraje y una empaquetadura nueva m...

Page 134: ...l alloggiamen to del termostato Rimuovere il termostato B dal suo alloggiamento V V V V V4 4 4 4 4 A A A A A V V V V V2 2 2 2 2 B B B B B Verschlussdeckel der Wasserpumpe aufsetzen und Schrauben V4 festziehen Anziehdrehmoment Anziehdrehmoment Anziehdrehmoment Anziehdrehmoment Anziehdrehmoment siehe Tab S 10 THERMOSTAT THERMOSTAT THERMOSTAT THERMOSTAT THERMOSTAT AUSBAU AUSBAU AUSBAU AUSBAU AUSBAU W...

Page 135: ...STAT REMOVAL REMOVAL REMOVAL REMOVAL REMOVAL Disconnect the water hose from the thermostat housing A Disconnect the breather pipe from the thermostat housing Remove the thermostat housing from the cylinder head Unscrew the screws V2 and separate the two thermostat halves Remove the thermostat B from the housing Montar la tapa de la bomba de agua y apretar los tornillos V4 Par de apriete Par de apr...

Page 136: ...ici Dati tecnici Dati tecnici Inizia ad aprirsi 80 2 C Completamente 90 C aperto Valvola alzata 3 5 4 5 mm Termometro Termometro Termometro Termometro Termometro A A A A A B B B B B Während der Prüfung Während der Prüfung Während der Prüfung Während der Prüfung Während der Prüfung darf der Thermostat darf der Thermostat darf der Thermostat darf der Thermostat darf der Thermostat den Rand des Behäl...

Page 137: ... is open at room temperature Check the thermostat after heating it at 70 C for at least 5 minutes THERMOSTAT CHECK THERMOSTAT CHECK THERMOSTAT CHECK THERMOSTAT CHECK THERMOSTAT CHECK Plunge the thermostat A into a container full of water set on a laboratory burner then increase the water temperature gradually to check the thermostat operation Technical data Technical data Technical data Technical ...

Page 138: ...ilizza le pressioni pulsanti positiva e negativa prodotte dal basamento per inviare carburante dal serbatoio al carburatore attraverso le val vole di aspirazione e di scari co 1 1 1 1 1 2 2 2 2 2 3 3 3 3 3 5 5 5 5 5 6 6 6 6 6 4 4 4 4 4 A A A A A C C C C C B B B B B C C C C C AUSBAU AUSBAU AUSBAU AUSBAU AUSBAU VERGASER VERGASER VERGASER VERGASER VERGASER Kraftstofförderleitung A abtrennen Kabel des...

Page 139: ...t 2 Diaphragms 3 Suction valve 4 Pressure variation 5 Suction 6 Exhaust valve FUEL SYSTEM FUEL SYSTEM FUEL SYSTEM FUEL SYSTEM FUEL SYSTEM CARBURATOR CARBURATOR CARBURATOR CARBURATOR CARBURATOR FUEL PUMP FUEL FUEL PUMP FUEL FUEL PUMP FUEL FUEL PUMP FUEL FUEL PUMP FUEL TANK TANK TANK TANK TANK FUEL PUMP FUEL PUMP FUEL PUMP FUEL PUMP FUEL PUMP The fuel pump used for this model is a vacuum fuel pump u...

Page 140: ...nneggiamento del pistone a vuoto e dello spillo Verificare che la membrana non presenti lacerazioni V V V V V2 2 2 2 2 A A A A A B B B B B B B B B B C C C C C E E E E E F F F F F Schrauben V2 der Unterdruckdose und des Deckels entfernen Kompressionsfeder A und Kolben samt Membran B entfernen Nadelhalter C Feder E und die Düsennadel F aus dem Kolben ausbauen Darauf achten die Darauf achten die Dara...

Page 141: ...e the vacuum piston Handle the vacuum piston Handle the vacuum piston diaphragm B with care diaphragm B with care diaphragm B with care diaphragm B with care diaphragm B with care VACUUMPISTON VACUUMPISTON VACUUMPISTON VACUUMPISTON VACUUMPISTON CHECK CHECK CHECK CHECK CHECK Check the vacuum piston and needle for wear or damage Check the diaphragm for tearing Quitar los tornillos V2 de la tapa cáma...

Page 142: ...GALLEGGIANTE GALLEGGIANTE GALLEGGIANTE GALLEGGIANTE GALLEGGIANTE Verificare lo stato di usura del l area di contatto sede valvo la E V V V V V4 4 4 4 4 C C C C C D D D D D B B B B B E E E E E AUSBAU AUSBAU AUSBAU AUSBAU AUSBAU VERGASERBEHÄLTER VERGASERBEHÄLTER VERGASERBEHÄLTER VERGASERBEHÄLTER VERGASERBEHÄLTER Die Schrauben V4 am Behälter A und den Behälter entfernen Den Bolzen B am Schwimmer den ...

Page 143: ...DISASSEMBLY DISASSEMBLY DISASSEMBLY DISASSEMBLY Remove the float chamber A and the chamber screws V4 Remove the float pin B the float C and the valve D FLOAT VALVE FLOAT VALVE FLOAT VALVE FLOAT VALVE FLOAT VALVE CHECK CHECK CHECK CHECK CHECK Check the valve sliding walls E for wear DESMONTAJE CUBETA DEL DESMONTAJE CUBETA DEL DESMONTAJE CUBETA DEL DESMONTAJE CUBETA DEL DESMONTAJE CUBETA DEL CARBURA...

Page 144: ...imo ap pena rimossi con olio deter gente NOTA NOTA NOTA NOTA NOTA Utilizzareoliodetergen te pulito V R V R V R V R V R B B B B B A A A A A AUSBAU DÜSEN AUSBAU DÜSEN AUSBAU DÜSEN AUSBAU DÜSEN AUSBAU DÜSEN SCHRAUBEN SCHRAUBEN SCHRAUBEN SCHRAUBEN SCHRAUBEN Vor dem Ausbau der Einstellschraube E S die Schraube im Uhrzeigersinn solange drehen bis diese in die Aufnahme sitzt und die ausgeführten Umdrehun...

Page 145: ... the screw clockwise until it is fit properly into seat and take note of the necessary revolutions To prevent damages do not force the adjusting screw Remove the main jet A Remove the slow jet B Immediately after disassembly clean the main jet the needle jet holder the needle jet and the slow jet with detergent oil NOTE NOTE NOTE NOTE NOTE Use clean detergent oil DESMONTAJE DESMONTAJE DESMONTAJE D...

Page 146: ...ICO AUTOMATICO Rimuovere le viti V2 della piastrina A elapiastrinastes sa rimuovere poi l avviamen to automatico B dal corpo del carburatore B B B B B V V V V V2 2 2 2 2 A A A A A KONTROLLE AUSBAU AUTOMATIK KONTROLLE AUSBAU AUTOMATIK KONTROLLE AUSBAU AUTOMATIK KONTROLLE AUSBAU AUTOMATIK KONTROLLE AUSBAU AUTOMATIK STARTER STARTER STARTER STARTER STARTER AUSBAU AUTOMATIK AUSBAU AUTOMATIK AUSBAU AUTO...

Page 147: ...TER AUTOMATICSTARTER AUTOMATICSTARTER CHECK CHECK CHECK CHECK CHECK Measure the resistance of the two automatic starter teminals Resistance 10Ω at least 10 minutes after switching the engine off If the value exceeds this limit replace the automatic starter unit AUTOMATICSTARTER AUTOMATICSTARTER AUTOMATICSTARTER AUTOMATICSTARTER AUTOMATICSTARTER REMOVAL REMOVAL REMOVAL REMOVAL REMOVAL Remove the pl...

Page 148: ...i aria C Rimuovere la molla D la membrana E e gli O ring Verificare lo stato di usura o l eventuale danneggiamento della membrana e della mol la B B B B B A A A A A C C C C C V V V V V2 2 2 2 2 E E E E E D D D D D KONTROLLE AUTOMATIK KONTROLLE AUTOMATIK KONTROLLE AUTOMATIK KONTROLLE AUTOMATIK KONTROLLE AUTOMATIK STARTER STARTER STARTER STARTER STARTER Ventil des Automatik Starters A und Nadel B au...

Page 149: ...damage or chipping In case of excessive wear replace the automatic starter with a new one AIR CLOSING VALVE AIR CLOSING VALVE AIR CLOSING VALVE AIR CLOSING VALVE AIR CLOSING VALVE V C A V C A V C A V C A V C A CLOSING AIR VALVE REMOVAL CLOSING AIR VALVE REMOVAL CLOSING AIR VALVE REMOVAL CLOSING AIR VALVE REMOVAL CLOSING AIR VALVE REMOVAL Remove the screws V2 and closing air valves C Remove the spr...

Page 150: ... parte piatta verso il lato corpo valvola Scollegareilmanicotto A dal la sede della valvola A A A A A B B B B B C C C C C REINIGUNG REINIGUNG REINIGUNG REINIGUNG REINIGUNG VERGASERGEHÄUSE VERGASERGEHÄUSE VERGASERGEHÄUSE VERGASERGEHÄUSE VERGASERGEHÄUSE Druckluft in alle Öffnungen des Vergasergehäuses einblasen Sicherstellen dass die Sicherstellen dass die Sicherstellen dass die Sicherstellen dass d...

Page 151: ...the Make sure that none of the Make sure that none of the holes is clogged holes is clogged holes is clogged holes is clogged holes is clogged CLOSING AIR VALVE ASSEMBLY CLOSING AIR VALVE ASSEMBLY CLOSING AIR VALVE ASSEMBLY CLOSING AIR VALVE ASSEMBLY CLOSING AIR VALVE ASSEMBLY Fit the O ring B on the closing air valve body C then secure the valve body on the carburator by means of the two screws F...

Page 152: ...ola chiudi aria Installare l O ring con la parte piatta verso il lato corpo valvola Installare la membrana la molla ed il coperchio V V V V V2 2 2 2 2 A A A A A V V V V V B B B B B EINBAU AUTOMATIK EINBAU AUTOMATIK EINBAU AUTOMATIK EINBAU AUTOMATIK EINBAU AUTOMATIK STARTER STARTER STARTER STARTER STARTER Automatik Starter A samt Plättchen einbauen Beide Schrauben festziehen Automatik Starter in da...

Page 153: ...TING Fit the automatic starter A and the plate Screw the two screws Fit the automatic starter down inside the carburator and set the plate B into the upper starter groove Place the plate round part down Fit and tighten the fastening screws V2 of the closing air valve cover Secure the O ring firmly to the closing air valve body Fit the O ring flat towards the valve body side Fit the diaphragm the s...

Page 154: ...minimo B Installare la vite di registro C Installare la valvola del galleg giante D il galleggiante E edilpernodelgalleggiante F B B B B B A A A A A C C C C C E E E E E D D D D D F F F F F EINBAU EINBAU EINBAU EINBAU EINBAU VERGASERBEHÄLTER VERGASERBEHÄLTER VERGASERBEHÄLTER VERGASERBEHÄLTER VERGASERBEHÄLTER Hauptdüse A einbauen Leerlaufdüse B einbauen Einstellschraube C einlegen Schwimmerventil D ...

Page 155: ...HAMBER FLOAT CHAMBER FLOAT CHAMBER FLOAT CHAMBER FLOAT CHAMBER ASSEMBLY ASSEMBLY ASSEMBLY ASSEMBLY ASSEMBLY Fit the main jet A Fit the slow jet B Fit the adjusting screw C Fit the float valve D the float E and the float pin F MONTAJE CUBETA DEL MONTAJE CUBETA DEL MONTAJE CUBETA DEL MONTAJE CUBETA DEL MONTAJE CUBETA DEL CARBURADOR CARBURADOR CARBURADOR CARBURADOR CARBURADOR Montar el chicler princi...

Page 156: ...sciugarla prima rettamente a causa dell espansione asciugarla prima rettamente a causa dell espansione asciugarla prima dell installazione dell installazione dell installazione dell installazione dell installazione C C C C C B B B B B A A A A A D D D D D E E E E E KONTROLLE KONTROLLE KONTROLLE KONTROLLE KONTROLLE SCHWIMMERSTAND SCHWIMMERSTAND SCHWIMMERSTAND SCHWIMMERSTAND SCHWIMMERSTAND Den Schwim...

Page 157: ... hole with the carburator body hole Fit the spring E Fit the vacuum chamber cover securing it by means of the two screws Make sure that the diaphragm Make sure that the diaphragm Make sure that the diaphragm Make sure that the diaphragm Make sure that the diaphragm does not slip does not slip does not slip does not slip does not slip In case of problems in fitting the In case of problems in fittin...

Page 158: ...ta incorrettamente c Carburatore allagato d Anomalie avviamento automatico e Valvola a farfalla eccessivamente aperta Controllare se il carburante raggiunge il carburatore allentando la vite di drenaggio Rimuovere candela e collegarla al coperchio della candela per controllarla collegandola alla terra del motore Emissione scintilla Compressione normale Il motore non si accende Scintilla debole o n...

Page 159: ...a di combustione d Carburante di scarsa qualità e Slittamento della frizione f Miscela troppo povera Controllo registrazione Sintomo Causa probabile Avviare il motore ed accelerare dolcemente per effettuare la verifica La velocità del motore aumenta Messa in fase corretta La velocità del motore non aumenta in modo sufficiente Messa in fase non corretta Controllare la messa in fase dell accensione ...

Page 160: ...ng CDI Gruppe Störung WS Generator Bruch bzw Kurzschluss Zündkerze Bruch bzw Kurzschluss Erregerspule Störung Start Schalter Anlasser läuft im Leerlauf aber Kurbelwelle dreht sich nicht Ventile zu wenig geöffnet Kontakt zwischen Ventil und Sitz nicht richtig Kolbenringe und Zylinder verschlissen Obere Zylinderdichtung durchgebrannt Zylinderkopf defekt Ventil festgefressen Ventilöffnungszeit nicht ...

Page 161: ...m Zündvorverstellung Luft im Kühlsystem vorhanden Übermäßige Kohlenstoffablagerung im Brennraum Kraftstoff geringer Qualität Kupplung rutscht Gemisch zu arm Mögliche Ursache Symptom Prüfung Einstellung Um die Prüfung auszuführen den Motor anlassen und sanft beschleunigen Zündverstellung prüfen mit Hilfe eines dafür geeigneten Lichts Ventilspiel prüfen Prüfung Zylinderverdichtung Prüfen ob Vergaser...

Page 162: ... irregular operation Ignition coil short circuit or failure Excitation coil short circuit or failure Starter button irregular operation The starter motor is idling but the crankshaft does not rotate Small valve opening Incorrect valve running along the seat Worn piston rings and compression rings Burst cylinder upper gasket Defective cylinder head Starter button irregular operation Automatic start...

Page 163: ...ty Excess of carbon Advance ignition timing Air in the cooling system Excess of carbon in the combustion chamber Low fuel quality Clutch slippage Lean mixture Possible cause Problem Check adjustment Start the engine and speed up slowly Check the ignition timing using an adequate light Check valve clearance Cylinder compression inspection Check that the carburator is not clogged Remove and check th...

Page 164: ...u court circuit de la bobine allumage rupture ou court circuit de la bobine excitant Anomalie interrupteur allumage Le démarreur est au minimum mais le vilebrequin mécanique ne tourne pas ouverture des soupapes trop petite contact soupape et siège non correct bagues piston et cylindre usées garniture supérieure du cylindre éclatée culasse du cylindre défectueuse soupape grippée temps ouverture sou...

Page 165: ...ion excessive de carbone dans la chambre de combustion phasage de l allumage en avance présence d air dans le système de refroidissement formation excessive de carbone dans la chambre de combustion carburant de mauvaise qualité patinage de l embrayage mélange trop pauvre Cause probable Symptôme Contrôle réglage Démarrer le moteur et accélérer doucement pour effectuer le contrôle Contrôler le phasa...

Page 166: ...a de encendido Rotura o cortocircuito bobina de excitación Anomalía interruptor de encendido El motor de arranque gira al ralentí mas el cigueñal no gira Válvulas demasiado poco abiertas Contacto entre válvula y asiento no correcto Segmentos de émbolo y cilindro desgastados Junta superior del cilindro quemada Culata defectuosa Válvula agarrotada Tiempo apertura válvula no correcto Error starter au...

Page 167: ...a calidad Se ha depositado demasiado carbono en la cámara de combustión Avance al encendido Presencia de aire en el sistema de refrigeración Se ha depositado demasiado carbono en la cámara de combustión Combustible de mala calidad El embrague resbala Mezcla demasiado pobre Causa posible Síntomo Control Ajuste Para efectuar el control poner el motor en marcha y acelerar suavemente Comprobar el regl...

Reviews: