5
12/99
MADISON 125-150
D
BRAKE PUMPS
REMOVAL (1 - F. 6)
DESMONTAJE BOMBAS
DE FRENOS (1 - F. 6)
DEPOSE DE LA POMPE
DES FREINS (1 - F. 6)
Empty the whole of the oleo-
dynamic circuit by pouring the
fluid into an appointed container
according to the regulations in force
for its disposal.
Pay particular attention to
brake’s fluid leaks and
splashes. It is corrosive and can
cause personal injuries and
damages to the coated parts of the
motorbike.
Vider entièrement le circuit
oléodynamique, en versant le
liquide dans un récipient adéquat pour
l’éliminer conformément aux
Réglementations en vigueur.
Faire particulièrement attention
à d’éventuelles coulées et
éclaboussures de liquide de freinage
car c’est un produit corrosif qui peut
provoquer des lésions personnels et
détériorer la peinture du scooter.
Vaciar completamente el
circuito oleodinámico. Verter el
líquido en un recipiente adecuado y
eliminarlo en el respeto de las
normativas vigentes.
Prestar particular atención a
eventuales derrames y
salpicaduras del líquido de frenos, ya
que se trata de una sustancia corrosiva
que puede causar daños personales
y deteriorar las partes pintadas del
vehículo.
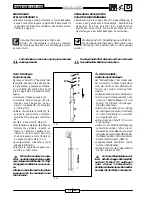
• Remove the front and the rear
handlebar cover (S/C - P. 9).
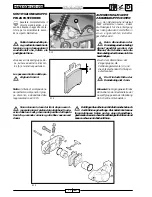
• Unscrew and remove the fitting (A).
• Remove the pipe (B) and the linings (C).
• Unscrew the screw (V).
•Enlever le protège-guidon avant et
arrière (S/C - P. 9).
•Dévisser et extraire le raccord (A).
•Enlever le tube (B) et les joints (C).
•Dévisser la vis (V).
•Extraer el protector manillar delantero
y trasero (S/C - P. 9).
•Desenroscar y extraer el racor (A).
•Extraer el tubo (B) y las guarniciones (C).
•Aflojar el tornillo (V).
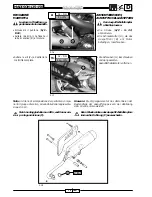
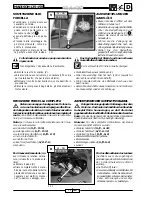
• Unscrew the screws (V2) and remove
the U bolt (D).
• Remove the pump unit (E).
• The reassembly must be carried out
by positioning (by means of a long
T-wrench) the lower screw first,
without fastening it.
After the assembly of the
brake pump (front/rear),
install the pipe (B) interposing two
new linings (C) and fasten the
fitting (A) to the appointed torque
wrench setting.
Note: after each reassembly of the
oleo-dynamic pump, always supply
the “virgin” circuit.
•Aflojar los tornillos (V2) y extraer la
grampa en U (D).
•Extraer el grupo bomba (E).
•El reensamblaje se efectúa
introduciendo primero el tornillo
inferior (con una llave en T de tija
larga), sin apretarlo.
Tras el montaje de la bomba
de freno (delantero/trasero),
montar el tubo (B) interponiendo
dos guarniciones (C) nuevas y
enroscar el racor A según el par de
apriete indicado.
Nota: tras cada reensamblaje de la
bomba oleodinámica, rellenar siempre
el circuito “virgen”.
•Dévisser les vis (V2) et enlever le
cavalier (D).
•Enlever le groupe pompe (E).
•Le remontage se fait en talonnant
(à l’aide d’une clef en “T” à tige
longue) d’abord la vis inférieure,
sans la serrer.
Après le montage de la
pompe frein (avant/arrière),
positionner le tube (B) en
interposant deux joints (C) neufs,
et serrer le raccord A suivant le
couple indiqué.
Note : après tout remontage de la
pompe oléodynamique, ravitailler
toujours le circuit “vierge”.
Summary of Contents for MADISON 125
Page 1: ...1 12 99 MALAGUTIMADISON125 150 ...
Page 46: ...8 12 99 NOTE HINWEIS NOTES NOTES NOTAS ...
Page 129: ...1 3 12 99 MADISON 125 150 A3 E ...
Page 130: ...1 4 12 99 MADISON 125 150 A3 E ...


