SkyRaider DS287 User Manual
August 19, 2018
SkyRaider DS287 User Manual
Page 45
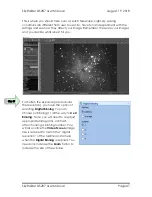
Now, we are heading into the “Art” of video imaging. You can
decrease
the
Exposure Time
, as long as you
increase
the
Gain
. But, by increasing the
Gain
, you
also
increase any noise
that is present. Use your own judgment in what you are
willing to accept on your image.
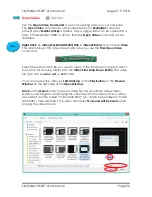
Now, that we have an image that we are happy with, it is time to enable
Dark
Field
subtraction (if you took Dark Field Images).
Click
on the
Enable CheckBox
in the
Dark Field
Correction
Tab. Dark Fields will automatically be
applied during the next image refresh, so in our
example you may have to wait up to 30 seconds
before the Dark fields are applied.
Obtaining an Image of our First Deep Sky Object is enough for most to start the
celebration process (again most of us will call for our spouse to have a look at
the amazing image we have just produced, again trying to justify the money
used in buying those extra pieces of hardware).
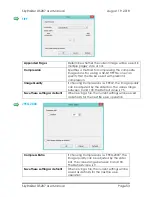
Next, we want to fine tune our image to perfection (at least that is what you will
tell yourself), but this is a great time to get familiar with some of the adjustment
options available in MallincamSky.
Step 12
M57, 20 Seconds exposure, VRC 6", F/4.5
with MallinCam 0.5X focal reducer, NO
Dark Field Correction. No processing, as
seen live on monitor. Single frame.
M57, 20 Seconds exposure, VRC 6", F/4.5
with MallinCam 0.5X focal reducer, One
Single DARK FIELD CORRECTION APPLIED
LIVE, no processing, as seen live on
monitor, Single frame.


