background image

12

2.3.6 Installation of the hood

1. Position the cutout to the countertop. The

distance between the hob’s edge and the

hood’s  edge  shall  be  max.  20  mm

(see Figure M1).

2. Installing the hood housing

Insert  the  hood  housing  into  the  cutout  until 

you can carefully place the mounting sleeve 

on the countertop (fig. M2a).

Fasten  with  the  mounting  brackets  the 

aligned, vertically positioned hood housing at 

the bottom of the cabinet floor (Fig. M2b).

Fasten  the  motor  module  to  the  hood 

body 

(Fig. M3) . Pay attention to the blowing 

direction of the motor.

Connect  the  air  channel  as  prepared  for 

exhaust or recirculation.

Electrical  connection 

of  the  electronics 

module with the motor/hood housing.

Plug  the  connection  cable  with  2  different 

couplings accordingly.

ATTENTION!

Do not install or operate a defective 

hood.  Repair  work  must  be 

performed  by  qualified  personnel 

authorized  by  the  manufacturer 

(      Customer Service).

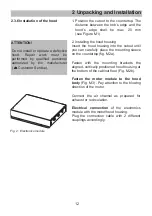
Fig. 2:  Electronics module

2 Unpacking and Installation

Summary of Contents for K-3410DR

Page 1: ...COOKER HOOD INSTRUCTIONS MANUAL K 3410DR...

Page 2: ...12 Email chamsockh malloca com Trung t m ch nh 279 ng Nguy n V n Tr i Ph ng 10 Qu n Ph Nhu n TP HCM S T 028 39975 893 94 028 39975 294 95 Khu v c B R a V ng T u 258 260A L H ng Phong Ph ng 4 TP V ng...

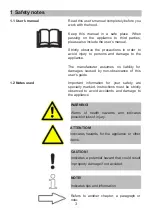
Page 3: ...r damages caused by non observance of this user s guide Important information for your safety are specially marked Instructions must be strictly observed to avoid accidents and damage to the appliance...

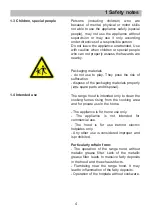
Page 4: ...als properly spare parts and disposal The range hood is intended only to clean the cooking fumes rising from the cooking area and for private use in the home The appliance is for home use only The app...

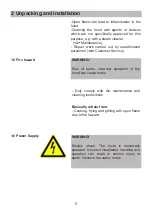
Page 5: ...ized personnel Customer Service WARNING Risk of burns Incorrect operation of the hood can cause burns Duly comply with the maintenance and cleaning instructions Basically refrain from Cooking frying a...

Page 6: ...tes the guarantee and warranty claims Warranty 1 7 Defective equipment ATTENTION Do not install or operate a defective hood Repair work must be performed by qualified personnel authorized by the manuf...

Page 7: ...tes Read the installation instructions completely before installation Strictly observe the precautions in order to avoid injury to persons and damage to the appliance The manufacturer assumes no liabi...

Page 8: ...ife in case of damage to power lines When drilling supply lines electricity gas and or water pipes can be damaged Before drilling get informed about courses of the supply lines e g use a detector to l...

Page 9: ...9 2 3 3 Installation drawings Fig M3 Fig M2a Fig M1 Fig M2b 800 103 Min 760 2 Unpacking and Installation...

Page 10: ...10 2 3 4 Dimensions of the appliance 880 115 860 758 0 350 4 10 6 731 660 780 Max 857 Min 735 89 91 65 250 320 320 95 150 222 2 Unpacking and Installation...

Page 11: ...e exhaust duct with a diameter of 150 mm up to an already prepared wall penetration Recirculation mode The active carbon filter module must be placed so that the air is fed back into the kitchen area...

Page 12: ...ned hood housing at the bottom of the cabinet floor Fig M2b Fasten the motor module to the hood body Fig M3 Pay attention to the blowing direction of the motor Connect the air channel as prepared for...

Page 13: ...dule To install and to remove later to change the carbon filter pads draw towards the front the front panel with the drawer For carbon filter assembly fix a place under the bench Remove the sheet from...

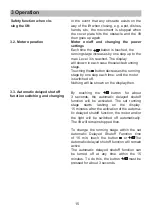
Page 14: ...be shown on the display Neither motor nor light goes on in this condition After touching the button the light goes on after 20 cm of lifting height but motor does not Stopping the lift or pulling it o...

Page 15: ...g the button for about 3 seconds the automatic delayed shutoff function will be activated The set running stage starts lashing on the display 15 minutes after the activation of the automa tic delayed...

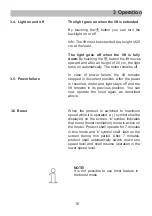
Page 16: ...d light stays off and the lift remains in its previous position You can now operate the hood again as described above 3 5 Power failure 3 4 Light on and off 3 Operation 3 6 Boost When the product is s...

Page 17: ...ainless steel surface can lead to stains Always clean the surface of the range hood thoroughly after the installation For this purpose use a cleaner that is specially suitable for stainless steel surf...

Page 18: ...ray Order No PS 500 ATTENTION Fire hazard An oversaturated metallic grease filter may lead to fires Therefore follow the maintenance and cleaning instructions Immediately absorb and wipe dry fresh dro...

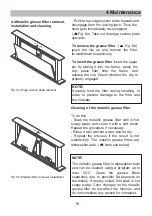
Page 19: ...C Clean the grease filters separately due to possible fat deposits on the dishes If heavily soiled first soak in hot soapy water Color changes on the metallic grease filter do not affect the function...

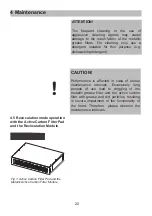
Page 20: ...e hood Therefore please observe the maintenance intervals ATTENTION Too frequent cleaning or the use of aggressive cleaning agents may cause damage to the mesh fabric of the metallic grease filters Fo...

Page 21: ...er pad can be washed 3 times The service period is 3 4 months under normal cooking conditions is 2 3 months under frequent cooking practice then it must be washed or replaced with a new filter pad It...

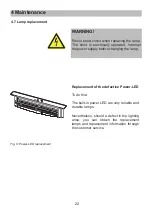
Page 22: ...r supply before changing the lamp Replacement of the defective Power LED To do this The built in power LED are very reliable and durable lamps Nevertheless should a defect in the lighting arise you ca...

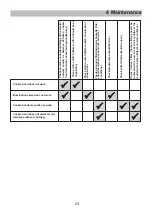
Page 23: ...ion Check aluminum filter Aluminum Cassette Filter should be washed once a month at normal conditions Check lamps Lamps should be firm Check outlet Outlet should be open Check Carbon Filter Carbon fil...

Page 24: ...hood according to Table 1 If the problem goes on contact the seller or the most authorized service 4 9 In order to use the cooker hood efficiently Use ducts of 150 mm diameter and as few bends as poss...

Reviews: