800-295-0042 ext 206
technical@maloneautoracks.com
9
MPG525G
LIGHT ASSEMBLY (Group 3)
REFERENCE:
Trailer Wiring Color Code
•Brown = running lights
•Yellow = driver turn / driver brake
•Green = passenger turn / passenger brake
•White = ground
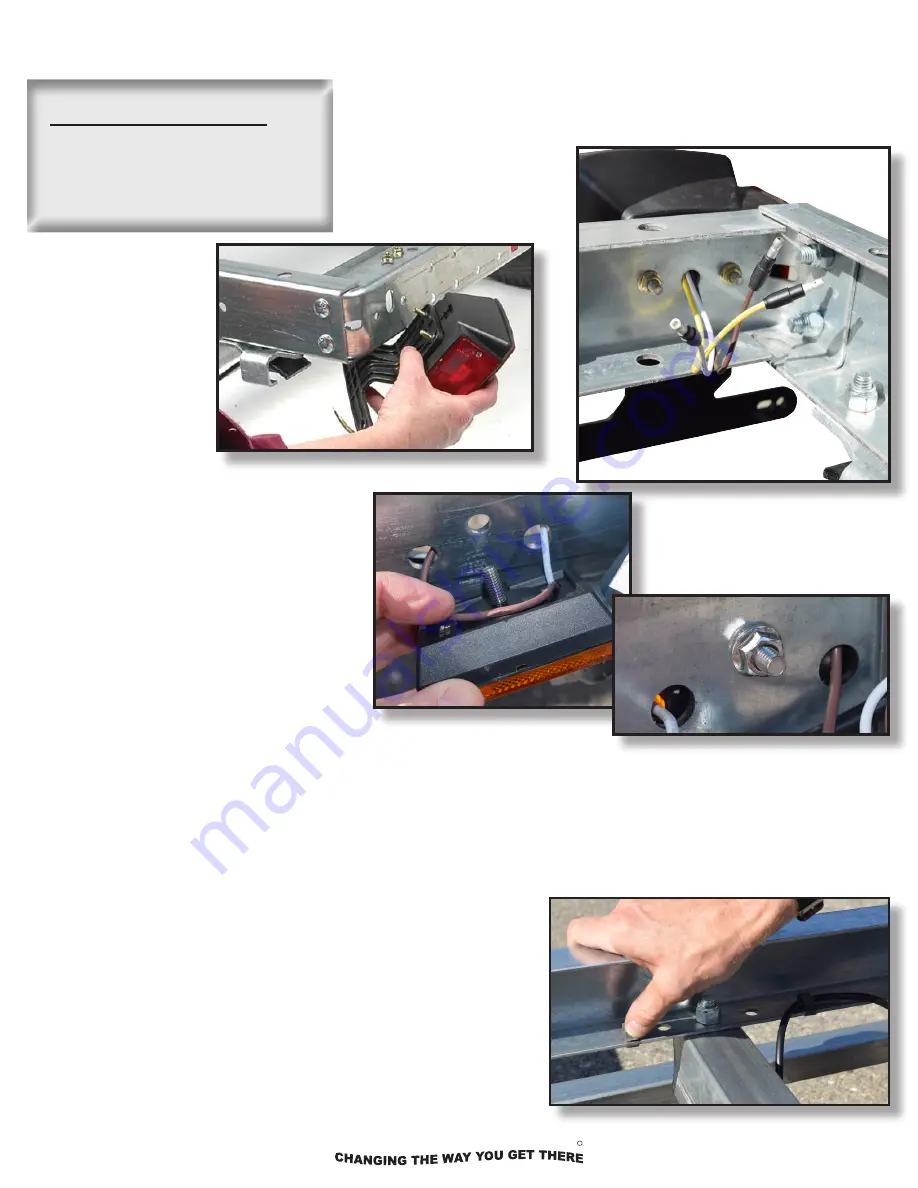
1. Sandwich the license plate mounting bracket
between the driver side lamp and the frame. Use the nuts
provided with the lamp kit.
3. Check that the wiring harness outside
the tongue grommet at the coupler is still
full length and did not pull into the tongue.
4. Route the GREEN/BROWN wire along
the passenger’s side of the frame. Route the
YELLOW/BROWN wire along the driver’s side. Install wire
clips beside the tongue and clip the wires.
5. Route each harness around the
corner to the side marker light. Note
where you will connect the side marker
wire. Lift the harness on top of the
frame. Pierce the knife tip between the
wires, PULL only about 1/2” of wire past
the blade, then use your
fi
ngers to pull
2-3 inches of wire apart.
2. Install side marker lights at the 2 holes in the front of the side
rails. One hole for the bolt, one hole for the
wire. Use the nuts provided with the lamp kit.
6. Press the brown wire into the quick connector as shown. Then
insert the wire from the side marker
light fully into the 2nd opening. Use
pliers to squeeze the conductor blade
down and through the insulation. The
blade cuts through the insulation and
connects the wires inside. Flip the
cover to lock the connector. Repeat on
the other side again using the brown
wire.
L.E.D. REFERENCE:
Trailer Wiring Color Code
•Brown = running lights
•Yellow = left turn / left brake
•Green = right turn / right brake
•White = ground
LIGHT ASSEMBLY (Group 3)
1. Sandwich the license plate mounting bracket between the driver
side lamp and the frame. Push the wire leads through the center
hole and the lamp studs through the outer holes. Use the nuts
provided with the lamp kit.
2. Using the holes in the front corners
of the frames side rail, mount the amber
side lights. First, push the wire leads
through the outside holes and the lamp
stud through the center hole.
3. Secure with the lamp stud nut.
technical@maloneautoracks.com
8
800-295-0042 ext. 215
MALONE
R
4. Starting at the end of the tongue, we will divide the wiring to both sides of the trailer and then again to the
running lights and the tail lights.
Looking at the end connections, route the GREEN/BROWN/WHITE wire along the passengers side. Route
the YELLOW/BROWN/WHITE along the drivers side as shown. These color coated wires should match the
connections at your lights.
5. With the wiring divided at the end of the tongue, use the
clips provided to secure the wire to the inside of the frame
channel as shown.


