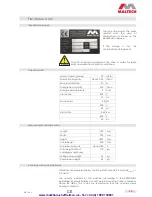
background image


25 

M5 – Eco

                                  CE


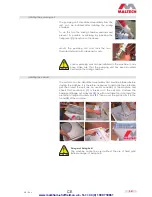
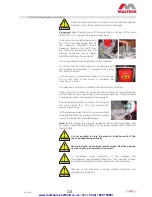
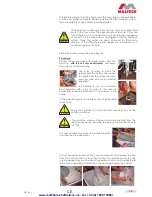
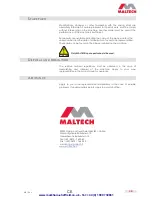
A  manometer  for  the  pressure  of  the  mortar 
must  be  mounted  between  the  pump  outlet 
and  the  transport  hose  as  an  additional 
control device. 
 
This  manometer  supervises  and  indicates  the 
pressure present in the transport hose.  
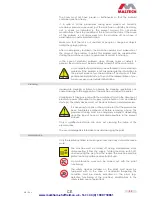


ATTENTION! 
It is possible to use only transport hoses that can guarantee an 
operative pressure of at least 40 bars!  


We  recommend,  before  connecting  the  transport  hose  to  the 
machine,  to  use  water  internally  so  that  the  material  can  flow 
easier and does not dry up. In this way it is possible to avoid the 
hose becoming obstructed.  


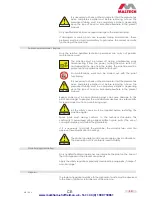
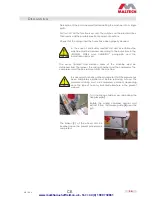
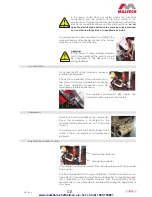
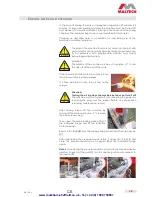
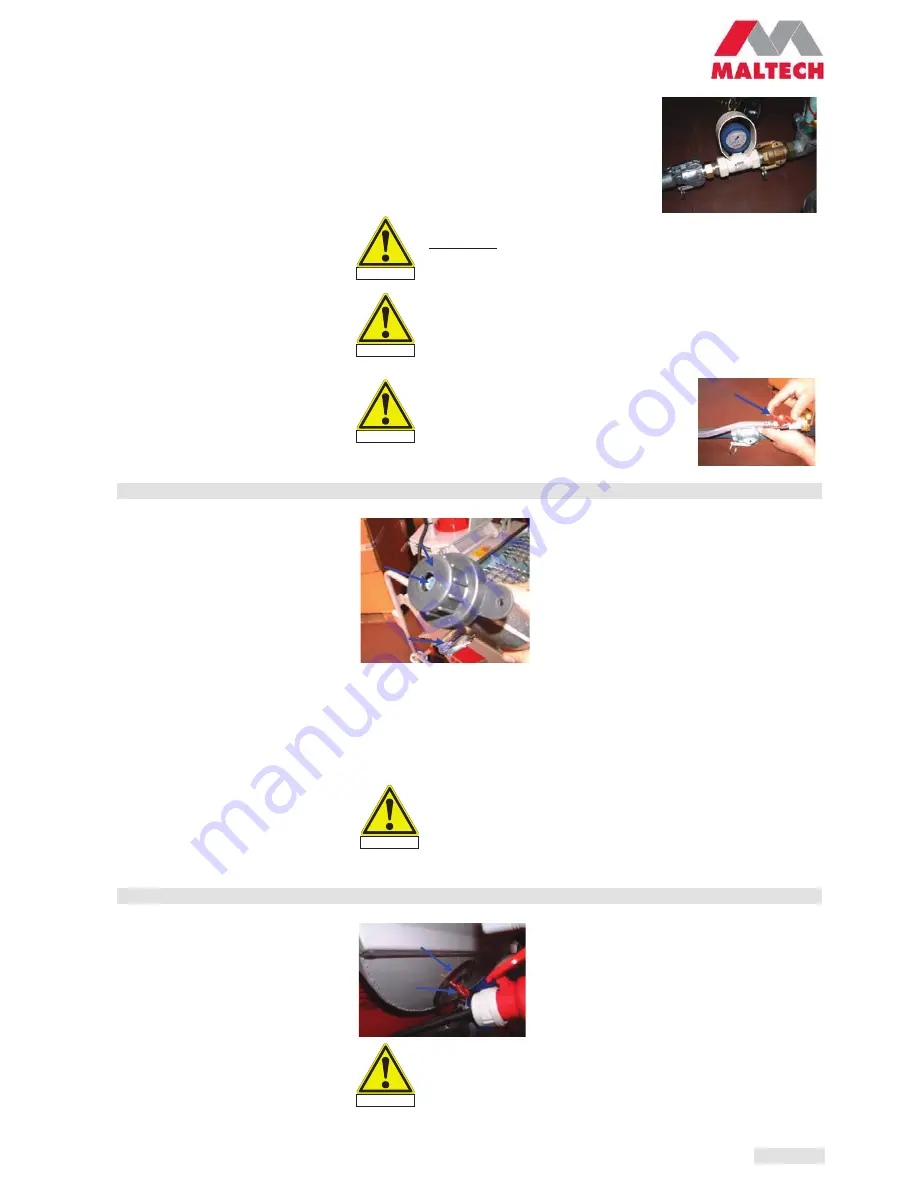
Check  whether  the  air  tap 

(4)

  on  the 

sprayer  has  been  closed  and  whether 
this  sprayer  has  been  well  cleaned 
before  connecting  the  air  and  transport 
hoses. 


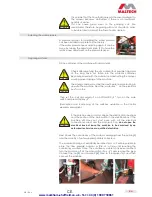
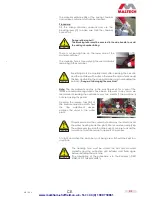
Adjusting the sprayer  


Next  the  distance  between  the  air  jet  tube 

(A)

  and  the  opening  of  the  nozzle 

(B)

  must 

be  adjusted  by  unscrewing  the  fixing  screw 

(1)

 on the nozzle.  


The  ideal  adjustment  corresponds  to  the 
diameter of the opening of the nozzle.  


You  must  consider,  choosing  the  nozzle  for 
the  sprayer  and  the  relative  opening,  that 

with  large  diameters  a  more  copious  spray  is  obtained  but  a  minor 
distance of spray.  
 
Using a small opening instead, a less copious spray is obtained but greater 
speed of spray with better vaporisation of the material.  


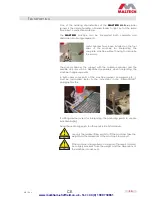
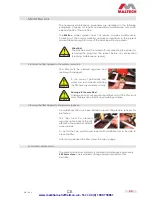
During  the  procedures  of  connection  and  adjustment,  the 
sprayer  must  be  directed  at  a  free  zone  where  there  are  no 
people  or  objects  that  might  be  hit.  In  any  case,  people  must 
be  kept  away  from  the  range  of  action  of  the  plaster  sprayer 
(see the technical data of the machine).  


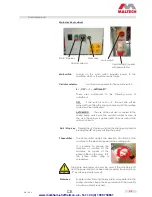
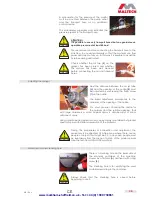
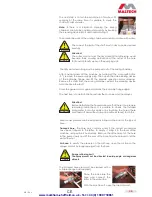
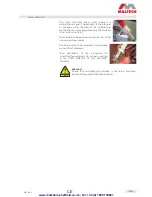
Material container cleaning hole  


There  is  a  cleaning  hole  on  the  lower  side  of 
the  material  container  of  the  machine, 
closed by a flat disc 

(A)

 and fixed with a ring 

screw 

(B)

.  


The  cleaning  hole  is  for  emptying  the  used 
materials remaining in the container. 


Always  check  that  the  cleaning  hole  is  closed  before 
beginning to use it. 

4

ATTENTION

ATTENTION

Important 

B

ATTENTION

Important 

 www.markham-sheffield.co.uk - Tel: +44 (0) 1909 730861 

Summary of Contents for M5-Eco

Page 1: ...SPRAYER M5 Eco M a l t e c h G m b H S r l I 39040 Freienfeld Campo di Trens BZ Gewerbezone Reifenstein 15 Zona Artigianale Reifenstein 15 Tel 0472 765065 Fax 0472 764295 ITO1449180213 www markham sh...

Page 2: ...nally and externally rustic finish insulating plastering and ready and self levelling mortar for floors The present manual contains all the use and maintenance instructions relating to the machine Car...

Page 3: ...NCE MANUAL 5 GENERAL SAFETY REGULATIONS 7 TECHNICAL DATA 13 RANGE OF NORMAL USE 14 TRANSPORTING 15 DISMANTLING 16 FIRST START UP 17 STARTING UP 19 USE 26 ENDING WORK AND CLEANING 28 MAINTENANCE 32 SOL...

Page 4: ...llowing cases Insufficient care by the user failure to clean Incorrect or inappropriate use of the machine In the case of failing to observe the use and maintenance instructions and the safety regulat...

Page 5: ...he use in conformity of the machine refer to the safety regulations contained here The above mentioned preventive measures must be fully observed Use and maintenance manual symbols The following symbo...

Page 6: ...arts Extract the plug from the socket before possible direct contacts Parts that carry pressure Make sure to empty the pressure from the machine before possible cleaning or maintenance work Attention...

Page 7: ...to the plant to whom the machine has been sent Possible modifications to the plant must be performed by the manufacturer or by those approved in writing MALTECH declines any responsibility for damage...

Page 8: ...ing The operator must provide for suitable lighting of the work area Range of use The MALTECH machine must be used exclusively for mixing and pumping ready mortar and plaster for treating interiors an...

Page 9: ...de away Incorrect or unsatisfactory montage can cause damage to the machine or to its singular parts and cause grave danger to people To avoid this the operator must keep rigorously to the instruction...

Page 10: ...tart the plant The person in charge must check the application of the safety regulations at work At least one operator must be near the control unit during the starting of the machine During the mixin...

Page 11: ...cleaning or failure to observe the cleaning regulations can cause damage to the single parts of the machine or danger to people Cleaning must take place only with the machine off and in the absence o...

Page 12: ...ust be completely emptied depending upon the type of hose as indicated elsewhere in the present manual Repairs carried out in non conforming ways can cause damage to the plant and danger to people The...

Page 13: ...ion 400 V 50 Hz Pump motor 5 5 kW 400 V 50 Hz Cell motor 0 55 Kw 400 V 50 Hz Measurements and dimensions Length 1100 mm Width 730 mm Height 1520 mm Container jet 900 mm Container capacity about 130 lt...

Page 14: ...neously Restrictions on the group of operators Only adults who have been instructed in its functioning training by the responsible person and who have read and understood the present use and maintenan...

Page 15: ...will be dispatched separately when transporting the machine in single segments In both cases some parts of the machine sprayer compressor etc must be dismantled Refer to the instructions in the DISMAN...

Page 16: ...sport and aeration hoses of the machine must be detached from the sprayer the mixing chamber and the compressor The compressor must then be removed from the machine It is necessary to check on the man...

Page 17: ...the machine on a flat and stable base and make sure that it cannot move by using the brakes on the wheels Installing the compressor The compressor can be positioned on the specific support under the...

Page 18: ...on the mixing chamber Installing the cell disc The cell disc can be dispatched separately and must be installed before starting the machine It is therefore necessary to dismantle the protective grill...

Page 19: ...hat the fuses and switches cabinet in the building yard is equipped with a grounded switch and a 25 A safety device In addition it is necessary to make sure that the power supply is stable and that th...

Page 20: ...d regularly and replaced if damaged In the case of particularly dirty water we also recommend cleaning the filter several times during the day Damaging the machine Damage because of particles of dirt...

Page 21: ...op key Pressing the I start key will start the mixing pump and or pressing the 0 stop key will stop the pump Phase shifter The phase shifter adapts the direction of rotation of the machine to the elec...

Page 22: ...wrong turn the machine off and position the phase shifter on the currnet plug in the opposite direction The procedure is described in the control elements paragraph After having turned the machine off...

Page 23: ...e machine before connecting the hose Unsuitable connections must be replaced by suitable connections The supplied manometer 2 adjusts the compressor and is preset by the factory Compressor There is an...

Page 24: ...s the water key on the electrical box To do this Then set the cell disc selector on AUTOMATIC 1 turn on the main switch and press start key I Description and functioning of the switches available in t...

Page 25: ...deal adjustment corresponds to the diameter of the opening of the nozzle You must consider choosing the nozzle for the sprayer and the relative opening that with large diameters a more copious spray i...

Page 26: ...een start key I on the electrical box starts the treatment procedure We recommend regularly examining the consistency of the material that emerges from the sprayer and if necessary adjust the quantity...

Page 27: ...aterial The material at the outlet of the sprayer becomes increasingly watery as the dry material is slowly used up At this point the work must be interrupted and the instructions in the next chapter...

Page 28: ...he sprayer until only water emerges It is then possible to close the air tap on the sprayer Attention Closing the air tap stops the machine but does not turn it off The machine must be turned off disc...

Page 29: ...e inclinable flange again The next step is to detach the hoses from the machine and the sprayer Attention Before detaching the hoses make sure that there is no pressure remaining inside them It is pos...

Page 30: ...er to clean the sprayer and the nozzle First remove the nozzle from the sprayer and pre treat the tube with a pipe cleaner supplied It is possible to use a non metallic brush together with a jet of wa...

Page 31: ...for a year if the relative conservation regulations have been followed In any case we recommend cleaning the container every two months if the machine is not used during this period Opening the relea...

Page 32: ...e case of particularly dirty water we recommend cleaning the filter even several times a day Damage to the machine Damage can occur because of particles of dirt if the filter is not used Inobservance...

Page 33: ...o fluid These problems depend upon wear of one of the above mentioned parts The worn part must be replaced to guarantee a use without problems The description of the procedure for mounting the pumping...

Page 34: ...eck the water pressure on the indicator Clean the filter The plant does not start up The plant stops and does not start up again Filter obstructed Install a new filter The plant makes strange noises A...

Page 35: ...que installed on the machine Only MALTECH spare parts should be used DISPOSAL AND DEMOLITION The relative national regulations must be observed in the case of demolishing and disposal of the machine A...

Reviews: