background image

Making a measurement

 Chapter 3

Visco 88

Page 3-3

6.

Push the viscometer 

 into position in the hole in its clamp. Hold the viscom-

eter steady while tightening the clamp nut 

. Do not overtighten the nut. 

ill 7750

7.

If using a computer to run the Bohlin software, connect the cable from this 


to the connector on the back of the viscometer.

8.

Unless using the battery, plug the AC adapter into the AC power supply and 
the other end of the cable 

 into the viscometer. 

If intending to use the viscometer unplugged, make sure that the batteries are 
charged. If they are not, after the viscometer is powered on the display will 
continue to read 

Low bat

 even after the initial few seconds.

ill 7749

Now work through the rest of this chapter in the order given to make the measure-
ment.

7

8

5

6

Summary of Contents for Visco 88

Page 1: ...Visco 88 User Manual MAN0378 Issue 1 0 October 2006...

Page 2: ...for any changes errors or omissions after the date of publication No reproduction or transmission of any part of this publication is allowed without the express written permission of Malvern Instrumen...

Page 3: ...2 5 Temperature control 2 9 Connections 2 10 Power supply and battery operation 2 11 Making a measurement Introduction 3 1 Assembling the instrument 3 2 Getting started 3 4 Choosing a rotational speed...

Page 4: ...measuring system constants 4 4 Freezing the display 4 5 Using the Bohlin software Introduction 5 1 About the software 5 2 Installing the software 5 2 Connecting to the computer 5 2 Getting started 5...

Page 5: ...Appendices Health and safety General warnings A 1 Power safety A 2 Sample handling warnings A 3 Specification Site requirements Introduction C 3 Environmental conditions C 3 Space required C 4 Power r...

Page 6: ...Table of Contents Visco 88 Page iv MAN 0378...

Page 7: ...Part 1 Operator s Guide...

Page 8: ......

Page 9: ...lain how to perform other tasks for example adjusting the residual torque Explain how to use the instrument connected to a computer running the Boh lin software Identify the user maintenance and troub...

Page 10: ...elp desk if the local Malvern Instruments repre sentative is not available Its direct line is 44 0 1684 891800 Note This help line is primarily English speaking Remote support Malvern Instruments offe...

Page 11: ...is required In addition to standalone use the Visco 88 can be controlled by a connected com puter The computer can run the Bohlin software which allows pre programmed measurements as well as data proc...

Page 12: ...d to maintain the shear rate Torque and movement are converted into rheological format using a set of measuring system constants The calculated shear rate shear stress and viscosity are based on Newto...

Page 13: ...he display The residual torque adjustment position Cal can also be reached by holding down this button see Chapter 4 ON OFF turns power to the instrument on off If the power is switched off the displa...

Page 14: ...connected that communication with it has been achieved Low bat is the battery low indicator always seen temporarily at power on The labels for viscosity shear rate shear stress torque temperature rot...

Page 15: ...g inside an outer cylin der with the sample placed between the two like this ill 7725 The standard instrument has three concentric cylinder measuring systems Inner cylinder diameter 14mm 25mm and 30mm...

Page 16: ...ring loaded chuck attachment This makes measuring systems easy to change The outer cylinders have removable bases to make cleaning easier The O rings in the base are made of Viton The measuring system...

Page 17: ...For example a CP2 5 30 cone has an angle of 2 5 and a 30mm diameter Parallel plate systems are referred to as PP followed by the diameter of the upper plate in millimetres The lower plate is the same...

Page 18: ...t 5 For cone and plate parallel plate systems eight different measuring system combi nations are available The table below shows the main combinations For these measuring systems change the constant s...

Page 19: ...cket as shown below to fit over cup and bob geometries This allows use of an external fluid circulator to regulate the sample temperature when using the DIN standard or wide gap configurations This ha...

Page 20: ...s can be studied more accurately as by default no result buffering occurs The connector is a BNC type connector giving between 0 and 1 volts PSU input plug the power cable from the supplied AC adapter...

Page 21: ...an those supplied Integral Ni Cd batteries these can be used for between 1 5 and eight hours depending on the workload The batteries are recharged automatically when the instrument is connected to the...

Page 22: ...Chapter 2 What is the Visco 88 Page 2 12 MAN 0378...

Page 23: ...heck that the measurement system is optimal Fitting and loading the cup and bob This covers Fitting the measuring system Loading the sample Fitting and loading plate systems This covers Fitting the me...

Page 24: ...ng Caution The Visco 88 is a precision instrument and needs careful handling 2 Use the Allen key supplied to fasten the stand column to the heavy base plate Place the base plate on the bench 3 Place t...

Page 25: ...the connector on the back of the viscometer 8 Unless using the battery plug the AC adapter into the AC power supply and the other end of the cable into the viscometer If intending to use the viscomet...

Page 26: ...ch to select the speed at which the upper measuring system will turn Eight speeds are available in a specific progression scale as shown below Note These speed values are approximations The exact valu...

Page 27: ...turn them to the storage case when not in use Measuring system combinations This table shows all the combinations of SYSTEM switch setting and constant set 1 to 8 used for any measuring system setup D...

Page 28: ...g system of cone angle yy degrees and diameter xx mm The gap to use is 1 cone 0 03mm 30 m 2 5 cone 0 07mm 70 m 5 4 cone 0 15mm 150 m PPxx a parallel plate of diameter xx mm The dimension x mm on the l...

Page 29: ...umn of the table in Chapter 2 Hold the cup so that the vertical cutouts in the top are at the front and back as shown below ill 7745 5 Gently raise the cup onto the instrument then turn it anti clockw...

Page 30: ...plate parallel plates use of the correct gap between the measuring sys tems is crucial An incorrect gap will lead to errors in the results especially with small gaps or small cone angles Set up the su...

Page 31: ...er 2 using a feeler gauge of the appropriate size Other measuring systems Cones of other angles should have certification showing the truncation height Follow the above procedure with a feeler gauge o...

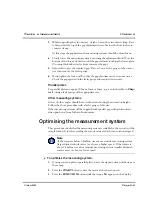
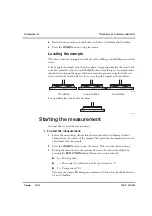
Page 32: ...oad the sample as shown below ill 7747 Overfilled Correctly filled Underfilled For a parallel plate aim for this situation ill 7748 Starting the measurement It is now time to start the measurement To...

Page 33: ...viscom eter and measuring systems given in Chapter 6 This is very important Closing down the viscometer This assumes that the upper measuring system has already been removed as part of the cleaning pr...

Page 34: ...Chapter 3 Making a measurement Page 3 12 MAN 0378...

Page 35: ...oduction This chapter describes other tasks as follows Adjusting the residual torque Reporting the residual torque Calculating rheological data Changing measuring system constants how to change the co...

Page 36: ...e display 3 Run the motor for about 30 seconds Turn the SPEED switch and read the torque at speeds 1 to 4 If the torque value of any of the four lowest speeds is greater than 0 01mNm residual torque a...

Page 37: ...ing the ON OFF button 2 Set the SYSTEM switch to position 8 The SPEED switch can be in any position 3 Simultaneously hold down the START button and press the ON OFF button to switch the power on 4 Rel...

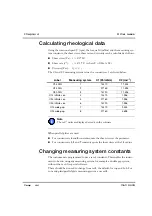
Page 38: ...s at the perimeter For constant sets 3 5 and 7 constants quote the shear stress at the 3 4 radius Changing measuring system constants The instrument is programmed to use a set of constants This enable...

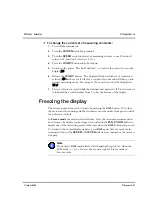
Page 39: ...ile the instrument is powered off The current set is indicated by a small number from 1 to 8 at the bottom of the display Freezing the display The last measured value can be frozen by pressing the CAL...

Page 40: ...Chapter 4 Other tasks Page 4 6 MAN 0378...

Page 41: ...run on a connected computer In this situation the viscometer is controlled by the software and not its front panel controls The chapter covers About the software what it calculates Installing the sof...

Page 42: ...sert the new Bohlin CD in the CD drive 2 If Autorun is enabled on the computer the software will start to install auto matically Follow all on screen instructions to complete the installation 3 If Aut...

Page 43: ...icating that the motor is not running initially 3 Switch on the computer then double click the Bohlin icon to start the software 4 In this User login dialogue select Visco 88 and click OK omit the nam...

Page 44: ...user must read its online help before starting to use it 6 If the computer and instrument are communicating correctly the display on the instrument shows OK as shown below ill 7724 7 If this is not di...

Page 45: ...be selected as required To make the measurement 1 Select File Open parameters to select a file from the following folder C Documents and Settings All Users Application Data Bohlin Rotational Examples...

Page 46: ...the Measured Values panel To stop the measurement at any time click the Abort Test button 7 When the measurement ends the data can be analysed further as described in the online help 8 Click on File...

Page 47: ...tion refer to the online help Closing down the system When the measurement is complete follow the procedure for cleaning the viscom eter and measuring systems given in Chapter 6 This is very important...

Page 48: ...name and click the OK button 4 The USER CONFIGURATION dialogue shows the new name In the Login Entries panel type in the user s full name and the password they will log in with 5 Select the Test Cont...

Page 49: ...Visco 88 Page 6 1 6 Maintenance and troubleshooting Introduction This chapter describes maintenance and fault finding procedures...

Page 50: ...mplete switch the instrument off 2 Lift the upper measuring system clear of the lower one If the sample is very stiff or stringy undo the upper measuring system before lifting the viscometer out of it...

Page 51: ...to cleaning the threads on these Caution Cleaning is important as samples left behind may attack the measuring sys tem surfaces Do not use abrasive or sharp implements since these may scratch or pit...

Page 52: ...C adapter lead is plugged into the back of the viscometer Check that the unit is switched on If operating without the mains power check that the battery is fully charged Check that any fuses are funct...

Page 53: ...obe is submerged about 5mm into the sample If the temperature shown is obviously wrong the temperature card may be faulty contact Malvern Instruments If using a cone and plate parallel plates use the...

Page 54: ...Chapter 6 Maintenance and troubleshooting Page 6 6 MAN 0378...

Page 55: ...Part 2 Appendices...

Page 56: ......

Page 57: ...e system in a manner not specified by Malvern Instruments may impair the protection provided by the system The instrument must only be stored or operated in environmental conditions con forming to the...

Page 58: ...called trailing sockets Ensure the lead is connected to a wall power outlet and not to another exten sion lead The extension lead must be designed for grounding plugs and plugged into a grounded wall...

Page 59: ...eferably a fume cupboard if the fumes from the sample are toxic or noxious Wear personal protective equipment as recommended by the Material Safety Data Sheets if toxic or hazardous sample are being h...

Page 60: ...should be done so in a responsible manner The following are guidelines that should be followed Refer to any local regulations on disposal of equipment in Europe refer to the information below Seek adv...

Page 61: ...ehold type waste the volume of waste sent to incinerators or landfills will be reduced and natural resources will be conserved For more detailed information about recycling of this product please cont...

Page 62: ...Appendix A Health and safety Page A 6 MAN 0378...

Page 63: ...24 5cm Width 23cm Weight 5kg Measuring system DIN 53019 Infinite sea Wide gap C14 C25 C30 C14 C25 C30 C14 C25 Cones 1 2 5 or 5 4 angle 15mm or 30mm diameter Parallel plates 15mm 30mm Accumulator capa...

Page 64: ...4 Measurement out of range and too high is indicated by HI on the display 5 Measurements made when the shear rate is too low are indicated with OFLO on the display Temperature control The temperature...

Page 65: ...Visco 88 Page C 1 C Site requirements Appendix C of the Visco 88 User Manual MAN 0378 Issue 1 0...

Page 66: ...for any changes errors or omissions after the date of publication No reproduction or transmission of any part of this publication is allowed without the express written permission of Malvern Instrume...

Page 67: ...al and vibration free It must also be capable of supporting the weight of the system This table lists the weights of the system components Avoid passing electrical cables through areas where liquids c...

Page 68: ...45mm depth of bench space Allow at least 700mm above the bench surface for easy access to the instrument Power requirements When mains rather than battery power is used the mains power supply must be...

Page 69: ...Visco 88 Page D 1 D Regulatory statements EMC...

Page 70: ...Appendix D Regulatory statements Page D 2 MAN 0378 D...

Page 71: ...cting to computer 5 2 Connections 2 10 Connectors 3 3 Constant sets 4 4 changing 4 4 summary table 3 5 COSHH A 3 Cup and bob constants to use 4 4 described 2 5 fitting and loading 3 7 D DIN53019 2 6 D...

Page 72: ...1 PSU input 2 10 PT100 2 3 R Reporting residual motor torque 4 3 Residual torque adjustment 3 6 Residual torque adjustment 4 2 Residual torque high 4 3 Rheological data calculating 4 4 Rotation but no...

Page 73: ...uptible Power Supply UPS safety A 3 User login screen 5 3 User setup software only 5 7 V Values show zero 6 4 VISCOMETRY button 5 3 Viscosity 4 4 5 2 Viscosity curve 5 7 W Warnings sample handling A 3...

Page 74: ...Page iv Visco 88 Index Visco 88...

Reviews: