1
2
3
4
Removing and installing the crankshaft
109
Removing the crankshaft
D 2866 LUE 605
D
Removing the oil pan and oil pump,
see page 62
D
Removing the gear case, see page 102
D
Remove front cover for sealing crankshaft and
cylinder heads
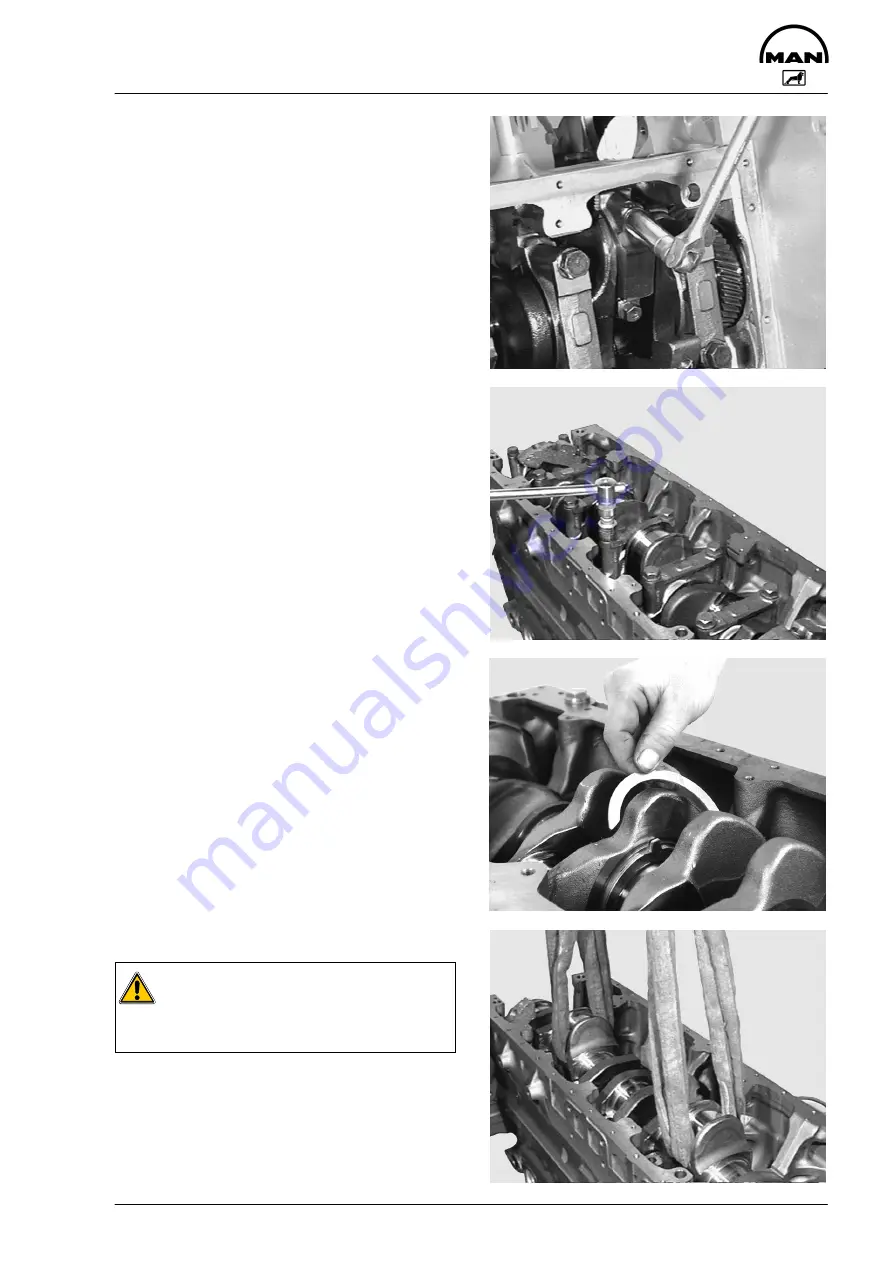
Fig. 1
Remove bolts from connecting rod bearing caps,
take out connecting rods with pistons and arrange
them in order of installation.
Fig. 2
Release the mounting bolts from the crankshaft
bearing caps in stages from the inside outwards
and remove.
Remove the bearing cover and place to one side in
the order of installation.
Remove the bearing bush halves from the bearing
covers and place to one side assigned to the bea-
ring covers.
Fig. 3
Remove the lower half of the contact washers.
Fig. 4
Lift the crankshaft out of the crankcase with hemp
rope or a leather belt.
Caution:
If a steel cable is used, the contact surfa-
ces of the crankshaft bearing journals
could be destroyed.
Remove the bearing shells and the upper halves of
the contact washers from the crankcase. If they
have not yet been marked, mark the bearing shell
halves for the bearing caps.
Clean the parts and check for wear; replace if ne-
cessary.
Summary of Contents for D 2866 LUE 605
Page 1: ......
Page 2: ......
Page 14: ...Notes 12...
Page 19: ...Memoranda 17...
Page 20: ...Engine views 18 Engine views 3 4 2 1 7 6 5 8 11 10 9...
Page 68: ...Memoranda 66...
Page 133: ...131 Service Data...
Page 157: ...155 Special tools...
Page 158: ...Special tools 156 2 3 4 5 6 7 8 1 6 1 6 2 6 3 9 1 9 2 9 3 9...
Page 162: ...Special tools 160 21 22 25 25 2 24 25 1 26 27 1 27 2 27 20 1 19 2 19 1 20 2 19 20 23 28...
Page 164: ...Special tools 162 30 31 32 1 32 32 2...
Page 167: ...Special tools 165 Pressing mandel for cap dia 62 1 mm Pressing mandel for cap dia 50 1 mm...
Page 170: ...Notes 168...
Page 173: ......
Page 174: ......


