35
solutions creator
DIDO 26 MV
fig.20
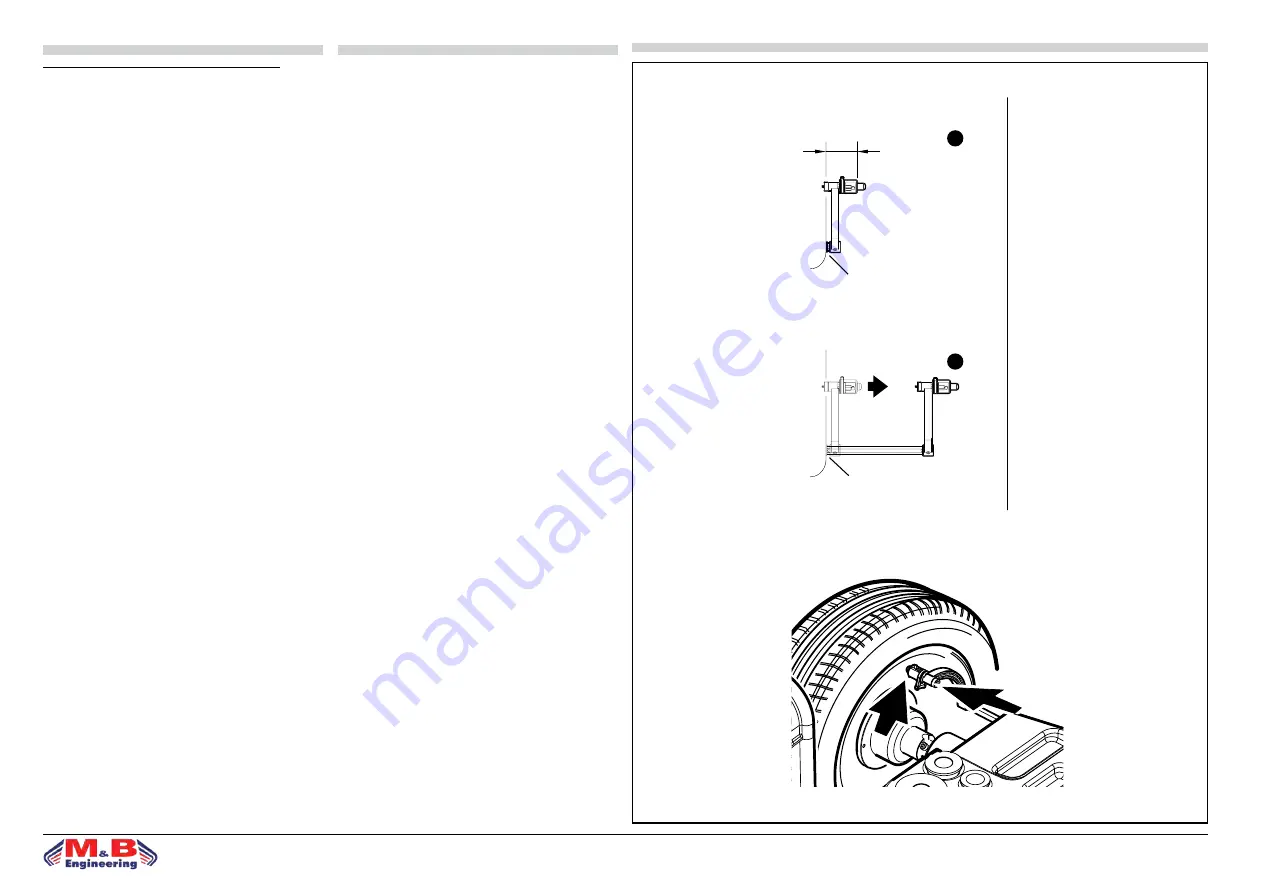
A = 0÷1
fig.19
65
B = 200
a
b
TARATURA BASE DELLA MACCHINA
Per selezionare la modalità autocarro/vettura tenere pre-
muto il tasto menù fino alla comparsa della voce SET, con-
tinuare a premere menù fino all’ultima voce TRK.
Se ON è settata la modalità autocarro, se OFF la modali-
tà vettura (premere i tasti +/- del diametro per cambiare
valore).
•CALIBRAZIONE
Tenere premuto il tasto menù fino alla comparsa della fun-
zione CAL, velocemente premere il tasto mm/inch.
Prima di eseguire i lanci di taratura ruota (C2 lancio ruota
- C3 lancio con peso interno – C4 lancio con peso esterno),
sarà richiesta la taratura del calibro. Premere il tasto menù
e in successione:
d1 --> valore 0 del calibro a riposo: confermare con il tasto
+ della distanza.
d2 --> valore 200mm del calibro: tenendo il calibro in cor-
rispondenza del valore 200 premere tasto + della distanza.
Impostare sulla tastiera il valore del diametro della ruota
scelta per la taratura utilizzando i tasti +/- del diametro.
Portare il tastatore del calibro della distanza con il punto di
battuta sul cerchio e mantenendolo fermo in questa posi-
zione, confermare il dato con il tasto + della distanza.
Attendere BIP di conferma.
Una volta impostato premere il tasto STOP e sul display di
sinistra comparirà C-2.
Si prosegue con il C2 di calibrazione macchina, eseguendo
un lancio con ruota di taratura.
Successivamente alla comparsa di C3, posizionare il peso di
taratura all’interno del cerchio ed eseguire un nuovo lancio.
Alla comparsa di C4, posizionare il peso di taratura all’e-
sterno del cerchio ed eseguire l’ultimo lancio.
Al termine di quest’ultima operazione, occorre girare ma-
nualmente la ruota in modo da portare il peso di calibra-
zione in posizione perpendicolare ad ore 6 (in basso sot-
to l’albero principale); il display di sinistra visualizza C-5
mentre quello di destra il valore dell’angolo di calibrazione;
Tenendo la ruota con il peso di calibrazione a ore 6, preme-
re il tasto SPLIT (che presenta entrambi i led accesi).
La taratura eseguita viene automaticamente memorizzata
in modo permanente.
NB: La taratura si può effettuare sia con ruote vettura che
con ruote autocarro; prestare attenzione al peso da appli-
care in C3 e C4: Per la vettura 100g, per l’autocarro 300g
(valore da settare correttamente anche a display di destra
in C3 con i tasti +/- del diametro).
ITALIANO
ENGLISH
BASIC CALIBRATION OF THE MACHINE
To select the truck/car mode press and hold in the menu
key until SET appears. Continue pressing the menu key
until arriving at the last item, TRK.
If it is set to ON the truck mode is set; if it is OFF the car
mode is set (press the +/- diameter keys to change the va-
lue).
•CALIBRATION
Hold in the menu key until the CAL function appears.
Then quickly press the mm/inch key.
Before executing the wheel calibration spins (C2 spin whe-
el - C3 spin with internal weight – C4 spin with external
weight), the gauge must be calibrated. Press the menu key
followed by:
d1 --> 0 value of the gauge at rest: confirm with the + di-
stance key.
d2 --> 200mm value of the gauge: keeping the gauge in
correspondence to the value 200 press the + distance key.
On the keypad set the diameter value of the wheel selected
for calibration using the +/- diameter keys.
Take the distance gauge sensor with the end position point
onto the rim and, holding it steady in this position, confirm
the data using the + distance key.
Wait for the confirmation BEEP.
Once set, press the STOP key and C-2 will appear on the
left hand display.
Proceed with C2 machine calibration, executing a calibra-
ting wheel spin.
After C3 appears position the calibration weight inside the
rim and execute a new spin.
When C4 appears position the calibration weight inside the
rim and execute the final spin.
At the end of this final operation you must manually turn
the wheel in order to bring the calibration weight into a
perpendicular position at 6 O'clock (at the bottom under
the main shaft); C-5 will appear on the left hand display
while the calibration angle value will appear on the right
hand display;
Holding the wheel with the calibration weight at 6 O'clock,
press the SPLIT key (which will have both LEDs on).
The calibration executed is automatically saved permanen-
tly.
Note: Calibration can be carried out both with car and
truck wheels; pay attention to the weight to be applied in
C3 and C4: For cars use 100g, for trucks use 300g (value to
be correctly set on the right hand display as well in C3 with
the +/- diameter keys).
Summary of Contents for DIDO 26 MV
Page 2: ......
Page 39: ...39 solutions creator ...
Page 40: ...40 solutions creator ...
Page 41: ...41 solutions creator ...
Page 42: ...42 solutions creator ...
Page 44: ...44 solutions creator ...
Page 50: ...50 solutions creator ...
Page 51: ...51 solutions creator ...
Page 52: ...52 solutions creator ...
Page 53: ...53 solutions creator ...
Page 54: ...54 solutions creator ...
Page 55: ...55 solutions creator ...
Page 56: ...56 solutions creator ...
Page 57: ...57 solutions creator ...


