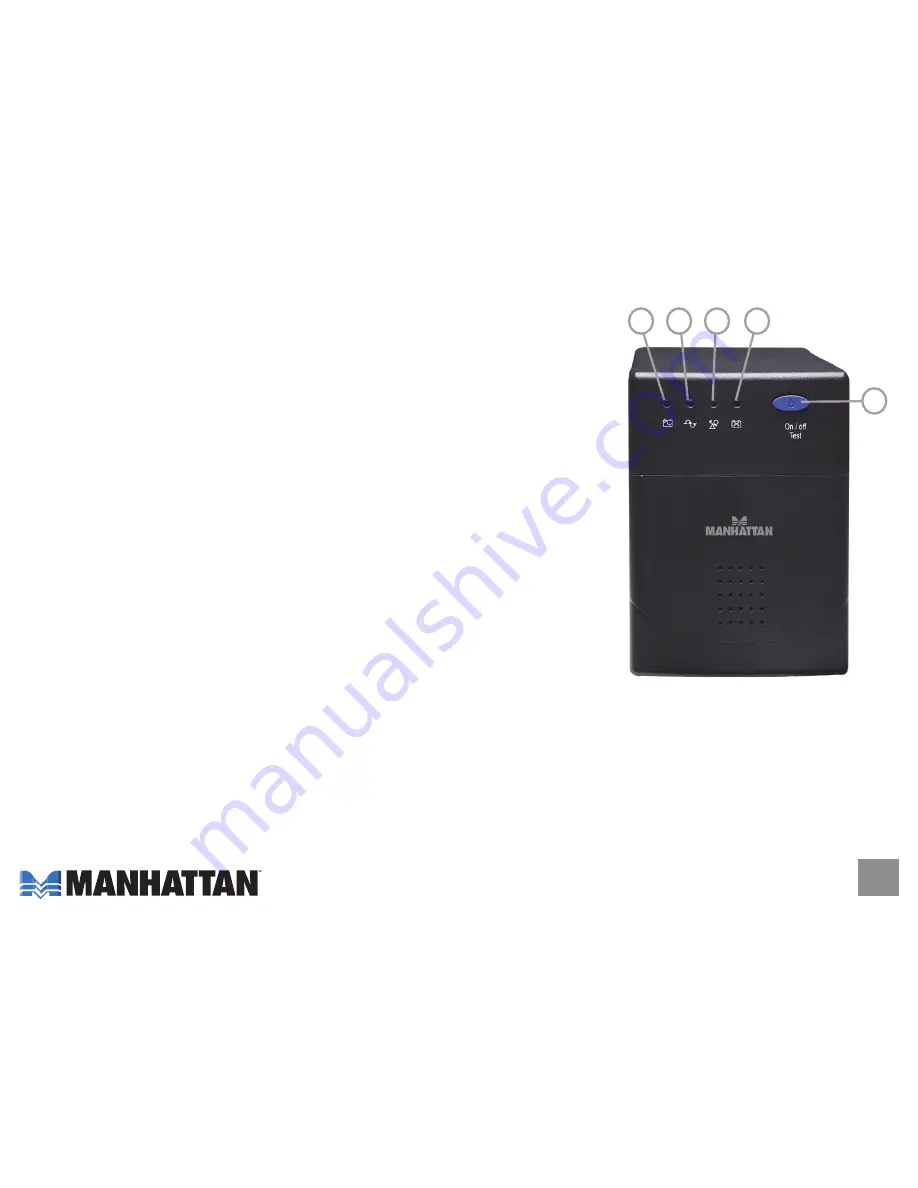
controls & indicators
1. On/Off/Test Button:
This button controls power to the UPS and its
output receptacles. Press and hold the button one to four seconds to
switch on the UPS.
Press and hold the button two to three seconds when the utility power is
normal, and the UPS will simulate a utility outage and perform its self-test
function. It provides a convenient means of testing the UPS’s battery.
Push the button during a utility failure (when the UPS is off), and the UPS
will re-start and provide power to its output receptacles.
During a utility power outage, the UPS will emit one beep every five
seconds. Press and hold the button for two seconds to silence the beep.
2. Replace Battery LED:
The LED lights when the UPS detects that the
battery needs to be replaced soon. Charge the UPS at least four hours.
If the LED lights again after charging, the battery might need replacing.
3. Overload LED:
During an overload operation, the UPS will emit a loud
tone and this LED will come on. See Troubleshooting to recover the UPS.
4. On-line LED:
During normal operation, this indicator always stays on.
When the automatic voltage regulator is in operation, this LED blinks.
5. On-battery LED:
In on-battery operation, the on-battery LED illuminates and the UPS will sound two
beeps once every ten seconds. The UPS will emit a steady tone when the battery reserve runs low
until either the AC returns or the UPS shuts down from battery exhaustion.
3
5
4
2
1
120 V Model 168120 shown. Indicators are
similar for 220 V version and both versions
of Model 168175.


