INSTRUCTIONS
SOLSENSE MOTION SENSOR
LED LIGHT
PACKAGE CONTENTS
•
Solsense light
•
Light mount
•
3 screws and plastic plugs
•
User’s manual
TECHNICAL SPECIFICATIONS
•
Illuminated area: 50
–
80
m²
•
IP rating: IP65
•
Solar panel: 5 V, 300 mA
•
Output power: 4 W
•
Luminous flux: 500 lm
•
Battery: lithium, 3.7 V, 1200 mAh
•
Charging time: 4
–
6 h
•
Sensor range: 0
–
6 m
•
Sensor angle: 120°
•
Material: PC, ABS
•
Size:
3 × 11 × 14 cm
INSTALLATION
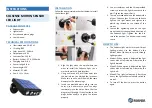
Follow the steps pictured in the chart below to install
the Solsense light.
1.
Align the light mount on a wall where you
want to install the Solsense light. Use a
marker to mark the hole locations.
2.
Using an electric drill, drill three holes into
the wall where you marked the locations.
Make sure you use a drill bit with the same
diameter as the plastic plugs.
3.
Insert the provided plastic plugs into the
holes. Use a hammer to push the plugs
completely into the holes. Note that the
plugs must fit snugly. If they feel loose, the
plugs will be unable to grasp the screws
properly.
4.
Use a screwdriver and the three provided
screws to screw the light mount onto the
wall. Tighten the screws firmly.
5.
There is a threaded hole on the bottom side
of your Solsense light. Screw the Solsense
light on the light mount and tighten the
plastic ring located on the thread of the
mount.
6.
Loosen the tightening knob on the light
mount to adjust the angle and direction of
the Solsense light. Tighten the knob to
secure the position. The device is now ready
to use.
HOW TO USE
•
The Solsense light works in three different
lighting modes. Use the button on the
bottom side of the device to cycle through
lighting modes.
•
Mode 1: When motion is detected, the light
shines with its full intensity. Otherwise, the
light is dimmed.
•
Mode 2: When motion is detected, the light
shines with its full intensity. Otherwise, the
light is off.
•
Mode 3: The light is always on. After three
hours, the light will automatically switch to
mode 2.
•
To turn off the device, press the button
again.


