background image

2-4

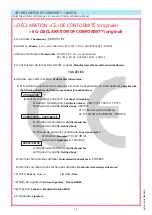
  «EC» DECLARATION OF CONFORMITY  - 160 ATJ E3 ET 160 ATJS E3

1)


DÉCLARATION «CE» DE CONFORMITÉ (originale)

« EC» DECLARATION OF CONFORMITY (original)

2)

 La société, 

The company

 : MANITOU BF

3)

 Adresse, 

Address

 :  

430, rue de l’Aubinière - BP 10249 - 44158 - ANCENIS CEDEX - FRANCE

4)

 Dossier technique,

Technical file

 :  

MANITOU BF - 430, rue de l’Aubinière

BP 10249 - 44158 - ANCENIS CEDEX - FRANCE

5)

 Constructeur de la machine décrite ci-après, 

Manufacturer of the machine described below

 :

        160 ATJ


E3 et 160 ATJS E3

6)

 Déclare que cette machine, 

Declares that this machine

 :


7)

  Est conforme aux directives suivantes et à leurs transpositions en droit national, 

Complies with 

the following directives and their transpositions into national law

 :


8)

 Pour les machines annexe IV , 

For annex IV machines

 :  


9)

 Numéro d’attestation, 

Certificate number 

:   0526 5179 760 10 11 4965


10)

 Organisme notifié, 

Notified body

 :  CETIM  NB N° 0526


  52 avenue Felix Louat - BP 80067 


  60304 SENLIS CEDEX    FRANCE


11)

 Numéro d’attestation, 

Certificate number 

:       


10)

 Organisme notifié, 

Notified body

 : 


12)

 Niveau de puissance acoustique, 

Sound power level 

:       


13)

 Mesuré, 

Measured :    

101,61 dB (A)


14)

 Garanti, 

Guaranteed

 : 102  dB (A)


11)

 Numéro d’attestation, 

Certificate number 

:       


10)

 Organisme notifié, 

Notified body

 : 


15)

 Normes harmonisées utilisées, 

Harmonised standards used

 : EN12895


16)

 Normes ou dispositions techniques utilisées, 

Standards or technical provisions used

 :

17)

 Fait à, 

Done at

 : 

Ancenis


18)

 Date, 

Date

 : 

12/10/2011

19)

 Nom du signataire, 

Name of signatory

 : 

Eric LAMBERT

20)

 Fonction, 

Function

 : 

Président division RTH

21)

 Signature, 

Signature

 :

2006/42/CE

2000/14/CE + 2005/88/CE

2004/108/CE


• UP TO THE LIFTING PLATFORM No. 951 457 EXCEPT LIFTING PLATFORM No. 950 552

647414 EN (27/05/2015)

Summary of Contents for 160 ATJ E3

Page 1: ...2 E3 RC AUSTRALIA MANITOU BF BP 10249 44158 ANCENIS CEDEX FRANCE TEL 33 0 2 40 09 10 11 YOUR DEALER INSTRUCTIONS MANUAL ORIGINALINSTRUCTIONSMANUAL THIS INSTRUCTIONS MANUAL MUST BE KEPT PERMANENTLY INTHE LIFTTRUCK ANDTHE OPERATORS MUST HAVE READ AND FULLY UNDERSTOOD IT ...

Page 2: ... to ensure that the platform remains in a completely safe and operational condition The platform has been designed and produced to enable you to perform your overhead work completely safely Before it was delivered MANITOU and the dealer have carefully inspected the platform so that it comes to you in perfect working order 647414 EN 27 05 2015 ...

Page 3: ...TIONS AND ADVICE 2 DESCRIPTION 3 MAINTENANCE THE TEXT AND THE ILLUSTRATIONS IN THIS DOCUMENT MAY NOT BE REPRODUCED EITHER IN WHOLE OR IN PART 06 03 2014 27 05 2015 1st PUBLICATION DATE UPDATE EN280 647414 EN 27 05 2015 ...

Page 4: ...REAR 160 ATJ E3 FRONT 647414 EN 27 05 2015 ...

Page 5: ...180 ATJ 2 E3 REAR FRONT 647414 EN 27 05 2015 ...

Page 6: ...647414 EN 27 05 2015 ...

Page 7: ...1 1 1 OPERATING AND SAFETY INSTRUCTIONS 1 OPERATING AND SAFETY INSTRUCTIONS 647414 EN 27 05 2015 ...

Page 8: ...1 2 647414 EN 27 05 2015 ...

Page 9: ...RM MAINTENANCE INSTRUCTIONS 1 24 GENERAL INSTRUCTIONS 1 24 MAINTENANCE 1 24 LUBRICANT AND FUEL LEVELS 1 24 LEVEL OF ELECTROLYTE IN THE BATTERY 1 24 HYDRAULIC 1 25 ELECTRICITY 1 25 WELDING ON THE ACCESS PLATFORM 1 25 WASHING THE PLATFORM 1 25 IF THE PLATFORM IS NOT TO BE USED FOR A LONG TIME 1 26 INTRODUCTION 1 26 PREPARING THE PLATFORM 1 26 PROTECTING THE I C ENGINE 1 26 CHARGING THE BATTERIES 1 2...

Page 10: ... platform operator tempted to operate a truck to win a bet in competition or for their own personal experience The person in charge of the equipment must take these criteria into account when assessing whether or not a person will make a suitable driver OBTAIN INFORMATION ON How to behave when there is a fire The location of the nearest first aid kit and fire extinguisher The emergency telephone n...

Page 11: ...ur safety and that of others you must not change the structure and settings of the various components used in your platform hydraulic pressure calibrating limiters I C engine speed addition of extra equipment addition of counterweight unapproved attachments alarm systems etc yourself In this event the manufacturer cannot be held responsible Your lifting platform is delivered with standard wheels o...

Page 12: ... on the platform and be written in the language used by the operator Any operations or manoeuvres not described in the operator s manual must necessarily be forbidden right from the start Follow the safety advice and the instructions on the platform Ypu must necessarily replace the operator s manual as well as any plates or stickers if they are no longer legible or are damaged A second operator mu...

Page 13: ...ries The batteries are not charged in an explosive environment There is no smoking and no naked flame directed towards the batteries when they are being handled during removal re installation and checking the levels D MODIFYING THE PLATFORM For your safety and that of others you must not change the structure and settings of the various components used in your platform yourself hydraulic pressure c...

Page 14: ... body outside the basket is forbidden Safety helmets must be worn MANITOU recommends a safety harness in the operator s size be provided when the platform is in use for the harness attachement in the basket see chapter 2 DESCRIPTION CHECKING AND CONTROL INSTRUMENTS pages The control units must never in any event be used for any other than their intended purposes e g climbing onto or down from the ...

Page 15: ...Do not heap up these materials to the pint where you have to step over them If the basket must remain stationary over a structure for a long period there is a risk that the basket will rest on this structure because of the oil cooling in the cylinders or a minor leak in the cylinder locking system To eliminate this risk Regularly check the distance between the basket and the structure and re adjus...

Page 16: ... the electricity distributor or transmission line operator documentary evidence that the conductors have been positively de energized isolated and earthed Where such documentary evidence has been made available it shall state the date and time frame of isolation and any special conditions and precautions The platform shall not be operated in contravention of this documentary information C1 2 Preca...

Page 17: ...lines up to and including 133 kV unless A written permission from the electricity distributor has been obtained B a spotter performs spotting duties and C a pre start site job meeting has been convened and a risk assessment completed b Overhead power lines greater than 133 kV The following applies i No go zone The platform shall not be operated in the no go zone as indicated in Figure C1 3 for ove...

Page 18: ...ty distributor B written permission from the electricity distributor has been obtained C all conditions specified by the electricity distributor are complied with D the electricity distributor is notified before commencing work E a spotter performs spotting duties and F a pre start site job meeting has been convened and a risk assessment completed ii Spotter required zone The platform shall not be...

Page 19: ...platform during operation g Earthing systems An appropriate earthing system shall be fitted to the platform and shall be in use Operators and those working in proximity to the platform shall be advised of the limits of the effectiveness of the earthing equipment NOTE The purpose of the earthing system is to provide an alternate path to earth to minimize risks to personnel and plant and it may not ...

Page 20: ...1 14 FIG C1 3 CLEARANCES FROM LIVE AERIAL CONDUCTORS 647414 EN 27 05 2015 ...

Page 21: ...ch any part of the platform c Without anyone approaching the platform operate the platform in such a manner to break contact where possible d When unable to move or disentangle the platform from the aerial conductors remain on the platform and take no further action until it is confirmed that conditions are safe Where the platform operator is immobilized the power shall be isolated before assistan...

Page 22: ...1 16 FIG C1 4 TYPICAL AFFECTED AREA SURROUNDING A PLATFORM WHEN IN CONTACT WITH A LIVE AERIAL CONDUCTOR 647414 EN 27 05 2015 ...

Page 23: ...f water moderate waves of some length 6 Strong breeze 22 27 39 49 10 8 13 8 Large branches are moved overhead wires whistle umbrella use becomes difficult Waves form with white foam crests and airborne spray 7 High wind 28 33 50 61 13 9 17 1 Whole trees are moving effort required to walk against the wind The sea heaps up some foam from breaking waves is blown into streaks in the wind direction 8 G...

Page 24: ...ng into a low doorway overhead electric wires travelling cranes highway bridges tracks or any obstacle in the area in front of the platform In reverse look directly behind you In any case avoid reversing over long distances If visibility of your road is inadequate ask someone to help standing outside the area in which the platform will be moving and make sure you always have a good view of this pe...

Page 25: ...tor for more than 15 seconds and carry out the preheating for 10 seconds between unsuccessful attempts Check all control instruments when the I C engine is warm and at regular intervals during use so as to quickly detect any faults and to be able to correct them without any delay If any faults are displayed on the screen stop the engine and immediately take the necessary measures ELECTRICPLATFORMS...

Page 26: ... in control of your speed Travel slowly on damp slippery or uneven terrain or on truck ramps Always remember that the hydraulic form of steering is very sensitive to movements Never leave the I C engine on when the platform is unattended Look where you are going and always make sure you have good visibility along the route Drive round obstacles Never drive on the edge of a ditch or steep slope Wha...

Page 27: ...the platform after a long working period leave the I C engine idling for a few moments to allow the coolant liquid and oil to lower the temperature of the I C engine and transmission Do not forget this precaution in the event of frequent stops or warm stalling of the I C engine or else the temperature of certain parts will rise significantly due to the stopping of the cooling system with the risk ...

Page 28: ...welded without damaging the electronic components The power supply to the welding equipment must be via an earthed socked and any extension required just also be earthed In all cases ensure that there are no electrical arcs in the basket or on the platform contact between the brazing rod or the torch and the welding equipment s earth To ensure this at any time the welding equipment s earth must no...

Page 29: ...1 23 647414 EN 27 05 2015 ...

Page 30: ...e to perform the periodic service may cancel the contractual guarantee MAINTENANCE LOG The maintenance work performed following the recommendations in Part 3 MAINTENANCE and the other inspection servicing repair and modification work performed on the lifting platform must be recorded in a maintenance log A note must be made for each operation of the date of the work the names of the persons or com...

Page 31: ...battery or batteries before welding on the platform When carrying out electric welding work on the platform connect the negative cable from the equipment directly to the part being welded so as to avoid high tension current passing through the alternator or the live ring If the platform is equipped with an electronic control unit disconnect this before starting to weld to avoid the risk of causing...

Page 32: ...ngine running at idling speed for a few minutes then switch off Replace the I C engine oil and oil filter see 3 MAINTENANCE Add the protective product to the engine oil Run the I C engine for a short time so that the oil and cooling liquid circulate inside Disconnect the battery and store it in a safe place away from the cold after charging it to a maximum Remove the injectors and spray the protec...

Page 33: ...gine cut off solenoid Refit and reconnect the battery Remove the protection from the cylinder rods Perform the daily service see 3 MAINTENANCE Empty and replace the fuel and replace the fuel filter see 3 MAINTENANCE Refit and set the tension in the drive belts see 3 MAINTENANCE Turn the I C engine using the starter to allow the oil pressure to rise Lubricate the platform completely see 3 MAINTENAN...

Page 34: ...he manufacture of cement or to create reusable granules LENSES These can be removed and collected for processing by glass manufacturers ENVIRONMENTALPROTECTION If you entrust the maintenance of your nacelle to the MANITOU network the risk of pollution is limited and the contribution to the protection of the environment is respected WORN OR DAMAGED PARTS Do not discard parts into the environment MA...

Page 35: ...1 29 647414 EN 27 05 2015 ...

Page 36: ...g 90 Lbs 7 2 9 9 6 7 6 831465 21 5 5 5 5 678424 14 9 9 676988 A 676988 A 9 9 9 12 679452 12 679452 9 676988 A 10 679450 10 679450 10 679450 12 10 679450 9 676988 A 676988 A 11 683112 679452 12 679452 676988 A 676988 A 676988 A 676988 A 679450 10 10 679450 683108 A 13 6 3 15 15 17 17 17 17 4 685608 16 598892 A 59 76 52 18 30 C 22 F 59 76 49 40 C 40 F 20 19 17 17 22 647414 EN 27 05 2015 ...

Page 37: ...F 676988 1 25 10 DANGER KEEP AWAY REF 679450 1 25 11 MOVING PART REF 683108 1 25 12 DANGER RISK OF CRUSHING REF 679452 1 25 13 RISK OF BURNS REF 683112 1 26 14 ARM SUPPORT REF 678424 1 26 15 SAFETY ATTACHMENTS REF 834438 1 26 16 RECOMMENDATIONS FOR WASHING REF 313672 1 26 17 TIE DOWN HOOK REF 833041 1 27 18 HYDRAULIC OIL REF 597652 1 27 19 DIESEL REF 683437 1 27 20 ANTI FREEZE REF 597649 1 27 21 S...

Page 38: ...ooking at the arrows on the chassis and those on the basket control console 3 BASKET INSTRUCTIONS AND LOAD CAPACITY This describes several points The platform s capacity in indoor and outdoor use The risks of electric shocks An invitation to check the instructions for more details on the safety instructions NOTE The capacities are individual to each platform please refer to this sticker for your o...

Page 39: ...machine must not be towed if it breaks down 4C WASHING RECOMMENDATIONS It is strictly forbidden to use a pressure washer to clean the control knobs and the electrical components 5 WHEEL LOAD Thisshowsthemaximumloadthatawheelmayexertontheground see2 DESCRIPTION CHARACTERISTICS for the value A B C 4900 Kg 10800 Lbs 313819 B 180 ATJ 2 E3 160 ATJ E3 647414 EN 27 05 2015 ...

Page 40: ...performing movements with the emergency pump and the manual controls when an accident or breakdown occurs that makes the electrical control box inoperative Operate see the description in SECTION 2 8 EMERGENCY PUMP The emergency pump must only be used in the event of a problem or breakdown occurring It must not be used for longer than 4 minutes in every 10 minute period 676992 831465 A 676992 2 1 6...

Page 41: ...rms scissors jib mounted platform basket and in the lifting platform s operating area 11 MOVING PART This sticker shows the hazard relating to locating hands or fingers at this place cutting of fingers in the blades of the cooling fan 12 DANGER OF BEING CRUSHED It is strictly forbidden to park in this area when the lifting platform is moving translation rotation etc The components to which the sti...

Page 42: ...the use of a maintenance support when working on the lifting platform in operating position 15 SAFETY ATTACHMENTS This sticker shows where the safety harness should be attached and the number of people that can use it 16 RECOMMENDATIONS FOR WASHING This adhesive indicates that water must not be splashed on the mouth of the air filter or on the electrical components 647414 EN 27 05 2015 ...

Page 43: ...servoir is designed only to hold hydraulic oil NB see MAINTENANCE LUBRICANTS 19 DIESEL This indicates that this reservoir is designed only to hold fuel for diesel vehicles 20 ANTI FREEZE This sticker indicates that there is anti freeze in the engine When protection is provided by anti freeze with properties differing from the original the 30 or 40 C box must be ticked 647414 EN 27 05 2015 ...

Page 44: ...default S Communicationdefault T Memorydefault U Functionalwarning V Activatingdefault C Opencircuit wirecut DEFAULT CODE A Court circuitau démarrageavant alimentationdu composant B Horsneutremouve mentaudémarrage C Circuitouvert Fil coupé D Court circuit au E Incohérencecapteurs redondants TORouANA F Valeurhorsplage G Défautniveauhaut H Défautniveaubas S Défautcommunication T Défautmémoire V Défa...

Page 45: ...elating to locating hands or fingers at this place cutting of fingers in the blades of the cooling fan 25 ELECTRICAL SAFETY DISTANCE This sticker shows the differents aeras for operating with elevating work platforms near power lines 26 USE MANITOU TYRES ONLY This sticker indicates that the operator must use the tyres defined by Manitou 683109 A 683108 A 647414 EN 27 05 2015 ...

Page 46: ...1 40 647414 EN 27 05 2015 ...

Page 47: ...2 1 2 DESCRIPTION 2 DESCRIPTION 647414 EN 27 05 2015 ...

Page 48: ...2 2 647414 EN 27 05 2015 ...

Page 49: ...0 ATJ E3 160 ATJ E3 RC 2 20 SPACE OCCUPIED 160 ATJS E3 2 21 SPACE OCCUPIED 180 ATJ 2 E3 180 ATJ 2 E3 RC 2 22 DIAGRAM 160 ATJ E3 160 ATJ E3 RC 160 ATJS E3 2 24 DIAGRAM 180 ATJ 2 E3 180 ATJ 2 E3 RC 2 25 LIFTING PLATFORM OPERATION 2 26 BASE CONTROLS 2 28 BASKET CONTROLS 2 30 EMERGENCY AND GROUND MAINTENANCE STATION 2 32 BASKET CONTROL STATION 2 39 SCREEN DISPLAY PAGE DESCRIPTIONS 2 48 DESCRIPTION OF ...

Page 50: ...or annex IV machines 9 Numéro d attestation Certificate number 0526 5179 760 10 11 4965 10 Organisme notifié Notified body CETIM NB N 0526 52 avenue Felix Louat BP 80067 60304 SENLIS CEDEX FRANCE 11 Numéro d attestation Certificate number 10 Organisme notifié Notified body 12 Niveau de puissance acoustique Sound power level 13 Mesuré Measured 101 61 dB A 14 Garanti Guaranteed 102 dB A 11 Numéro d ...

Page 51: ...ito 6 Dichiara che questa macchina 7 È conforme alle direttive seguenti e alle relative trasposizioni nel diritto nazionale 8 Per le macchine Allegato IV 9 Numero di Attestazione 10 Organismo notificato 15 norme armonizzate applicate 16 altre norme e specifiche tecniche applicate 17 Stabilita a 18 Data 19 Nome del firmatario 20 Funzione 21 Firma lt 1 CE atitikties deklaracija originalas 2 Bendrovė...

Page 52: ...nnex IV machines 9 Numéro d attestation Certificate number 0062 5131 760 04 15 0313 10 Organisme notifié Notified body VERITAS 61 71 Boulevard du Château 92 571 NEUILLY SUR SEINE FRANCE 11 Numéro d attestation Certificate number 10 Organisme notifié Notified body 12 Niveau de puissance acoustique Sound power level 13 Mesuré Measured 101 61 dB A 14 Garanti Guaranteed 102 dB A 11 Numéro d attestatio...

Page 53: ...ito 6 Dichiara che questa macchina 7 È conforme alle direttive seguenti e alle relative trasposizioni nel diritto nazionale 8 Per le macchine Allegato IV 9 Numero di Attestazione 10 Organismo notificato 15 norme armonizzate applicate 16 altre norme e specifiche tecniche applicate 17 Stabilita a 18 Data 19 Nome del firmatario 20 Funzione 21 Firma lt 1 CE atitikties deklaracija originalas 2 Bendrovė...

Page 54: ...exe IV For annex IV machines 9 Numéro d attestation Certificate number 0526 5131 760 05 13 4968 10 Organisme notifié Notified body CETIM NB N 0526 52 avenue Felix Louat BP 80067 60304 SENLIS CEDEX FRANCE 11 Numéro d attestation Certificate number 10 Organisme notifié Notified body 12 Niveau de puissance acoustique Sound power level 13 Mesuré Measured 103 5 dB A 14 Garanti Guaranteed 104 dB A 11 Nu...

Page 55: ...ito 6 Dichiara che questa macchina 7 È conforme alle direttive seguenti e alle relative trasposizioni nel diritto nazionale 8 Per le macchine Allegato IV 9 Numero di Attestazione 10 Organismo notificato 15 norme armonizzate applicate 16 altre norme e specifiche tecniche applicate 17 Stabilita a 18 Data 19 Nome del firmatario 20 Funzione 21 Firma lt 1 CE atitikties deklaracija originalas 2 Bendrovė...

Page 56: ...es and their transpositions into national law 8 Pour les machines annexe IV For annex IV machines 9 Numéro d attestation Certificate number 0062 5131 760 04 15 0312 10 Organisme notifié Notified body VERITAS 61 71 Boulevard du Château 92 571 NEUILLY SUR SEINE FRANCE 11 Numéro d attestation Certificate number 10 Organisme notifié Notified body 12 Niveau de puissance acoustique Sound power level 13 ...

Page 57: ...ito 6 Dichiara che questa macchina 7 È conforme alle direttive seguenti e alle relative trasposizioni nel diritto nazionale 8 Per le macchine Allegato IV 9 Numero di Attestazione 10 Organismo notificato 15 norme armonizzate applicate 16 altre norme e specifiche tecniche applicate 17 Stabilita a 18 Data 19 Nome del firmatario 20 Funzione 21 Firma lt 1 CE atitikties deklaracija originalas 2 Bendrovė...

Page 58: ...er s plate is fastened inside the turret on the motor side EWPADDITIONAL INFORMATION PLATE FIG C Model Serial No Date of commission Design Registration No LOCATION OF THE EWPADDITIONAL INFORMATION PLATE FIG D NO D1 The EWP additional information plate is fastened inside the turret on the motor side and beside the manufacturer s plate A B C D B1 D1 647414 EN 27 05 2015 ...

Page 59: ...E1 Engine no HYDROSTATIC PUMP FIG F Pump No Coding type Manufacture No Year of manufacture FRONT AXLE FIG G Axle type Serial No Manufacture No REAR AXLE FIG H Axle type Serial No Manufacture No E F H G E1 647414 EN 27 05 2015 ...

Page 60: ...n mm 405 405 455 455 2 Load on one front wheel transport position Kg 1465 1337 1540 20 Load on one rear wheel transport position Kg 1615 1588 1690 20 Max load on one wheel work position Kg 3740 3740 3910 25 Contact surface on the ground hard soft ground Cm 267 620 325 602 290 780 20 Surface punch through hard soft ground daN cm 14 06 6 03 11 51 6 22 13 48 5 02 HYDRAULIC MOVEMENT basket control UNI...

Page 61: ...45 Supplier BOSCH REXROTH Cylinder capacity Cm3 46 Max service pressure bar Dr 305 5 Hydrostatic motor A2FM80 Supplier BOSCH REXROTH Cylinder capacity Cm3 80 Axle Type 26 20 Type 211 front Type 111 rear Type 26 20 Supplier CARRARO DANA CARRARO Reduction ratio 42 97 44 02 42 97 Traction power daNm 3130 3300 2790 Front axle differential SLIPPAGE LIMIT 45 Rear axle differential Hydraulic lock 100 No ...

Page 62: ... Return μm Suction μm 100 ß10 Pressure μm 10 ELECTRICAL CIRCUIT UNIT 160 ATJ E3 160 ATJS E3 160 ATJ E3 Wheel 18 TOL Battery C5 capacity Ah 105 Nominal voltage V 12 Type Starting Alternator Type Intensity A 40 Voltage V 12 Starter Type Power Kw Voltage V 12 EMERGENCY PUMP UNIT 160 ATJ E3 160 ATJS E3 160 ATJ E3 Wheel 18 TOL Type Electric Cubic capacity Cm3 2 0 Power Kw 1 3 Voltage V 12 Intensity at ...

Page 63: ...nce angle under chassis 75 78 2 INT EXT radius of gyration two wheel mm 2800 5600 2112 4990 2800 5600 3 INT EXT radius of gyration four wheel mm 1390 3710 3 Basket External volume mm 1800 x 800 1 Floor area mm 1790 x 760 1 CAPACITY UNIT 160 ATJ E3 160 ATJS E3 160 ATJ E3 Wheel 18 TOL Hydraulic oil reservoir l 54 2 Diesel tank l 52 2 Engine oil sump l 6 7 2 Coolant circuit l 5 2 STANDARD EQUIPMENT U...

Page 64: ...1h transport mm 405 455 2 Front rear wheel radius under dynamic load transport mm 415 477 Bearing circumference recorded mm 2618 2999 Load on a front wheel transport position Kg 1763 1840 5 Load on a rear wheel transport position Kg 1862 1935 5 Maximum load on a wheel working position Kg 4742 4845 5 Bearing surface on ground hard unconsolidated Cm 268 645 314 830 3 Indenting on ground hard unconso...

Page 65: ...TATIC Pump A10VG45 Supplier BOSCH REXROTH Cylinder capacity hydraulic transmission Cm3 46 Max service pressure bar Dr 305 5 Hydrostatic motor A10FM63 Supplier BOSCH REXROTH Cylinder capacity Cm3 63 Axle Type 26 20 Supplier CARRARO Reduction ratio 52 36 Traction power daNm 3130 2790 Front axle differential SLIPPAGE LIMIT 45 Rear axle differential Hydraulic lock 100 No of steered wheels front rear 2...

Page 66: ...turn μm Suction μm 100 ß10 Pressure μm 10 ELECTRICAL CIRCUIT UNIT 180 ATJ 2 E3 180 ATJ 2 E3 Wheel 18 TOL Battery C5 capacity Ah 105 Nominal voltage V 12 Type Starting Alternator Type Intensity A 40 Voltage V 12 Starter Type Power Kw Voltage V 12 EMERGENCY PUMP UNIT 180 ATJ 2 E3 180 ATJ 2 E3 Wheel 18 TOL Type Electric Cubic capacity Cm3 2 0 Power Kw 1 3 Voltage V 12 Intensity at 150 bars A Integral...

Page 67: ...ce under chassis 2 mm 260 310 2 Maximum angle under chassis 75 78 2 Interior turning circle 2 wheels 4 wheels mm 3 Exterior turning circle 2 wheels 4 wheels mm 1390 3710 1390 3710 3 Basket External dimensions mm 1800 x 800 1 Floor area mm 1790 x 760 1 CAPACITY UNIT 180 ATJ 2 E3 180 ATJ 2 E3 Wheel 18 TOL Hydraulic oil reservoir l 54 2 Diesel tank l 52 2 Engine oil sump l 6 7 2 Coolant circuit l 5 2...

Page 68: ...DIMENSIONS 160 ATJ E3 160 ATJ E3 RC B A M E L C C1 A1 X D F G H J K A 6530 A1 4440 B 2200 C 2370 C1 2610 D 2298 E 355 F 260 G 1390 H 3710 J 5950 K 2730 L 370 M radius under load 405 X 37 647414 EN 27 05 2015 ...

Page 69: ...2 23 DIMENSIONS 160 ATJS E3 G H J K B E M L C A A1 C1 X D F A 6530 A1 4440 B 2200 C 2370 C1 2610 D 2320 E 355 F 275 G 2112 H 4990 J 5734 K 3490 L 370 M 405 X 35 5 647414 EN 27 05 2015 ...

Page 70: ...ONS 180 ATJ 2 E3 180 ATJ 2 E3 RC B A M E X A1 C1 C L D F G H K I J A 7591 A1 5522 B 2429 C 2472 C1 2610 D 2298 E 355 F 260 G 1390 H 3710 I 4528 J 6891 K 2730 L 316 M radius under load 405 X 37 647414 EN 27 05 2015 ...

Page 71: ...2 25 647414 EN 27 05 2015 ...

Page 72: ...ATJS E3 G1 H1 H2 G2 H3 G3 G5 G4 H4 H5 H6 10 3 11 13 15 16 17 10 9 8 7 6 12 14 2 1 0 1 3 3 1 2 4 5 6 7 8 4 2 5 9 2 2 3 4 5 3 7 8 9 10 6 G1 2910 G2 3890 G3 7795 G4 7820 G5 6820 H1 14010 H2 12470 H3 7505 H4 2225 H5 205 H6 7380 647414 EN 27 05 2015 ...

Page 73: ...2 3 4 5 6 7 8 2 3 1 2 3 4 5 6 7 8 9 10 11 12 13 14 15 16 17 18 19 0 1 2 3 4 5 6 7 8 9 G3 10 G4 11 H4 1 G5 2 H5 10 11 3 H1 H2 G2 H3 H6 9 G1 3552 G2 4537 G3 10038 G4 10065 G5 9063 H1 16120 H2 14577 H3 7556 H4 2275 H5 58 H6 7434 647414 EN 27 05 2015 ...

Page 74: ...basket controls are working correctly Stickers showing the characteristics safety warnings and the rescue procedure are affixed to the machine The operator must read these and fully understand their content To avoid any risk of wrongly interpreting the pictograms please refer to the paragraph SAFETY STICKERS Section 1 SAFETY INSTRUCTIONS AND ADVICE The lifting platform s movements are provided by ...

Page 75: ... arm lifting or telescopic movements are forbidden for safety reasons To regain control only perform non dangerous manoeuvres return to a safe position by withdrawing the telescopic arm and lowering the arms To re enable lifting movements once the nacelle is returned to the transport position cancel the fault by pressing OK 7c If the fault persists contact your dealership OVERLOAD When the lifting...

Page 76: ...2 30 BASE CONTROL INSTRUMENTATION A GROUND MAINTENANCE AND EMERGENCY STATION 676992 685368 3 8 2 5 4 1 14 19 13 9 16 17 9 10 11 12 6 7 15 18 20 17 647414 EN 27 05 2015 ...

Page 77: ...DATION SCREEN KEYS 2 34 8 DEAD MAN S BUTTON 2 35 9 BASKET TILT DOWN TILT UP BUTTON 2 35 10 TURRET ROTATION KEYS 2 35 11 LOWER ARM UP DOWN BUTTONS 2 36 12 UPPER ARM UP DOWN BUTTONS 2 36 13 TELESCOPE EXTENSION RETRACTION BUTTONS 2 36 14 PENDULAR ARM UP DOWN BUTTONS 2 36 15 BLOCKING TURRET ROTATION 2 37 16 FLASHING LIGHT 2 37 17 TILT SENSOR 2 37 18 BUZZER 2 37 19 EMERGENCY PUMP BUTTON 2 38 20 FUEL CO...

Page 78: ...2 32 BASKET CONTROL INSTRUMENTATION B BASKET CONTROL STATION 42 43 44 43 41 6 7 7 7 677718 ON OFF 40 37 36 31 29 39 33 24 38 35 30 34 27 32 25 21 22 23 28 26 45 48 46 47 647414 EN 27 05 2015 ...

Page 79: ...NMENT LEDS except for 160 ATJ S 2 42 30 BUZZER CONTROL BUTTON 2 43 31 DIFFERENTIAL LOCKING CONTROL BUTTON 2 43 32 LOW FUEL LEVEL INDICATOR 2 43 33 TRANSLATION SPEED SELECTION CONTACTOR 2 44 34 OVERLOAD INDICATOR LIGHT 2 44 35 TILT INDICATOR LIGHT 2 44 36 USE UNDER TILT BUTTON 2 44 37 BASKET INCLINATION CONTACTOR 2 44 38 BASKET ROTATION CONTACTOR 2 45 39 BASKET PENDULAR ARM CONTACTOR 2 45 40 EMERGE...

Page 80: ...g 2 STARTER BUTTON BUTTON 2 Engine start up 3 GROUND OR PLATFORM CONTROL SELECTION SWITCH This contactor has two positions POSITION 1 The commands are given from the basket POSITION 2 The commands come from the ground base control The button must be held down in position 2 dead Man s system to provide power to the base control Releasing it prevents any movements from being made Position 1 Position...

Page 81: ...m it immediately as no action can be performed on the control panels at ground level or in the basket 5 LOW TEMPERATURE ENGINE START UP AID This selector switch has two positions to be selected according to the ambient air temperature 1 SUN POSITION If the temperature is over 10 C start the engine at tickover rpm 2 SNOW POSITION If the temperature is less than around 10 C set the selector switch t...

Page 82: ...sals on the menu pages 7B Selection keys for the proposals on the sub menu pages 7C This Confirm OK key has two functions Confirmation key for the selections made by the plus minus keys Fault acknowledgement key the fault has been seen this key enables you to get rid of the screen without necessarily resolving the problem 7D This Menu key has two functions It enables you to open the Access Menu pa...

Page 83: ...ket in Transport position 9A TILTING THE BASKET DOWNWARDS Hold down the Dead Man s button 8 and press key 9A 9B TILTING THE BASKET UPWARDS Hold down the Dead Man s button 8 and press key 9B 10 TURRET ROTATION KEYS Using these keys at the same time as pressing button 8 to the Dead Man s position enable you to rotate the turret 10A ROTATING THE TURRET LEFT Hold down the Dead Man s button 8 and press...

Page 84: ...PER ARM Hold down the Dead Man s function 8 and press key 12B 13 TELESCOPE EXTENSION AND RETRACTION KEYS Using these keys at the same time as pressing button 8 to the Dead Man s position enables the telescope to be extended and retracted A EXTENDING THE TELESCOPE Hold down the Dead Man s function 8 and press key 13A B RETRACTING THE TELESCOPE Hold down the Dead Man s function 8 and press key 13B 1...

Page 85: ...g platform is in translation or making a movement 17 TILT SENSOR This sensor controls the safety buzzer 41 when the lifting platform has reached the maximum authorised level of tilt The buzzer sounds intermittently see the SAFETIES section Two LEDs located under the tilt sensor 17A show its operating status Red LED lit maximum permissible tilt not yet reached Yellow and red LEDs lit maximum permis...

Page 86: ... RESCUE PROCEDURE section Only use this if the engine or the electrical system has broken down 20 FUEL COCK The fuel cock 20 located on the diesel filter must be in the ON position as shown opposite before starting the engine The OFF position on the fuel cock shuts off the fuel supply to the engine 676992 20 Diesel fuel cock opening area Diesel fuel cock shut off point 20 19 647414 EN 27 05 2015 ...

Page 87: ... lever to the right ROTATING LEFT Push the lever to the left 22 LOWER ARMS UP DOWN AND TELESCOPE EXTENSION RETRACTION CONTROL LEVER Lever 22 enables you to raise the platform s lower and intermediate arms and extend and retract the telescope NB This is a progressive control lever which provides you with great accuracy in approach It must be manipulated flexibly without jerking RAISING THE LOWER AR...

Page 88: ...anslation shown by the arrows affixed to the chassis and those on the basket control console white and black arrows Always refer to the arrows shown on the machine s chassis to know the direction of movement 24 EMERGENCY STOP This switch enables you to cut off all the machine s movements in the event of an anomaly or danger arising Press the knob to cut off all movements Turn the knob a quarter tu...

Page 89: ...he starter button 26 START UP CONTROL BUTTON Wait for the Preheating light to go out and then press button 26 to start the lifting platform from the basket console 27 ENGINE FAULT LIGHT This indicator light comes on and a short intermittent signal sounds Descend quickly to the ground before automatic engine switch off Problem Engine oil pressure 90 seconds before engine switch off Engine water tem...

Page 90: ...4 wheel drive mode In this configuration the only translation speeds are Slow or Ramp 29A FRONT WHEEL ALIGNMENT This indicator light illuminates when the front wheels are correctly aligned with the machine s axis 29B REAR WHEEL ALIGNMENT This indicator light illuminates when the rear wheels are correctly aligned with the machine s axis P1 P2 P3 28 29A 29B 647414 EN 27 05 2015 ...

Page 91: ...e differential locking while keeping the wheels in the machine s axis 32 LOW FUEL LEVEL INDICATOR This indicator light illuminates when the fuel level is low and the basket buzzer is activated Level 1 of alarm 3 beeps every 10 minutes is approximately 5 hours of autonomy Level 2 of alarm 3 beeps the every 1 minute is approximately 3 hours of autonomy Level 3 of alarm 3 beeps every 10 seconds is ap...

Page 92: ...d the buzzer sounds continuously see the SAFETY SYSTEMS section 35 TILT INDICATOR LIGHT When the lifting platform reaches the maximum authorised tilt the LED lights up any movements to raise the arms are blocked and the buzzer sounds with intermittent long beeps 36 USE UNDER TILT BUTTON This button enables you to utilise the prohibition on movements when the lifting platform is tilting see the SAF...

Page 93: ...or backwards 40 EMERGENCY PUMP BUTTON This button enables you to make all the basket s movements to bring it back to the ground in the event of a breakdown see the RESCUE PROCEDURE section Only to be used if the engine or electrical system breaks down Check the engine battery s charge this must be charged otherwise the emergency pump cannot be operated 41 DEAD MAN S PEDAL This pedal is fixed to th...

Page 94: ...e is overloaded When the platform is overloaded all movements are blocked It is essential to unburden the machine so that you can manoeuvre 43 SAFETY HARNESS HOOK UP POINTS These fittings are to be used for fastening the harnesses when operators are in the basket 44 SAFETY RAIL You must hold the rail to climb into the basket so that the rail does not fall back as the operator climbs in Do not hold...

Page 95: ...SCRIPTION AND USE OF OPTIONS page 2 62 47 SENSITIVE EDGE SAFEMANSYSTEM OPTION See the chapter DESCRIPTION AND USE OF OPTIONS page 2 62 48 BLUE WARNING LIGHT SAFEMANSYSTEM OPTION See the chapter DESCRIPTION AND USE OF OPTIONS page 2 62 46 47 48 647414 EN 27 05 2015 ...

Page 96: ...period and the bar graph increases in increments in proportion to the pre heating time elapsed 3 START UP PAGE When the pre heating time has expired bar graph complete OK is displayed followed by the Work page or where applicable the Fault page A Network search B Start up OK 4 WORKING PAGE FROM THE BASE WITH FAULT PRESENT 5 WORKING PAGE FROM THE BASE WITH ENGINE OIL PRESSURE FAULT PRESENT 1 PRESEN...

Page 97: ...Y A SUB MENU After having chosen the menu select the various choices of modifications if required using the arrows Use the buttons to change the value of the selected option then validate for a first time using to display the parameter modification confirmation message then press again to validate To return to the previous page press on 4 MENU DISPLAY 6 7 647414 EN 27 05 2015 ...

Page 98: ...tions movements X X Optional rotating flashing light on switch on X X Dealer options Telescope locking X Prohibition on forward movement during Work mode X Prohibition on basket tilting during Work mode X Activation of wheel realignment X Safe Man System Activation X Manufacturer options Encoded anti starting X Languages French English German Dutch only X System parameters Engine management X Lowe...

Page 99: ...sion speed X Max telescope retraction speed X Max pendular arm raising speed X Max pendular arm lowering speed X Max basket tilt extension speed X Max basket tilt retraction speed X Max turret right rotation speed X Max turret left rotation speed X Max basket right rotation speed X Max basket left rotation speed X Max forward translation speed in Work mode X Max reverse translation speed in Work m...

Page 100: ...ton 2 to start up the IC engine Fig B Do not operate the starter for more than 30 seconds and run a pre heating cycle between all failed attempts to start Release the button as soon as the engine starts and let the engine run at tickover speed Never try to push or pull the lifting platform to start it Such an action would cause severe damage to the transmission TRANSPORT POSITION FORWARD TRANSLATI...

Page 101: ...d and the safety systems for tilt and overload are active Fig E NB You must use Ramp speed full power with the speed restricted to 2 km h to cross over steepslopesormoveoververybrokenground Thiscanproveveryuseful forinstance if an access ramp must be borrowed to move the lifting platform onto a truck bed In Work mode any movement over broken ground loose surfaces slopes greater than the authorised...

Page 102: ...ting platform lifting rotation look around and above you Pay particular attention to the electric cables and any items that may be in the lifting platform s operating space Familiarise yourself with the instruments on the ground maintenance and emergency station and in the basket described in the previous pages and in particular the warnings specifying the risks involved in performing certain mano...

Page 103: ...turret from rotating by using the pin 1 Fig A see the CONTROL INSTRUMENTS section paragraph BLOCKING TURRET ROTATION Use Ramp speed Ensure that the truck bed is large enough and has a sufficient load capacity to transport the lifting platform Also check the truck bed s permissible ground contact pressure with regard to the lifting platform There is a risk of the lifting platform losing adherence s...

Page 104: ...d rear 2 Fig E Also set chocks on the truck bed on the inside and the outside of each tyre 3 Fig D Lash the lifting platform down on the truck bed with sufficiently strong ropes 4 Fig E to the front and the rear passing the ropes through the slinging eyes 5 Figs D and F D F E 5 5 5 5 3 3 4 2 5 5 647414 EN 27 05 2015 ...

Page 105: ...basket emergency stop the person on the ground can take control of the nacelle from the backup and maintenance control panel Follow the instructions below Switch the contactor 1 Fig A to Position A and hold it down to recover control of the platform s movements Restart the engine 2 Fig A Proceed to lower the platform using the base controls Pay attention to any constructions or objects that may be...

Page 106: ...e lever Fig G to B Turn the wheel on valve 4 Fig H anti clockwise For turret left rotation set the lever to IV Turn the wheel on valve 5 Fig H clockwise Press button 3 Fig C to power the distributor and at the same time pull the lever Fig G to B Turn the wheel on valve 5 Fig H anti clockwise To raise the pendular arm set the lever to IV Turn the wheel on valve 6 Fig H clockwise Press button 3 Fig ...

Page 107: ...o activate the emergency pump and at the same time use the basket controls See the CONTROL INSTRUMENTS section B LIFTING PLATFORM CONTROL STATION Only to be used to bring the basket down to the ground in the event of the engine breaking down J 40 647414 EN 27 05 2015 ...

Page 108: ...s Retracting the telescope Lowering the upper arm Raising the lower arms Extending the telescope Raising the upper arm Rotating the turret left right Raising lowering the pendular arm PROPORTIONAL DISTRIBUTOR 647414 EN 27 05 2015 ...

Page 109: ...2 63 MAIN DISTRIBUTOR Raising the pendular arm Rotating the turret right Lowering the pendular arm Rotating the turret left 647414 EN 27 05 2015 ...

Page 110: ...Use the switch on the basket console to activate the generator OFF Press the button to activate or deactivate the generator The generator stops temporarily during a hydraulic movement e g an arm movement UNSTEERED REAR AXLE OPTION This option enables the steered wheels on the front axle P2 to operate while the rear axle wheels are fixed The crab P1 and 4 wheel drive P3 functions are not active Ind...

Page 111: ...acelle user OPERATION Each time the nacelle is switched on a system test is performed there is a beep and the blue warning light flashes Fig C If the pressure sensitive edge is pressed Fig A the system cuts all of the nacelle controls The blue warning light and an audible alarm are activated If the user releases the pressure sensitive edge Bypressingthenacelle OFF rearmingbutton Fig B once theuser...

Page 112: ...2 66 647414 EN 27 05 2015 ...

Page 113: ...3 1 3 MAINTENANCE 3 MAINTENANCE 647414 EN 27 05 2015 ...

Page 114: ...3 2 647414 EN 27 05 2015 ...

Page 115: ...CANTS AND FUEL 3 8 MAINTENANCE TABLE FOR THE 160 ATJ E3 160 ATJS E3 180 ATJ 2 E3 3 10 A EVERYDAY OR EVERY TEN OPERATING HOURS 3 12 B EVERY 50 OPERATING HOURS 3 15 C EVERY 250 OPERATING HOURS 3 20 D EVERY 500 OPERATING HOURS 3 28 E EVERY 1000 OPERATING HOURS 3 34 F EVERY 2000 OPERATING HOURS 3 38 G OCCASIONAL MAINTENANCE 3 40 647414 EN 27 05 2015 ...

Page 116: ...ANITOU ORIGINAL PARTS INYOUR SERVICING OPERASTIONS YOU BENEFIT Through its network MANITOU provides the operator with FROM KNOW HOW Know how and competence Guarantee of the quality of the work performed Original replacement parts Help with preventive maintenance Efficient diagnostic assistance Improvements based on feedback from experience Training of the operating personnel Only the Manitou netwo...

Page 117: ...CUIT 01 Operation of the service and parking brake 02 Brake fluid level 105 LUBRICATION AND GREASING 106 JIB MANISCOPIC MANIACCES ASSEMBLY 01 Beam and telescope s 02 Skid 03 Joints 04 Protective plate 05 Forks 107 MAST ASSEMBLY 01 Fixed and mobile uprights 02 Protective plate 03 Chains 04 Pulleys 05 Forks 108 ACCESSORIES 01 Adaptations to the machine 02 Hydraulic connections 109 CAB PROTECTOR ELEC...

Page 118: ...909 Replace 500 H This interval is provided only as an indication see 3 MAINTENANCE MAINTENACE TABLE for cleaning and replacing this FILTER ELEMENTS AND BELTS HYDRAULIC SYSTEM HYDROSTATICTRANSMISSION OIL FILTER CARTRIDGEUE Reference 518251 Replace 500 H HYDROSTATIC OIL RESERVOIR SUCTION STRAINER Reference 749589 Clean 1000 H AUXILIARY HYDRAULIC OIL FILTER CARTRIDGE Reference 518251 Replace 500 H H...

Page 119: ...MPONENTS ELECTRICAL COMPONENTS TILT SENSOR Reference 52521690 DEAD MAN S PEDAL Reference 831136 OVERLOAD SENSOR Reference 676845 LOW ARM SENSOR Reference 833194 TELESCOPE SENSOR Reference 832955 647414 EN 27 05 2015 ...

Page 120: ...ay be requested depending on the usage level CHARACTERISTICS OF THE RECOMMENDED FUEL Use a quality fuel to obtain optimum performance from the engine Type of Diesel fuel N590 Auto C0 C1 C2 C3 C4 BS2869 Class A2 ASTM D975 91 Class 2 2DA US DF1 US DF2 US DFA JIS K2204 1992 Grades 1 2 3 and Special Grade 3 TRANSMISSION COMPONENTS TO BE LUBRICATED RECOMMENDATION PACKAGING REFERENCE TRANSFER BOX TRACTE...

Page 121: ...5 l 20 l 209 l 1000 l 545976 582391 894257 720149 REAR WHEEL REDUCER 0 6 Litre Oil SHELL SPIRAX A 90 20 l 209 l 661950 662000 LIFTING STRUCTURE COMPONENTS TO BE LUBRICATED CAPACITY RECOMMENDATION PACKAGING REFERENCE GENERAL LUBRICATION MANITOU high performance grease Cartridge 400 g 479330 TURRET CROWN GEAR BEARING RACEWAYS LUBRICATION TURRET CROWN GEAR TEETH LUBRICATION SHELL MALLEUS GL 205 oil A...

Page 122: ...r 3 26 N N R Fuel filter cartridge 2 3 19 3 28 R N R Engine oil 2 3 13 3 33 V V Engine oil filter 2 3 33 R R Fuel tank 3 34 V N Dry air filter safety cartridge 3 34 R Engine silentblocks 3 37 C Engine speeds 3 37 C Valve sets 3 39 C C Injectors 3 39 C Radiator 3 39 C Water pump and thermostat 3 39 C Alternator and starter 3 39 C Fuel injection pressure 3 39 C Turbocompressor 3 39 C Injection pump ...

Page 123: ...themselves 3 37 C FRONT AND REAR AXLE Front and rear axle differential oil 3 20 3 35 C C V R Front and rear axle oil 3 20 3 35 C C V R Front and rear wheel reducer oil 3 20 3 35 C C V R CHASSIS Turret orientation crown 3 23 G G Shafts 3 24 G Tightness of the bolts fixing the axle assemblies on the chassis 3 25 C C Tightness of the turret orientation crown bolts 3 32 C C LIFTING PLATFORM General in...

Page 124: ...ation validation button known as the dead man device and select an access platform function Result the access platform should elevate Carry out of this test on the functions of elevation lowering turret rotation and translation from the base and basket control panels to obtain the same results BUZZER Press the basket s warning button Result the buzzer should sound ELEVATION LOWERING FUNCTIONS From...

Page 125: ...level is up to the supply opening Check the drain tap 2 Fig A4 2 located on the side of the engine casing Iftheradiatorcapmustberemoved followtheaboveprecautionsandthenretightenitsecurely Use pure fresh water and an antifreeze solution to refill the emergency reservoir If a water leak occurs contact your dealer Ensure that muddy water or sea water does not get into the radiator Do not refill the e...

Page 126: ...ws should not show any cracking or fissures risk of water penetration which could impair the machine s operation A8 CONDITION OF THE TYRES WHEELS CHECK Check the condition of the tyres to discover any cuts tears or swollen or worn patches etc on the tyres A8 SAFE MAN SYSTEM OPTION STATUS CHECK Press on the pressure sensitive edge Fig A8 1 and confirm All nacelle movements stop The blue warning lig...

Page 127: ...ery cover Manipulating and servicing a battery can be dangerous take the following precautions Wear protective goggles Keep the battery horizontal when manipulating it Never smoke or work close to a naked flame Work in a sufficiently well ventilated area If some electrolyte splashes onto your skin or in your eyes rinse the affected area thoroughly with cold water for 15 minutes and call a doctor B...

Page 128: ... Grease the front axle s oscillation shaft 3 Figs B3 2 B3 5 and B3 6 2 grease nipples Grease the transmission s universal joint at the front 4 Fig B3 7 B3 5 B3 7 B3 2 B3 1 1 1 2 2 1 2 2 3 1 2 FRONT AXLE REAR AXLE B3 6 B3 3 1 2 3 FRONT and REAR AXLES UNIVERSAL JOINT ATTHE FRONT 4 3 1 FRONT AXLE FRONT AXLE FRONT and REAR AXLES 647414 EN 27 05 2015 ...

Page 129: ...3 17 FRONT AXLE FRONT AXLE B3 9 B3 AXLES 160 ATJ S EURO 3 GREASE Grease the front and rear wheel reducer pivots 4 Fig B3 8 and 5 Fig B3 9 8 grease nipples B3 8 4 5 647414 EN 27 05 2015 ...

Page 130: ...Loosen the bolts 1 Fig B4 2 two or three turns Swivel the alternator assembly to obtain the requisite belt tension Retighten the bolts 1 fig B4 2 When changing an alternator belt recheck the tension after the first 20 hours of operation B5 RADIATOR CORE CLEAN Open the bonnet To avoid clogging the radiator core clean it with a jet of compressed air directed from the front towards the back Fig B5 Th...

Page 131: ... your eyes during this operation Clean the inside of the filter with a clean damp lint free cloth Check the condition of the filter cartridge and replace it if necessary Refit the cartridge and the cover Never wash a dry air filter cartridge You must not clean the safety cartridge located inside the filter cartridge under any circumstances replace it with a new one if it is clogged or damaged B7 F...

Page 132: ...See the LUBRICANTS section via the filling hole 2 Fig C1 2 Refit and tighten the cap 1 Fig C1 1 For the 160 ATJS E3 Set the lifting platform on a horizontal surface with the engine switched off Remove the cap 3 Fig C1 3 the oil level should be flush with the hole If necessary top up the oil See the LUBRICANTS section via this hole Refit and tighten the cap 3 Fig C1 3 tightening torque 6 daNm DIFFE...

Page 133: ...e hole If necessary top up the oil See the LUBRICANTS section via this hole Refit and tighten the level plug 2 Fig C2 1 front axle Fig C2 2 rear axle For the 160 ATJS E3 Remove the level plug 2 Fig C1 2 front axle Fig C1 3 rear axle the oil level should be flush with the hole If necessary top up the oil See the LUBRICANTS section via this hole Refit and tighten the level plug 2 Fig C1 2 front axle...

Page 134: ...struction may cause the wheel pins to be damaged and break as well as the wheels to deform C5 EMERGENCY PUMP CHECK Switch off the engine Check that the emergency pump is operating correctly by pressing the switch on the side of the base control box or the basket control box Perform an arm lowering movement example You must not use the lifting platform under any circumstances if the pump is not wor...

Page 135: ...ty is 1 3 litres Refit the sniffler filler plug 1 Fig C7 C8 TURRET ORIENTATION CROWN GREASE The bearing raceways and gears must be lubricated every 250 hours of operation as well as before and after any long period at a standstill Grease to use see the LUBRICANTS section Remove the left hand casing from the chassis Ref 1 see Fig C8 1 Find the 2 grease nipples Ref 1 Fig C8 2 and thoroughly grease t...

Page 136: ...3 24 C9 AXLES GREASE Clean and then grease the following points see the LUBRICANTS section for details of the grease and remove the surplus LEGEND AXLE HUB JOINT 647414 EN 27 05 2015 ...

Page 137: ...ndicator light is lit in the basket and the buzzer is activated intermittently in the basket In the event of a malfunction occurring prevent the lifting platform from being used Contact your dealer C13 OVERLOAD SENSORS CHECK Fold the arms into transport position for this operation Place a higher weight than that indicated in the basket see 2 DESCRIPTION SPECIFICATIONS The movements for extending t...

Page 138: ...the injection pump and the injectors wear more rapidly To avoid this regularly clean the fuel filter container C16 ALTERNATOR FAN CRANKSHAFT BELTTENSION ADJUST Open the left hand cowl Check the condition of the belt for signs of wear or cracking and replace it if necessary see 3 MAINTENANCE FILTER ELEMENTS AND BELTS Check the tension between the crankshaft and alternator pulleys Under thumb pressu...

Page 139: ...rload C19 STOPPING DISTANCE CHECK STOPPING DISTANCE ON HORIZONTAL GROUND The stopping distance is tested on flat ground with 1 1 times the nominal load in the basket Reach maximum speed and then release the control Expected result On horizontal ground Stopping distance Transport speed 1400 or 300 Working speed 160 or 50 CHECK BRAKE HOLDING ON A SLOPE Place the nacelle on a nominal 25 slope static ...

Page 140: ...e condition of the clogging indicator on the filter Before fitting check the condition of the new filter cartridge see 3 MAINTENANCE FILTER ELEMENTS AND BELTS Insert the cartridge in the axis of the filter and push it in by pressing on the circumference and not on the centre Refit the lid orienting the valve to the rear When using the machine in a very dusty atmosphere see the FILTER ELEMENTS AND ...

Page 141: ...e hydrostatic pump s hydraulic transmission circuit CLEANING OUT THE HYDRAULIC CIRCUIT Let the engine turn over for 5 minutes without using the lifting platform D4 AUXILIARY HYDRAULIC OIL FILTER CARTRIDGE REPLACE With the machine stopped and the battery cutout in the OFF position Unscrew the filter body 1 Fig D4 Remove the filter cartridge and replace it with a new one see FILTER ELEMENT section N...

Page 142: ...ore filling Refit the drain plug 1 Fig D5 1 and tighten it Refill with hydraulic oil see the LUBRICANTS section via the filling hole 4 Fig D5 4 The oil level should be above the red mark on the gauge 5 Fig D5 5 Dispose of the drained oil in an environmen tally friendly manner D6 CONDITION OF THE HOSES CHECK Check the apparent condition cracking of the hoses subject to heat stresses and UV their te...

Page 143: ...htening torque of the screws is 8 daN m 10 1 daN 1 Kg D10 DENSITY OF THE BATTERY ELECTROLYTE CHECK The electrolyte s density varies according to the temperature but a minimum level of 1260 at 16 C must be maintained In the hatched section Fig D10 the battery is normally charged Above the hatched section the battery must be recharged The density must not vary by 0 025 unit from one battery element ...

Page 144: ... chassis right hand side and make a translation movement The lifting platform must not move forward After the test reconnect the coil D13 ALTERNATOR FAN CRANKCASE BELT REPLACE Open the left hand cowl Loosen the bolts 1 fig D13 1 two or three turns Swivel the alternator assembly to free the belt and the replace it with a new one see 3 MAINTENANCE FILTER ELEMENTS AND BELTS Adjust the tension between...

Page 145: ...ay together with its seal Clean the filter support with a clean lint free cloth Light oil the new seal Refit the oil filter on its support Only tighten the oil filter by hand and then lock it with a quarter turn from a filter wrench REFILLING WITH OIL Ensure that the plug 1 Fig D15 1 is in place and tight Fill up with oil see the LUBRICANTS section via the filling hole 2 Fig D15 2 Wait a few momen...

Page 146: ...se an explosion or a fire Lay a receptacle under the drain plug 1 Fig E1 1 and unscrew the plug Let the diesel flow out and rinse with ten litres of clean diesel poured in through the filling hole 2 Fig E1 2 Refit and tighten down the drain plug 1 Fig E1 1 tightening torque 3 to 4 daN m Fill the fuel tank with clean diesel filtered through a strainer or a clean lint free cloth and refit the fillin...

Page 147: ... a receptacle under the drain plug 1 Fig E4 1 and remove the filling plug 3 Fig E4 2 to ensure good drainage Refill with oil see the LUBRICANTS section via the filling hole 3 Fig E4 2 The level is correct when the oil is flush with the hole 2 Fig E4 1 Refit the filling plug 3 Fig E4 2 and tighten it Check the level via the hole 2 Fig E4 1 E5 FRONT AND REAR WHEEL REDUCER OIL DRAIN REPLACE Set the p...

Page 148: ...tched off and the differential oil still warm Place a receptacle under the drain plug 3 and remove the level and filling plug 4 Fig E3 8 differential Refit and tighten the drain plugs 3 Fig E3 8 differential tightening torque 8 daNm Top up with oil See the LUBRICANTS section via the filling hole 4 Fig E3 8 differential The level is correct when the oil is flush with the hole Refit and tighten the ...

Page 149: ...ition of the cylinders There must be no Hydraulic leaks from the seals and the valve blocks Impacts on the cylinder rods E8 CONDITION OF THE CABLE BUNDLES AND THE CABLES THEMSELVES CHECK Inspect the following sectors check the condition of the bundles no deterioration and nothing loose Base control console Hydraulic block Battery Intermediate joint Basket control console E9 ENGINE SILENTBLOCKS CHE...

Page 150: ...in taps 2 Fig F1 2 and 4 Fig F1 3 and the radiator cap 3 Fig F1 2 all together NB The fluid cannot be drained out completely while the radiator cap is kept closed Leave the cooling circuit to drain completely ensuring that the holes are not blocked Check the condition of the rubber hoses and the fastenings and change the rubber hoses if necessary REFILLING WITH COOLANT Close the drain cocks 2 Fig ...

Page 151: ...OSTAT CHECK F4 ALTERNATOR AND STARTER CHECK F5 HYDRAULIC OIL RESERVOIR CLEAN F6 HYDRAULIC CIRCUIT PRESSURES CHECK F7 HYDRAULIC CIRCUIT OUTPUTS CHECK F8 FUEL INJECTION PRESSURE CHECK F9 INJECTION PUMP CHECK F10 INJECTORS CONTACTYOUR DEALER F11 RADIATOR CHECK DESCALE F12 TURBOCOMPRESSOR CHECK Contact your dealer 647400 EN 01 02 2015 ...

Page 152: ...urn the ignition key to the second notch to switch the machine on Open the left hand cover BLEEDING THE FUEL FILTER Refill the tank Open the fuel filter tap 1 Figs G1 1 and G1 2 Slightly loosen the fuel filter vent plug 2 Fig G1 2 Use the lever 4 Fig G1 3 to operate the feed pump manually Retighten the plug when no more bubbles form Open the vent plug in the top of the injection pump 3 Fig G1 3 Us...

Page 153: ...be removed without much effort Place the jack under the axle carrier as close as possible to the wheel and adjust the jack Fig G2 1 Lift the wheel until it separates slightly from the ground and set the safety stand under the axle Fig G2 2 The weight of one wheel is 134 kg Unscrew the wheel nuts completely and remove them Release the wheel by moving it to and fro and roll it to one side Slip the n...

Page 154: ...Place hooks on the anchoring points provided for this purpose A Centre of gravity B Strap length C Axis line slinging rings A 6163 Kg 63 2200 2250 2967 1450 A 6163 Kg 2250 760 B 1 9 9 0 A 6163 Kg 1980Kg 1980Kg 1710Kg 1710Kg 200 1115 1023 1177 2200 2967 A 6163 Kg 2200 760 B 2 0 1 0 C C C C G3 1 160 ATJ E3 647400 EN 01 02 2015 ...

Page 155: ... Pont AR Pont AV 1099 1219 452 332 Masse Machine mesurée 5850 kg charge sur pont AV 2674 Charge sur pont AR 3176 CENTRE OF GRAVITY CENTRE OF GRAVITY BASKET EMPTY FRONT Axle REAR Axle MACHINE WEIGHT MEASURED LOAD ON FRONT AXLE LOAD ON REAR AXLE 647400 EN 01 02 2015 ...

Page 156: ...3 44 1840 kg 1840 kg 2490 kg 2490 kg A 7250 kg 2200 63 2250 2250 760 2 0 3 0 B A 7250 kg 2892 1202 1264 200 938 1262 2200 A 7250 kg 2200 2 0 7 0 B 760 C C C C G3 3 180 ATJ 2 E3 647400 EN 01 02 2015 ...

Page 157: ...ng the pre defined tightening order tighten bolt 2A a quarter turn then tighten bolt 2B a quarter turn then tighten bolt 2C a quarter turn then tighten bolt 2A a quarter turn and so on until the mechanical stop is reached Do the same with bolts 2D 2E 2F Do not force the bolts to tighten further once they are at the mechanical stop Failure to follow this procedure of progressive alternating tighten...

Page 158: ... necessary precautions the machine will no longer have any brakes Remove the bonnet Screw in the HP restrictors 1 Fig G5 1 on the hydrostatic pump up to the sticking point 1 and a half turns No 13 wrench and No 6 hex wrench 3 Rear axle mechanical declutching Loosen the screw 1 Fig G5 2 without removing it Remove the pin Rep 2 Fig G5 2 Tighten the screw 1 Fig G5 2 Loosen the screw 1 Fig G5 3 withou...

Page 159: ...olding bracket 4 Fig G6 3 take care to lock this Fig G6 4 From the base console order the lower arms to lower until the upper joint is in contact with the maintenance stand Fig G6 4 and G6 5 then immediately release the controls Switch off the engine and cut the power to the platform using the battery cut out Make the necessary repairs After these operations follow the instructions below MACHINES ...

Page 160: ...3 48 647400 EN 01 02 2015 ...

Reviews: