Cleaning and checking:
- washing operations are extremely
important and determine the life of the
bucket and its main components;
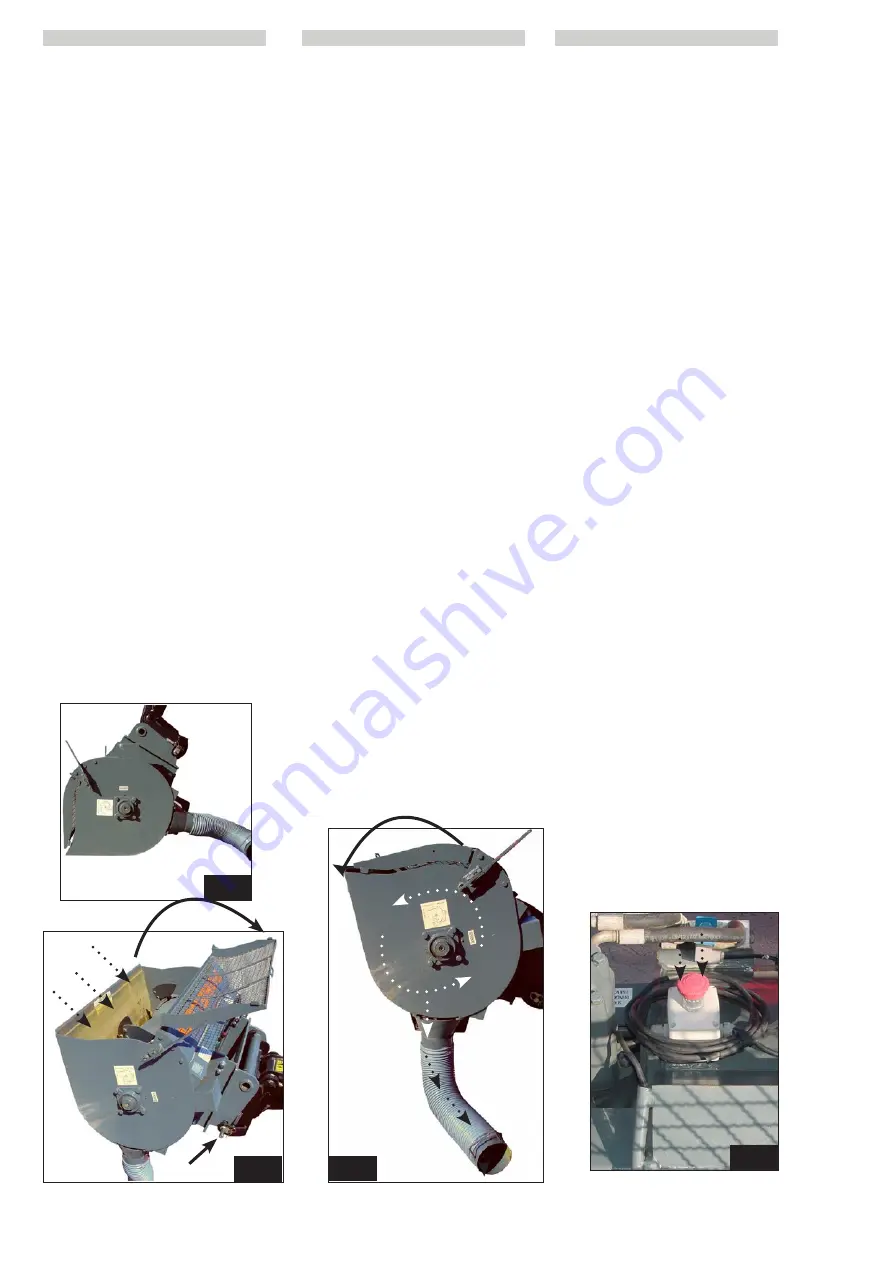
- position the bucket in hold position
(Fig.4);
- open the guard (Fig.4);
- spray water inside the bucket (Fig.4)
to loosen all the encrusted material;
- close the guard (Fig.5);
- start up the bucket and run the screw
conveyor through a few turns for
further wash (Fig.5);
- unload the bucket (Fig.5);
- check to make sure the bucket is free
of encrusted material, especially the
safety micro switch.
For other problems, check the electrical
and hydraulic connections before carrying
out a detailed mechanical check.
Stopping the machine:
- press the emergency button on the
bucket (Fig.6) ;
- lift the guard (Fig.4);
- switch off the earth moving machine
motor;
- disconnect the hydraulic pipes or
electric plug.
When the bucket is not in use, it must be
unhooked and placed in the correct par-
king position (Fig.7).
4-18
IT
EN
DE
4
5
6
7
Pulizia e controlli:
- le operazioni di lavaggio sono molto
importanti e determinano la durata
della benna e dei suoi principali
componenti;
- posizionare la benna in posizione
ritenuta (Fig.4);
- aprire il carter (Fig.4);
- spruzzare acqua dentro la benna
(Fig.4) fintanto che non si staccano
tutte le incrostazioni ;
- chiudere il carter (Fig.5);
- avviare la benna e far effettuare alla
coclea qualche giro per un ulteriore
lavaggio (Fig.5);
- scaricare la benna (Fig.5);
- controllare che la benna sia senza
incrostazioni dentro e soprattutto il
microinterruttore per la sicurezza.
Per eventuali malfunzionamenti,
prima di in approfondito controllo
meccanico, controllare i collegamenti elett-
rici ed idraulici.
Come arrestare la macchina:
- premere il pulsante d’emergenza sulla
benna (Fig.6) ;
- alzare il carter di protezione (Fig.4);
- spegnere il motore della macchina
operatrice;
- staccare i tubi idraulici o la presa
elettrica.
Quando non si utilizza la benna, occorre
sganciarla e appoggiarla correttamente in
posizione di parcheggio (Fig.7).
Reinigung und Kontrollen:
- Waschvorgänge sind äußerst wichtig
und bestimmen die Lebensdauer des
Beschickers und seiner Hauptbestandteile;
- Beschicker in Rückhalteposition bringen
(Abb.4);
- Abdeckung öffnen (Abb.4);
- Wasser in den Beschicker spritzen (Abb.4),
bis sich alle Verkrustungen gelöst haben;
- Abdeckung (Abb.5) schließen;
- Beschicker starten und Förderschnecke
zur weiteren Reinigung einige
Umdrehungen ausführen lassen (Abb.5);
- Beschicker entleeren (Abb.5);
- kontrollieren, dass der Beschicker innen
und vor allem der Mikrosicherheitsschalter
frei von Verkrustungen sind.
Bei eventuellen Störungen sollten vor einer
eingehenden mechanischen Kontrolle alle
elektrischen und hydraulischen Anschlüsse
kontrolliert werden.
Stoppen der Maschine:
- Not-Stopp-Taste am Beschicker drücken
(Abb.6);
- Schutzabdeckung (Abb. 4) anheben;
- Motor der Arbeitsmaschine ausschalten;
- Hydraulikrohre oder Netzsteckdose tren-
nen.
Bei Nichtbenutzung des Beschickers ist
dieser auszuhaken und korrekt in die
Parkposition zu legen (Abb.7).
649050
IT-EN-DE
(01/06/2017)
MRT
EASY
55P
400
ST4
S2,
MRT
EASY
55P
360
ST4
S2,
MRT
EASY
75P
400
ST3B
S2,
MRT
EASY
75P
360
ST3B
S2,
MRT-X
EASY
75P
400
ST3A
S2,
MRT-X
EASY
75P
360
ST3A
S2


