17.03.2011
4
Setting and verification
Flow rate
•
Place an underlay (e.g. cardboard or paper) on the ground.
•
Fill the chemical tank with herbicide (undiluted).
•
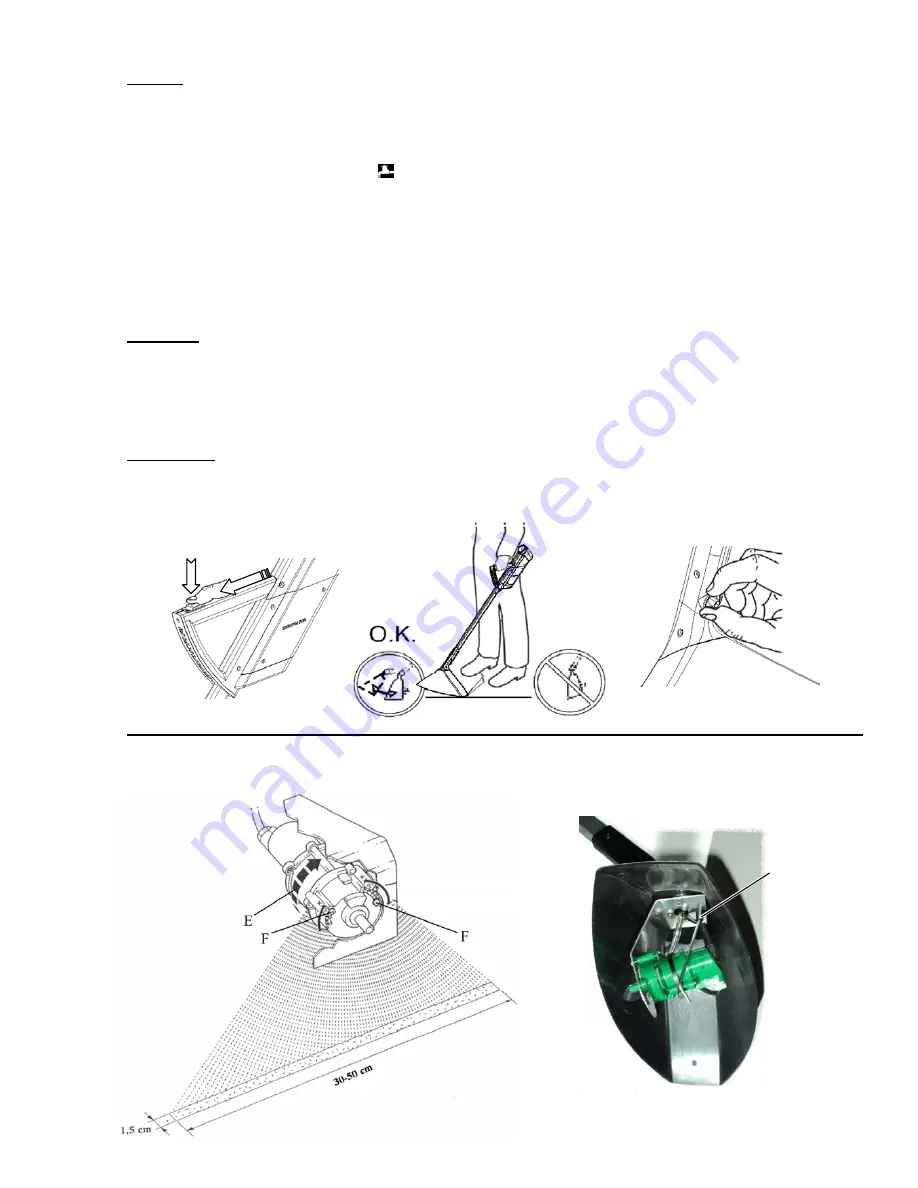
Set down the applicator as pictured below.
•
Remove the hose from the atomizer. (B)
•
Place the measuring cylinder beneath the flow rate controller (see drawing on page 3).
•
First set metering valve to maximum. (D)
•
Actuate switch/valve unit (C) and select continuous operation by pushing the button switch forward.
•
When the herbicide reaches the metering valve (identifiable in the flow rate controller), the desired setting
(see table) is adjusted on the valve. (D)
•
Collect the herbicide for 60 sec. in the measuring cylinder.
•
If desired quantity is not reached, readjust metering valve and calibrate again.
•
Afterwards reattach the hose.
Example for the MANKAR HQ:
The setting A is an approximation for Roundup UltraMax; 3 ml/min. Deviation from
the desired volume can be regulated at the metering valve by setting a greater or lesser flow rate.
Spray width
•
Hold the applicator in its working position above the overlay (e.g. cardboard or paper). Actuate the button switch
and initially direct the spray hood at the underlay, appraising the spray width at various heights above the section
being sprayed. The spray width must be set in such a manner that the droplets are discharged over the entire
spray hood width. The optimal spray width is set by the manufacturer under standard operating conditions.
•
It is possible to compensate for deviations by loosening the screw (F) and sliding the width adjustment on the
atomiser (see drawing) to adjust either side so that the spray jet just misses the edge of the hood.
Working width
•
The whole spray hood of the MANKAR HQ can be turned continuously to get a working width from 45 to 15 cm.
When the desired volume is obtained, the spray width verified and the working width adjusted, the application
process can begin.
E. Correct rotation direction for disc
G:
Setting of spray hood adjustment
G


