INSTALL ATION INSTRUCTIONS
WARNING:
When using electrical products, basic precautions should always be followed, including the
following:
1.
DANGER: RISK OF ELECTRIC SHOCK.
Connect only to a circuit protected by a ground-fault circuit-
interrupter.
2.
Grounding is required. The unit should be installed by a qualified service representative and grounded.
With a measuring tape ensure the bath will fit through all passageways and doors.
1.
Remove the existing bath or shower.
2.
Check the area where the walk-in bath will be installed for floor integrity. Keep in mind that the
walk-in bath is held up by six heavy duty support leveling legs and not the bath’s frame.
3.
With at least two people, lift the bath by placing hands underneath the deck and carry it to the
place of installation. DO NOT lift the bath by the plumbing nor the electrical components.
4.
Level the walk-in bath from the highest elevation point on the floor. Important note: If the floor
is sloping or bowed in any way, work from the highest elevation point using side panels as a guide
to the height. Make certain that the tub can be properly leveled. (Caution: if walk-in bathtub is
not resting on all leveling feet, water will not drain properly and may cause the door to leak).
Verify the product is completely level by checking tub deck surface and ensure all leveling feet are
touching the ground.
5.
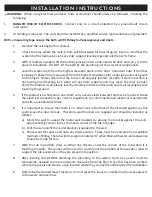
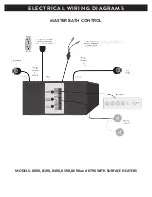
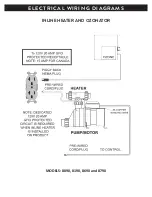
If the product is a whirlpool or an air bath carry out any electrical work that may be required. Make
the electrical connections per current regulations, per aforementioned electrical requirements
and with a qualified electrician.
6.
It is important to ensure that there is no movement in the floor of the intended position as this
could cause the door to leak. Therefore, wall brackets are supplied and should be installed as
follows:
a). Mark the wall to accept the metal wall brackets by placing the bracket against the wall,
approximately two (2) inches from each corner of the tub top edge.
b). Drill the wall and fit the metal brackets (supplied) to the wall.
c). Check walls for square and note any discrepancies. These must be overcome by acceptable
methods of filling. The tub will drop approximately 1/4” when filled with water, and allowance
should be made for this.
7.
With the tub in position, draw a vertical line directly under the corners of the tub where it is
touching the walls. These lines will be used for working out the position of the wooden cleats to
support the tub panels when they are placed into position.
8.
After leveling and BEFORE attaching the plumbing to the walk-in bath, ALL panels must be
temporarily installed to ensure adequate clearance from the floor. Once this has been verified,
remove the panels and store in a safe location where they can lay flat until required for installation.
9.
Determine the desired faucet location. In most cases the faucet is installed on the deck adjacent
to the waste and overflow.


