background image

Initial Setup

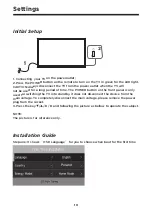
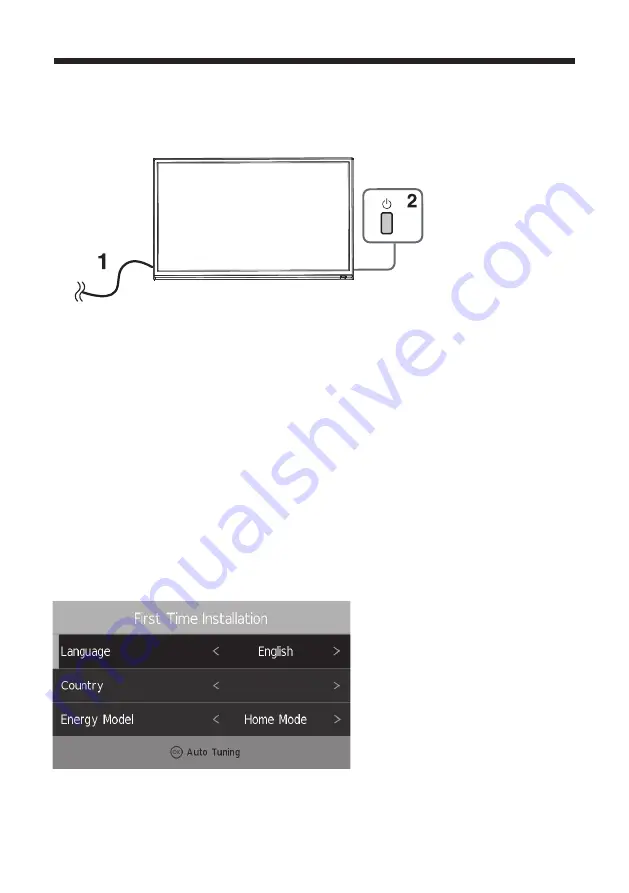
1. Connecting  your TV on the poweroutlet;
2. Press the POWER button on the remote to turn on the TV in green for the LED light.
CAUTION:Always disconnect the TV from the power outlet when the TV will 
not be used for a long period of time. The POWER button on the front panel is only 
used for switching the TV into standby, it does not disconnect the device from the 
main voltage. To completely disconnect the main voltage, please remove the power 
plug from the socket. 
3. Press the key

/

/

◄ 

and following the picture as bellow to operate the subject.

NOTE:
The picture is for reference only.

Installation Guide

Step one: It shows 

OSD Language

” 

for you to choose when boot for the first time

Poland

Settings

10

Summary of Contents for 32LHN28L

Page 1: ...32LHN28L ...

Page 2: ...es 7 Connecting external devices to your LED TV 7 Getting Started 5 Front Back View 5 Safety Information 3 Physical safety 3 Electrical safety 3 What is Included TV Placement Setup 4 Setting 16 Remote Control 8 11 Menuin Menu 14 8 Basic Operations 10 Settings 9 Install the Batteries 10 Initial Setup Installation Guide 12 Channel 12 Auto Tuning 16 Sound 18 Lock 17 explanation 14 10 Favorite List 19...

Page 3: ...he manufacturer or sold with the apparatus When a cart or rack is used use caution when moving the cart apparatus combination to avoid injury from tip over Unplug the apparatus during lightning storms or when unused for long periods of time Refer all servicing to qualified personnel Servicing is required when the apparatus has been damaged in any way such as power supply cord or plug is damaged li...

Page 4: ...dangerous and may invalidate the product s warranty Only qualified personnel should service this apparatus To avoid battery leakage remove exhausted batteries from the remote control or when not using for a long period Do not break open or throw exhausted batteries in a fire Physical safety Do not block ventilation slots in the back cover You may place the TV in a cabinet but ensure at least 5 cm ...

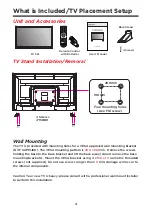
Page 5: ...nt the VESA bracket using 4 x M6 x 10 isometric threaded screws not supplied Do not use screws longer than 10 mm damage will occur to the internal components Caution Your new TV is heavy please consult with a professional wall mount installer to perform this installation Unit and Accessories TV Set Remote Control with Batteries User s Manual Four mounting holes size M6 screw 200mm 100mm 4 Screws 4...

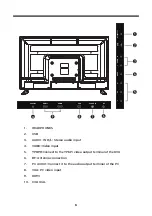
Page 6: ... on TV Stand SOURCE Audio Video input source selection MENU Open settings menu VOL Decrease volume VOL Increase volume CH Previous channel 7 CH Next channel 8 IR RECEIVER Receives infrared signals from the remote control 9 INDICATOR LED Status indicator Power On Standby Red ...

Page 7: ...O Video input PC AUDIO Connect it to the audio output terminal of the PC 7 9 HDMI VGA PC video input 8 1 HEADPHONES COAXIAL HDMI1 HDMI2 VGA PC AUDIO RF USB 5V 0 5A VIDEO L R AUDIO Headphone 10 COAXIAL 10 5 YPBPR Connect to the YPbPr video output terminal of the DVD Y Pb Pr ...

Page 8: ...e receiver satellite box Connecting external devices to your LED TV cable TV company VHF UHF antenna RF Coaxial cable 7 HDMI cable Composite cable Coaxial cable USB 5V 0 5A Headphone COAXIAL HDMI1 HDMI2 VGA PC AUDIO RF Component cable Y Pb Pr VIDEO L R AUDIO ...

Page 9: ...move in the menus and confirm settings 12 13 VOL Increase and decrease volume 14 15 CH Next and Previous channel 16 P MODE Output image mode selection Displays the main index in Teletext mode 17 S MODE Setting audio options Reveals hidden information such as the answers to a quiz in TELETEXT mode 18 EPG Show the Electronic Program Guide Freeze a multi page changing on Teletext mode 19 P SIZE Press...

Page 10: ...TOP Stop playback 26 TEXT Turns on and off the Teletext function GOTO Play from the desired location 27 REC In DTV mode press REC button to start recording press button to stop recording Press the appropriate colour to direct access functions in TELETEXT or EPG OSD mode 28 Previous file or chapter 29 Next file or chapter 30 Fast forward playback 31 Fast rewind playback 21 DTV RADIO In DTV mode pre...

Page 11: ... POWER button on the front panel is only used for switching the TV into standby it does not disconnect the device from the main voltage To completely disconnect the main voltage please remove the power plug from the socket 3 Press the key and following the picture as bellow to operate the subject NOTE The picture is for reference only Installation Guide Step one It shows OSD Language for you to ch...

Page 12: ...nergy menu Step 4 Enter Tune Type menu Press MENU key to show main menu there are five functions under main menu they are Channel Input Source Application Media Play Setting Press LEFT RIGHT to select these functions 11 Main Menu Poland Poland Full ...

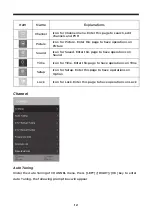
Page 13: ...e Setup Lock Icon for Channel menu Enter this page to search edit channels and PVR Icon for Picture Enter this page to have operations on Picture Icon for Sound Enter this page to have operations on Sound Icon for Time Enter this page to have operations on Time Icon for Setup Enter this page to have operations on Option Icon for Lock Enter this page to have operations on Lock Recorded List ...

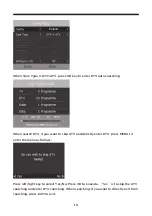
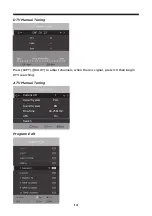
Page 14: ...u want to skip ATV and directly enter DTV press MENU to enter the menu as follows Press left right key to select Yes No Press OK to execute Yes is to skip the ATV searching and enter DTV searching When searching if you want to directly exit from searching press EXIT to exit 13 Poland Full ...

Page 15: ...ing Press LEFT RIGHT to adjust channels when there is signal press OK then begin DTV searching 14 Current CH 1 Colour System PAL Sound System BG Fine Tune 48 25 MHZ AFC On Search Adjust ATV Manual Tuning Program Edit ...

Page 16: ...rogram can t be selected even press the number key Move Press YELLOW key according to the prompt execute MOVE function move the program order Rename Rename function only appear and can be used under ATV program Press GREEN key under ATV the program can be renamed Favorite Press FAV key mark the program the cursor is in as favorite program 15 Operations in Setting Menu are shown in the following ta...

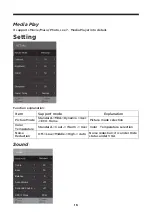
Page 17: ... Picture Mode Color Temperature Noise Reduction Support mode Standard Mild Dynamic User ECO Home Standard Cool Warm User Off Low Middle High Auto Picture mode selection Color Temperature selection Noise reduction it is under Hide status under VGA Sound Treble 50 Bass 50 Balance 0 Auto Volume off Surround Sound off SPDIF Mode PCM ...

Page 18: ...ows current time information It is under Hide status and can t be selected When there is no searching after power on it shows time beginning from 00 00 after DTV searching it shows current code s time Explanation Clock Hour Min information under DTV Auto standby 1 2 3 4H Sleep timer On off Time Zone It is set default according to shipping area and clients requirements when Auto Tuning searching it...

Page 19: ...de On Off You need to input password to enter submenu the password defaultis 0000 Set system password Press green LOCK then there is LOCK icon on this selected channel and the channel is locked Parental Guidance Set parental guidance Hotel Setting OFF 4 5 6 7 8 9 10 11 12 13 14 15 16 17 18 Option ...

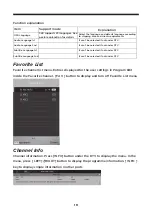
Page 20: ...ramme information INFO key to display simple information in other ports Function explanation Item Explanation OSD Language Audio Language 1st Audio Language 2nd Support mode 328 supports 23 languages See pecial explanation for details Select the language and default language according to shipping area and clients requirements It can t be selected if not under DTV It can t be selected if not under ...

Page 21: ...tton to enter the recorder menu to set Remind Press Green button to enter the Reminder setting menu Subtitle Language Press SUBTITLE button to display the menu The entries display the current Subtitle Language of the stream types and attributes EPG Press GUIDE hotkey to display the EPG menu only effect under the DTV ...

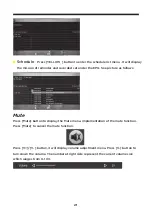
Page 22: ...he EPG See picture as follows Mute Press Mute button to display the Mute menu implementation of the mute function Press Mute to cancel the mute function Press V V button it will display volume adjustment menu Press V button to turn down the volume The number at right side represent the current volume size which ranges from 0 100 ...

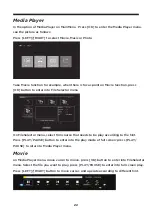
Page 23: ...nto File Selector menu On FileSelector menu select film source that needs to be play according to the hint Press PLAY PAUSE button to enter into the play mode of full screen press PLAY PAUSE to return to Media Player menu Movie on Media Player menu move cursor to moive press OK button to enter into FileSelector menu Select the file you want to play press PLAY PAUSE to enter into full screen play P...

Page 24: ...r into full screen play Press LEFT RIGHT button to move cursor and operate according to different hint Photo In the same way on Media Player menu move cursor to Photo press OK button to enter into FileSelector menu Select the file you want to play press PLAY PAUSE to enter into full screen play Press LEFT RIGHT button to move cursor and operate according to different hint ...

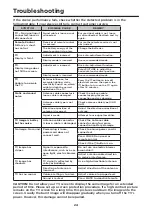
Page 25: ...tor plug for secure connection and any damage Antenna cable type is not correct Check antenna cable type VHF UHF Direction or position of antenna is incorrect Adjust the direction or position of antenna Signal is weak Attempt to use signal amplifier TV image is better but has noise Antenna cable connector is loose cable is damaged Check the antenna cable connector plug for secure connection and an...

Page 26: ...tem Files FAT32 and FAT16 Remote Control Signal Type Infrared Control Distance 8 meters Control Angle 30 Horizontal Power Supply AAA 1 5V x 2 Multimedia Categories File Extension Video Music Photo Text avi mp4 mpg mkv mov dat vob rm rmvb mp3 AAC aac m4a wav jpg jpeg txt Multimedia Playback Format Composite Cable PC Video Input VGA PC Audio Input HDMl input x 2 RF Antenna Input Headphones Output Co...

Reviews: