7
Switching on
Follow the instructions on this page on how to switch on your TV set and the remote
control before going on to following pages describing how to use the channel set-up
procedure.
1. Insert two batteries in the remote control.
Precautions on using batteries:
- Only use the battery types specified.
- Make sure you use the correct polarity.
- Do not mix new and used batteries.
- Do not use rechargeable batteries.
- Do not expose batteries to excessive heat such as sunshine, fire or the like,
throw them in a fire, recharge them or try to open them, as this could cause
them to leak or explode.
- Remove the batteries from the remote control if you are not using it for a long
period of time.
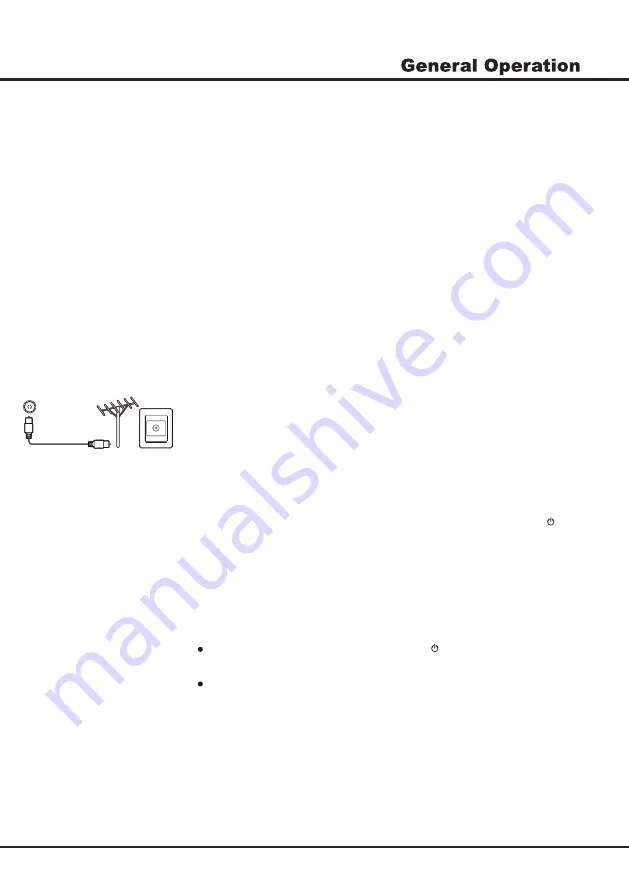
3. Connect an outside aerial to the
ANTENNA IN
socket at the back of the TV set.
4. When powered on, the TV will be turned on directly or be in standby.
Note: For some models, swi
tch the TV on by pressing the power button.
If the power indicator lights up, the TV set is in standby mode. Press the
button on the remote control or on the TV set to turn on the TV.
2. Connect the power cable
FIRST
to the television,
THEN
to a mains socket.
(Note: If the power cable is connected to the television, please only connect the
power cable to the mains socket.)
Your TV set should only be connected to an AC supply. It must not be connected
to a DC supply. If the plug is detached from the cable, do not, under any
circumstances, connect it to a mains socket, as there is a risk of electric shock.
Switching off
To put the TV set into standby mode, press the button on the remote control
or on the TV, the TV set remains powered up, but with low energy consumption.
To switch off the TV set, unplug the mains socket from the mains outlet.
Note: For some models, press the power button to switch off the TV set .
Chapter 2
Summary of Contents for 32LHN79T
Page 1: ...LED TV 32LHN79T PL INSTRUKCJA OBSŁUGI EN USER MANUAL ...
Page 28: ...Zablokuj Tryb Hotelowy Ustawienie ...
Page 29: ......
Page 30: ......
Page 31: ...HEADPHONE HEADPHONE OPTICAL OPTICAL ...
Page 33: ......
Page 37: ...Podstawy obsługi ...
Page 38: ......
Page 40: ......


