background image

USeR’S MAnUAL

42

before using 3D function. Even those without personal or 

family clinical record of epilepsy or stroke might suffer from 

elicited „photosensitive epilepsy attack” that has not diag

-

nosed before.

Once you have the following symptoms, please stop 

watching 3D video and consult physician: faintness, dizzi

-

ness; involuntary movement (like eyes and muscle twitches), 

confusion; nausea, unconsciousness, twitches, spasm and 

disorientation, etc..

Parents should observe and inquire if their children have 

such symptoms, for children are more likely to have these 

symptoms than adults.

5. Please do not watch 3D video in open staircase or 

balcony with cables or other articles that might stumble, 

knock down or hit you. As this product is designed to make 

you feel personally on the scene, some true-to-life 3D videos 

might make you take evasive action, resulting in knock down 

of the objects nearby and personal injuries.

Note:

1. You may not be able to experience 3D effect wearing 

3D glasses of other company, so please wear the 3D glasses 

designated by our company.

2. As 3D glasses are easily to be scratched, please prop

-

erly keep them when they are not used. Please clear the 

glasses with clean and soft cloth.

3. Please watch 3D video in effective visual angle and dis

-

tance. The most preferable distance is equivalent to 3 times 

of the height of screen. You will not be able to experience 3D 

effect beyond effective visual angle and distance. Suggest 

that you try to align your sight with the screen height.

4. You may not be able to experience 3D effect if your 

eyesight differs significantly for both eyes.

5. You may not be able to experience 3D effect if you 

watch 3D video by sleeping on the side.

6. Do not use 3D glasses as sunglasses or for other 

purposes.

3D formats supported by 3D video

Mode

Resolution

Refresh 3D video file that 

can be played

Function

Formats 

support

-

ed by 

HDMI 

input

1280 x 1470P

50Hz

Frame Parking 

(HDMI V1.4 

with 3D) frame 

package 

HDMI Frame 

Parking can 

only support 

the video for

-

mats of these 

3 resolutions; 

HDMI device 

should sup

-

port Version 

1.4

1280 x 1470P

60Hz

Frame Parking 

(HDMI V1.4 

with 3D) frame 

package 

1920 x 2205P

24Hz

Frame Parking 

(HDMI V1.4 

with 3D) frame 

package 

1920 x 720P

50/60Hz Side by side/top 

bottom

1920 x 1080i

50/60Hz Side by side/top 

bottom

60Hz

Side by side/

top bottom/line 

by line/

1920 x 1080P

50Hz

Side by side/top 

bottom

24Hz

Side by side/top 

bottom/line by line

Formats 

sup

-

ported 

by USB 

input

1920 x 1080P

30Hz

Side by side/top 

bottom/line by line

Other 3D 

formats not

recommended

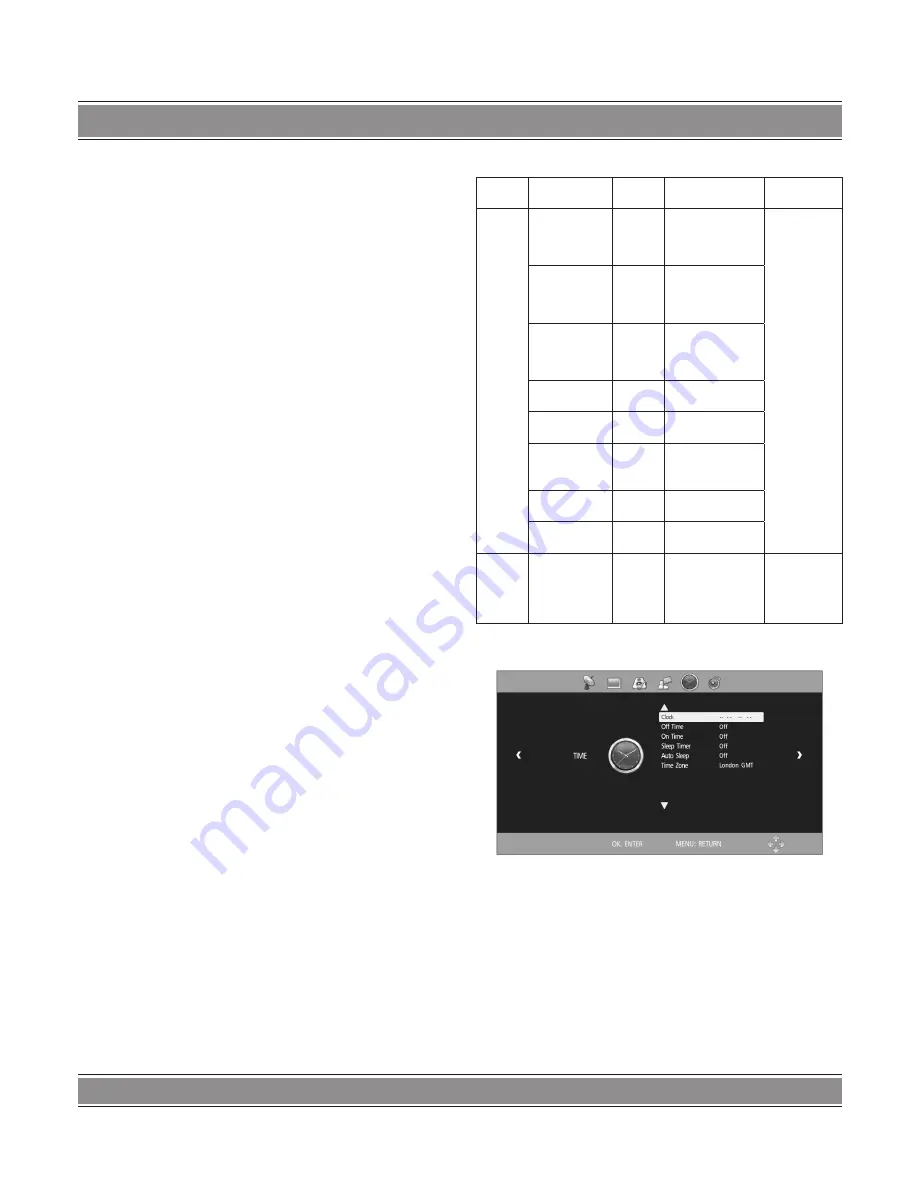
Time

Press the ‘’MENU’’ key, CHANNEL menu shows on the 

screen. Press ‘’Left/Right’’ key to select TIME, then press 

‘’Up/Down’’ key to select the item you’d like to adjust or set. 

After selecting Clock, press ‘’OK’’ key to enter into Clock 

submenu. Press ‘’Up/Down’’ key to select Date, Mouth, 

Year, Hour and Minute, then press ‘’Left/Right’’ key to ad

-

just value.

After selecting Off Time, press ‘’OK’’ key to enter into 

Off Time submenu. Press ‘’Up/Down’’ key to select Off 

Time, Hour and Minute, then press ‘’Left/Right’’ key to ad

-

just value.

Summary of Contents for LCD TV3214

Page 1: ...3D LCD TV Instrukcja obsługi User s Manual LCD TV3214 LCD TV4214 ...

Page 2: ...MB i wbudowany flash 2GB DVD053GEmperorPortable2 Przenośny odtwarzacz DVD Już teraz możesz oglądać swoje ulubione filmy w dowolnym momencie i miejscu Wbudowany tuner telewizyjny pozwala na odbiór naziemnej telewizji analogowej dodatkowo w zestawie znajdziemy magnesową antenę samocho dową Emperor obsługuje formaty DVD MPEG 4 XviD DVD R DVD RW VCD JPG CD CD R RW MP3 z polskimi napisami zaś wbudowany...

Page 3: ... 14 Przyciski pilota 14 Instalacja baterii 15 Środki ostrożności przy obsłudze pilota 15 Obsługa teletekstu przy pomocy pilota 15 Podstawowa obsługa 15 Włączanie 15 Tryb uśpienia 16 Wybór źródła sygnału 16 Obsługa menu 16 Kanał 16 Automatyczne strojenie 16 Strojenie ręczne DTV 17 Strojenie ręczne ATV 17 Edycja programu 17 Informacje o sygnale 18 Informacje o CI 18 Aktualizacja oprogramowania USB 1...

Page 4: ...emote Control 35 Telecontrol battery installation method 36 Remote control user manual about teletext 36 Precautions for use of remote control 36 Basic Operation 36 Power ON 36 Standby 37 Signal Source Selection 37 Menu Operation 37 Channel 37 Auto Tuning 37 DTV Manual Tuning 38 ATV Manual Tuning 38 Programme Edit 38 Signal Information 39 CI Information 39 Software Update USB 39 Picture 39 Sound 4...

Page 5: ...aktem z ostrymi z z przedmiotami Nie zakłócaj wentylacji przykrywając telewizor gaze z z tami serwetkami zasłonkami itp W sytuacji gdy z monitora lub zasilacza zacznie wy z z dobywać się dym nienaturalne dźwięki lub zapach należy natychmiast wyłączyć go i wyjąć wtyczkę z gniazda zasilania i skontaktować się z autoryzowanym punktem serwisowym Uwaga Upewnij się że masz stały dostęp do wtyczki zasila...

Page 6: ...iniejszej instrukcji użytkownika Charakterystyka funkcji Urządzenie obsługuje funkcję odtwarzacza z z wideo 3D zapewniając realistyczny obraz i wyjątkowe wrażenia Kompatybilność z ekranem 2D 3D pozwala z z na dowolne przełączanie z trybu 2D na 3D i odwrotnie Wysokiej jakości ekran ciekłokrystaliczny 3D dzięki z z eliminacji odblasków i niskiej emisji promieniowania zmniejsza zmęczenie oczu podczas...

Page 7: ...niki 8W 8W Wymiary Dł x Wys x Szer Bez podstawy 787 x 494 x 101mm lub 787 x 494 x 93 mm Z podstawą 787x 555 x 101 mm lub 787 x 555 x 93 mm LCD4214 Wymiary ekranu 42 Full HD Maksymalna rozdzielczość 1920x1080 Optymalna rozdzielczość 1920x1080 60Hz Wielkość plamki 0 4845mm x 0 4845mm Obszar aktywny 930 24mm x 523 26mm Kolory 16 7M Zasilanie 100V 240V AC 60 50 Hz Zużycie energii przez głośniki 8W 8W ...

Page 8: ...60 x 768 60 Hz 7 FHD 1600 x 900 60 Hz 8 WUXGA 1920 x 1080 60 Hz Zalecany tryb Full HD 1920 x 1080 60Hz Zarządzanie energią Niniejszy produkt jest zgodny ze standardami EPA Energy Star i VESA DPMS Szczegółowe dane podano poniżej Tryb Kontrolka Zużycie energii 32 42 Włączony Wyłączona 170W 240W Czuwanie Świeci 1 0W 1 0W Uwaga Wszystkie specyfikacje w instrukcji obsługi lub na kartonie mogą ulec zmia...

Page 9: ...0 Hz 2 Jeżeli urządzenie nie jest używane przez dłuższy czas należy odłączyć zasilanie 3 W celach bezpieczeństwa urządzenie musi być pod łączone do gniazdka trzybolcowego Podłączenie komputera Podłącz jeden koniec kabla VGA do portu wyjściowego w komputerze laptopie lub komputerze stacjonarnym a drugi do portu wejściowego VGA z tyłu telewizora Podłączenie złącza cyfrowego HDMI Podłącz zewnętrzne ź...

Page 10: ...zenie sygnału wideo AV1 Przy pomocy kabla kompozytowego podłącz wyjście VIDEO urządzenia zewnętrznego do odpowiedniego wejścia VIDEO w telewizorze analogicznie wyjście AUDIO urządze nia zewnętrznego do wejścia AUDIO w telewizorze ...

Page 11: ...ienia połączenia z lewej strony urządzenia znaj duje się grupa gniazd wejściowych AV Sposób podłączenia jest taki sam jak przy AV1 UWAGA Gdy słuchawki są podłączone głośniki będą wyłączone Proszę ustawić odpowiedni poziom głośności aby uniknąć uszkodzenia słuchu ...

Page 12: ...jściowych YPbPr lub YCbCr do złącza YPbPr YCbCr w telewizorze W celu uzyskania lepszej jakości obrazu należy jednocześnie podłączyć wyjście audio do wejścia audio w telewizorze w sposób pokazany na poniższym diagramie Aby wybrać sygnał YPbPr YCbCr należy ustawić wybór źródła sygnału na YPbPr Podłączenie SCART Podłącz urządzenie wyposażone w złącze SCART do gniazda SCART w telewizorze ...

Page 13: ...ybrać odpowiednie źródło 4 CH CH Naciśnij te przyciski aby wybrać kanał oraz dla ustawienia opcji w menu OSD 5 VOL VOL Naciśnij te przyciski aby zmniejszyć lub zwiększyć siłę głosu oraz dla modyfikacji wartości w menu OSD 6 MENU Naciśnij ten przycisk aby wejść do menu 7 Włącznik zasilania Uwaga Istnieją pewne różnice pomiędzy modelami prosimy kierować się praktyką ...

Page 14: ...Naciśnij aby ustawić czas automatycz nego przejścia w tryb uśpienia wyłączo ny 10 20 30 60 90 120 180 240 min Return Naciśnij aby powrócić do ostatnio oglą danego kanału L R Wybór trybu NICAM przy odbiorze sygnału ATV INDEX W trybie DTV naciśnij INDEX aby wy świetlić listę nagranych programów ZOOM W trybie DTV naciśnij ZOOM aby powiększyć oglądany obraz Jeżeli łącze USB jest połączone z pamięcią z...

Page 15: ...uwa blokowanie aktualizacji wyświe tlanej strony Jeżeli strona jest zablokowana nie będzie się aktualizować podczas wyświetlania Jeżeli nie jest zabloko wana wówczas aktualizacje będą możliwe Zablokowana strona jest oznaczona symbolem Hold Index W trybie Fastext naciśnięcie przycisku powoduje powrót do strony indeksowej jeżeli link indeksowy jest ak tywny lub do strony początkowej Packet 8 30 lub ...

Page 16: ...awień zawierającym 6 podpunktów CHANNEL kanał PICTURE obraz SOUND dźwięk OPTIONS opcje TIME czas LOCK blokada Używając przycisków góra dół lub CH CH wybierz opcję której ustawienia chcesz zmienić Naciśnij OK na pilocie aby wejść do kolejnego menu Naciśnij przycisk Menu aby wyjść z głównego menu lub aby przejść z menu niższego rzędu do menu głównego Naciśnij przycisk Source aby wyświetlić menu źród...

Page 17: ...przedniego menu Strojenie ręczne ATV Naciśnij przycisk MENU na ekranie pojawi się menu CHANNEL Przyciskami góra dół wybierz opcję ręczne go strojenia ATV Naciśnij OK aby wejść do menu Przy pomocy przycisków lewo prawo wybierz kanał i rozpocznij wyszukiwanie naciskając OK Po zakończeniu wyszukiwa nia możesz zapisać wyszukane kanały pod innym numerem W tym celu wybierz przy pomocy przycisków góra dó...

Page 18: ...między tymi dwoma kanałami Wybór kanałów przyciskami numerycznymi 1 Wybór kanału jednocyfrowego 0 9 Naciśnij przycisk numeryczny na pilocie 0 9 aby bez pośrednio wybrać kanał 2 Wybór kanału dwucyfrowego 10 99 Wprowadź dwucyfrowy numer kanału przy pomocy przy cisków numerycznych na pilocie 3 Wybór kanału trzycyfrowego 100 399 Wprowadź trzycyfrowy numer kanału przy pomocy przy cisków numerycznych na...

Page 19: ...sport tryb użytkownika Treble Poziom dźwięków wysokich Zwiększenie wartości zwiększa poziom wysokich dźwięków Zmniejszenie wartości zmniejsza poziom wysokich dźwięków 0 100 Bass Poziom dźwięków niskich Zwiększenie wartości zwiększa poziom niskich dźwięków Zmniejszenie wartości zmniejsza poziom niskich dźwięków 0 100 Balance Balans lewy prawy Zwiększenie wartości zmniejsza gło śność lewego kanału Z...

Page 20: ...menu ustawień 3D Pozycja Funkcja Opis 3D Włącza i wyłącza funkcję 3D Włącza i wyłącza funkcję 3D Side by side wyświetlanie dwóch nakładających się obrazów jeden obok drugiego Top bottom wyświetlanie dwóch nakładających się obrazów jeden nad drugim 3D Mode Wybór formatu 3D Line by line wyświetlanie obrazu jednocześnie dla obydwu oczu Frame alternative naprzemienne wyświetlanie klatek dla oka praweg...

Page 21: ... producenta możesz nie odbierać efektów 3D dlatego zawsze korzystaj z okularów naszej firmy 2 Okulary 3D są wrażliwe na zadrapania należy je od powiednio przechowywać Do czyszczenia używaj czystej i miękkiej ściereczki 3 Oglądaj filmy 3D pod właściwym kątem i w odpowied niej odległości Zalecana odległość to równowartość trzech wysokości ekranu Jeżeli kąt i odległość nie będą właściwe efekty 3D nie...

Page 22: ...dół wybierz opcję którą chcesz ustawić Po wybraniu Blokady systemu naciśnij OK aby włączyć lub wyłączyć blokadę Po wybraniu Ustawienia hasła naciśnij OK aby wyświe tlić okno dialogowe z prośbą o utworzenie nowego hasła Wprowadź stare hasło przyciskami numerycznymi następnie dwukrotnie podaj nowe hasło Zmiana zostanie zapamiętana i nastąpi powrót do poprzedniego menu Po wybraniu Blokady programu na...

Page 23: ... panelu Po jawi się prośba o podanie źródła INPUT SOURCE Przy pomocy przycisków góra dół na pilocie lub CH CH na panelu kontrolnym wybierz USB Naciśnij OK aby przejść do USB Klawisze skrótu pilota Przyciski w drugim rzędzie od dołu służą do obsługi USB Przy pomocy przycisków lewo prawo na pilocie lub VOL VOL na panelu kontrolnym możesz wybrać sposób sortowania plików W menu dostępne są cztery opcj...

Page 24: ...out Przyciskami lewo prawo na pilocie wybierz funkcję i naciśnij OK aby zmniejszyć obraz Move View Jeżeli obraz jest zbyt duży i nie mieści się na ekranie możesz użyć tej funkcji do przesuwania obrazu FB Przyciskami lewo prawo na pilocie wybierz funkcję i naciśnij OK aby przewinąć do tyłu Naciśnij PLAY aby powrócić do normalnego odtwarzania FF Przyciskami lewo prawo na pilocie wybierz funkcję i na...

Page 25: ...l input migająca czerwona dioda Obluzowany kabel sygnałowy Podłącz ponownie kabel sygnałowy Mały zasięg pilota lub brak kontroli 1 Czujnik w telewizorze jest zasłonięty przez inne przedmioty 1 Usuń przeszkody zasłaniające okienko czujnika 2 Wyczerpana bateria w pilocie 2 Wymień baterie Niewyraźny obraz z komputera 1 Niewłaściwe ustawienie 1 Użyj funkcji autoustawiania 2 Niewłaściwy tryb wyświetlan...

Page 26: ...oo long time Read the manual and marking label before using the z z machine and keep the user manual for later use Don t use the attachments which are not recommend z z ed by the machine manufacturer as they may cause hazards The power cord must be placed correctly so as to avoid z z be trample or crush Please do not make the power socket overloaded or z z the power cord extended Otherwise it will...

Page 27: ...etely eliminate z z shadow of picture seeing film and playing game may be more fluent Enough colours z z Wider viewing angle higher brightness higher contrast z z lower consumption Intelligent image mode and sound mode can offer you z z intelligent audiovisual effect Built in the latest digital comb filter which makes image z z more clear The internal 3D De Interlace technique can totally eliminat...

Page 28: ...kers 8W 8W Dimensions L x H x W Excluding base 787 x 494 x 101mm or 787 x 494 x 93 mm Including base 787x 555 x 101 mm or 787 x 555 x 93 mm LCD4214 Panel size 42 Full HD Max resolution 1920x1080 Best resolution 1920x1080 60Hz Pixel Pitch 0 4845mm x 0 4845mm Active Area 930 24mm x 523 26mm Color 16 7M Power Supply 100V 240VAC 60 50 Hz Power Consumption of speakers 8W 8W Dimensions L x H x W Excludi...

Page 29: ... Hz 7 FHD 1600 x 900 60 Hz 8 WUXGA 1920 x 1080 60 Hz Recommended mode Full HD 1920 x 1080 60Hz Power Management This product is complied with EPA Energy Star Standard and compatible with VESA DPMS Standard Details are listed as follows Mode LED Indicator Power Consumption 32 42 On OFF 170W 240W Standby Lighting 1 0W 1 0W Note All the specifications in the user manual or on the packing carton may b...

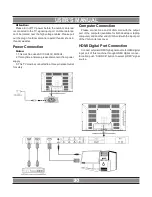
Page 30: ...ong time at leisure please disconnect it from power supply 3 This TV must be connected to a three pin socket outlet for safety Computer Connection Please connect one end of VGA cord with the output port of the computer available for both desktop or laptop computer and another end of VGA cord with the input port of the VGA on its rear cover HDMI Digital Port Connection Connect external HDMI high si...

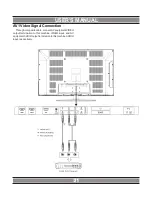
Page 31: ...l 31 AV1 Video Signal Connection Through composite cable connect AV equipment VIDEO output termination to this machine VIDEO input and AV equipment AUDIO output termination to this machine AUDIO input respectively ...

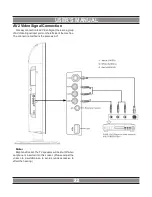
Page 32: ...group of AV Video Signal input ports on the left side of the machine The connection method is the same as AV1 Note Earphone Socket The TV speakers will be shut off when earphone is inserted into this socket Please adjust the volume to a suitable size to avoid sounds excessive to affect the hearing ...

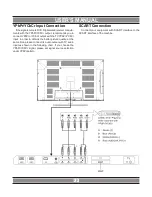
Page 33: ...bCr output with the TV YPbPr YCbCr input In order to obtains the better picture quality at the same time please connect its audio output with TV audio input as shown in the following chart If you choose the YPbPr YCbCr signal please set signal source selection under YPbPr pattern SCART Connection Connect your equipment with SCART interface to the SCART interface of the machine ...

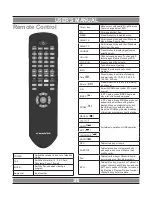
Page 34: ...nal source 4 CH CH Press these two keys to select the channel and adjust the options you need under OSD operation 5 VOL VOL Press these two keys to add or reduce vol ume and adjust the analog value under OSD operation 6 MENU Press this key to enter main menu 7 Power switch Note There are some apparent differences between modes please according to practicality ...

Page 35: ...set time of sleeping automatically Off 10 20 30 60 90 120 180 240 min Return Press this button to return to last watch ing channel L R Select NICAM mode under ATV signal source INDEX In DTV mode press INDEX key to dis play a list of recorded programs ZOOM In DTV mode press ZOOM key to zoom aspect ratio when there with graphic display When no graphic display and the USB port connected to memory pre...

Page 36: ...red Precautions for use of remote control 1 When using remote control you should point it to the remote control inductive window The goods between remote control and inductive window may hinder normal operation 2 Do not cause the remote control to receive fierce vi bration In addition do not set or place the remote control under direct sunlight for the thermal energy will cause the distortion of r...

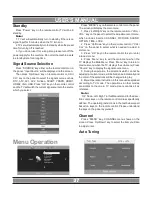
Page 37: ...el to select the adjustment sort menu which includes 6 sorts CHANNEL PICTURE SOUND OPTION TIME LOCK 2 Press Up Down key on the remote control or CH CH on the panel to select what is needed to adjust in sort menu 3 Press OK key on the remote control to set or enter into next menu 4 Press Menu key to exit the main menu when the TV displays the Main Menu Press Menu key to return to previous menu when...

Page 38: ... on the screen Press Up Down key to select ATV Manual Tun ing Press OK key to enter into ATV Manual Tuning menu Press Up Down key to select Search and then press Left Right key to conduct manual search After searching you may save the channel searched to other positions At this time press Up Down key to select Storage To and then press the Left Right key to choose channel Number After selecting Fi...

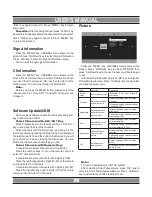
Page 39: ...ontrol to select TV channel directly 2 Operations to select channels with 2 digits 10 99 Press the number keys with 2 digits 10 99 on the remote control to select TV channels 3 Operations to select channels with 3 digits 100 399 Press the number keys with 3 digits 100 399 on the remote control to select TV channels Picture Press the MENU key CHANNEL menu shows on the screen Press Left Right key to...

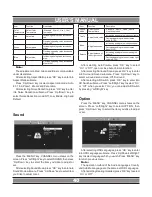
Page 40: ...Sound Temperature Standard Music News Sports User five modes Treble Adjust treble value Increasing analog value increases treble Decreasing analog value decreases treble 0 100 Bass Adjust bass value Increasing analog value increases bass Decreasing analog value decreases bass 0 100 Balance Adjust balance of left or right sound Increasing analog value decreasing left volume Decreasing analog value ...

Page 41: ...line by line for both eyes Frame alternative frame alternative format displaying images by frame alternative format for both eyes Automatic this function works when HDMI 1 4 format 3D signal is used L R Switch Arrange images for left and right eyes Left right arrange images from left to right eye right left arrange images from right to left 2D to 3D Switch from 2D to 3D Enable disable the function...

Page 42: ... angle and distance Suggest that you try to align your sight with the screen height 4 You may not be able to experience 3D effect if your eyesight differs significantly for both eyes 5 You may not be able to experience 3D effect if you watch 3D video by sleeping on the side 6 Do not use 3D glasses as sunglasses or for other purposes 3D formats supported by 3D video Mode Resolution Refresh 3D video...

Page 43: ...gram press OK key then a Block Program menu shows on the screen Press Up Down key to select the channel that you d like to lock and then press LOCK key to lock or unlock finally press MENU key to exit menu operation After selecting Parental Guidance press OK key to enter into Parental Guidance menu press Up Down key to select Off 4 5 6 7 8 9 10 11 12 13 14 15 16 17 18 Hotel Function optional Press...

Page 44: ...e lower right corner shows a red hook you can choose photos to join playlist Press INDEX key on the remote control to play When you choose nothing the machine will join all the photos in the file in playlist automatically Note The operation method of the MUSIC MOVIE and TEXT are the same as PHOTO Please refer to PHOTO options Basic Function When photos are playing press INFO key on the remote cont...

Page 45: ...ss Left Right key on the remote control to select this function press OK key to fast back Press MUTE key to Switch off sound GO TO Time Press Left Right key on the remote control to select this function press OK key to select the time to play Set A Press Left Right key on the remote control to select this function press OK key to set A and B the film will circu lating play in the time of A to B SF...

Page 46: ...minate mute Computer no display and prompt no signal input red indicator LED twinkling Signal cable is loose or fallen off Check signal cable whether or not loose fall off reconnect again Remote control distance is short lose control 1 Receive window of remote control was covered by objects 1 Remove objects obstructing the receiver window of remote control 2 The battery energy of remote control is...

Page 47: ...47 NOTE ...

Page 48: ... czy elektronicznych nie można wyrzucać razem z odpa dami gospodarczymi Właściwe działanie w wypadku konieczności utylizacji urządzeń czy podzespołów lub ich re cyclingu polega na oddaniu urządzenia do punktu zbiórki w którym zostanie ono bezpłatnie przy jęte W niektórych krajach produkt można oddać podczas zakupu nowego urządzenia Prawidłowa utylizacja urządzenia daje możliwość zachowania natural...

Reviews: